


Working with the hardware in the minitower system unit
109
To identify drive bays in the desktop system unit, see
“Identifying the parts of the system unit” on page 101.
Removing and replacing bay panels
When you first unpack your computer, all external drive
bays that do not contain drives are covered with bay
panels. To install a drive in a previously unoccupied
external bay, first remove the bay panel from the system
unit cover. If you remove a drive from an external bay
and you do not intend to install a new drive
immediately, replace the bay panel in the system unit
cover.
3
Can hold up to a 5.25-inch half
high drive, such as a diskette, hard
disk, tape, or CD-ROM drive.
149 x 41.3 mm
(5.87 x 1.625
in.)
4
Can hold up to a 3.5-inch half high
drive, such as a diskette or tape
drive.
101.6 x 41.3
mm
(4.0 x 1.625 in.)
5
Can hold a 3.5-inch slim hard disk.
(No external access.)
101.6 x 25.4
mm
(4.0 x 1.0 in.)
6
Can hold a 3.5-inch slim hard disk.
(No external access.)
101.6 x 25.4
mm
(4.0 x 1.0 in.)
Bay
Drive Specifications
Bay Capacity
Note:
Using the appropriate installation hardware, you can install
smaller drives than those listed here.
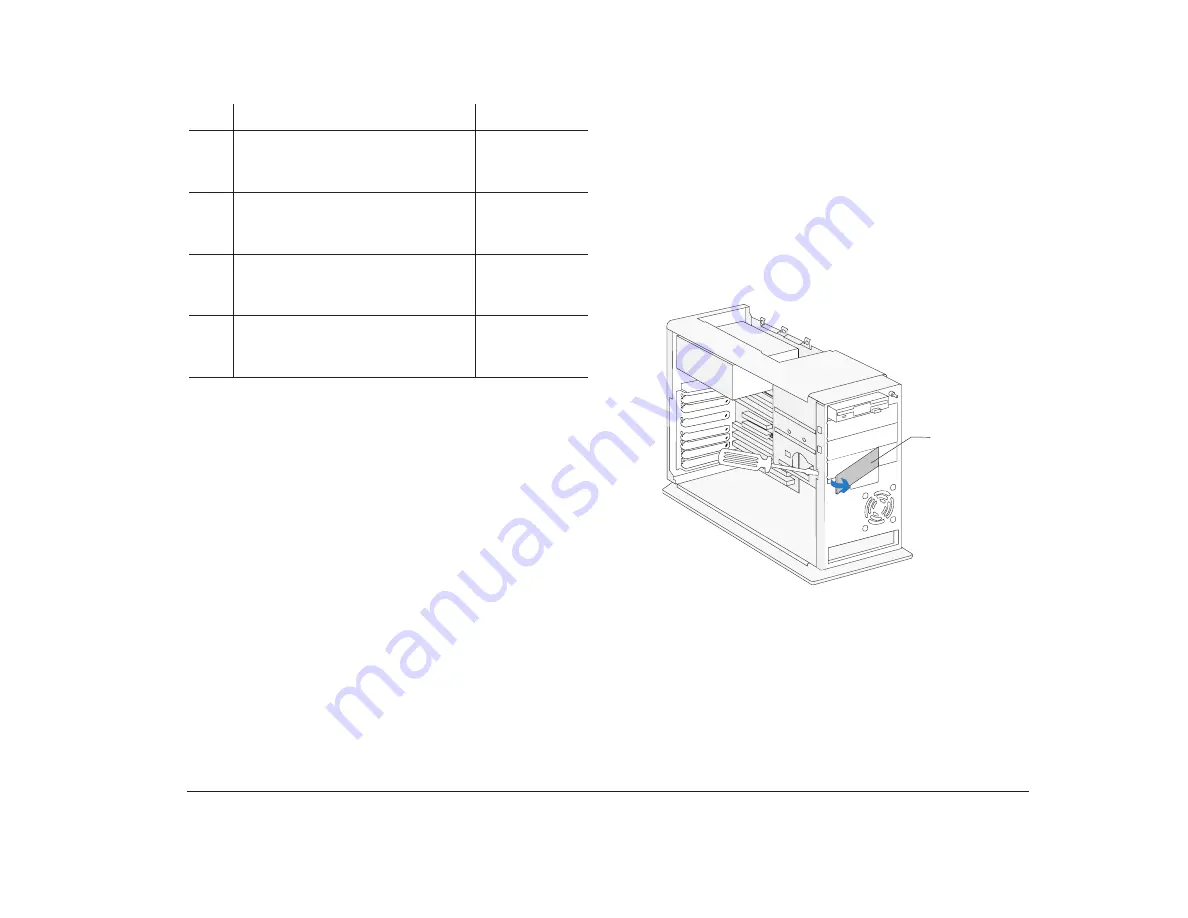
To remove a bay panel, follow these steps:
1.
Remove the system unit cover, if you haven’t
already. For these instructions, see “Opening a
minitower system unit” on page 59.
2.
Locate the panel latches on the inside of the frame.
Insert a small, flat-blade screwdriver behind the
panel and depress the panel latches. See the
following illustration for an example.
To replace a bay panel, follow these steps:
1.
Insert the panel into the opening at the front of the
frame.
2.
Push the panel into place until you hear the latch
click.
(Front View)
Bay Panel
Summary of Contents for Aptiva
Page 1: ......
Page 4: ...iv Contents at a glance...
Page 12: ...xii Table of contents...
Page 16: ...2 Part 1 Learning about this book...
Page 22: ...8 Chapter 1 Using this book...
Page 24: ...10 Part 2 Controlling system settings...
Page 42: ...28 Chapter 3 Understanding the Rapid Resume features...
Page 62: ...48 Chapter 4 Viewing and changing Aptiva configuration...
Page 64: ...50 Part 3 Upgrading and replacing hardware...
Page 136: ...122 Part 4 Troubleshooting...
Page 164: ...150 Part 5 Technical reference...
Page 174: ...160 Appendix A Specification tables...
Page 194: ...180 Appendix C Modem information...
Page 196: ...182 Appendix D Monitor terminology...


