According to the result of the EMC test, if a non-shielded cable is used, the system cannot respond
to the ESD. As a result, the system is suspended and restarts.
l
The new and old cables must be of the same model or be compatible.
Step 2
Number the new network cable.
l
The number of the new network cable must be the same as that of the old one.
l
Use the same type of labels for the network cable.
–
Record the name and number of the local device to be connected on one side of the
label, and those of the peer device on the other side.
–
Attach the label 2 cm (0.79 in.) away from the end of the network cable.
Step 3
Lay out the new network cable.
l
Lay out the new cable in the same way as the old one. Underfloor cabling is
recommended because it is tidy and easy.
l
Lay out network cables in the cabinet based on installation requirements. You are
advised to arrange cables in the same way as existing cables. Ensure that cables are
routed neatly and undamaged.
l
Separate network cables from power cables and signal cables when laying out the cables.
l
The minimum bend radius of a network cable is 4 cm (1.57 in.). Ensure that the cable
insulation layer is intact.
l
Ensure that cables are laid out for easy maintenance and capacity expansion.
l
Network cables must be bound using cable ties. Ensure that network cables are bound
closely, neatly, and straight, and cable ties are in even distance and fastened properly.
Step 4
Remove the network cable to be replaced.
Remove the network cable from the network interface card (NIC) or board in the cabinet.
Step 5
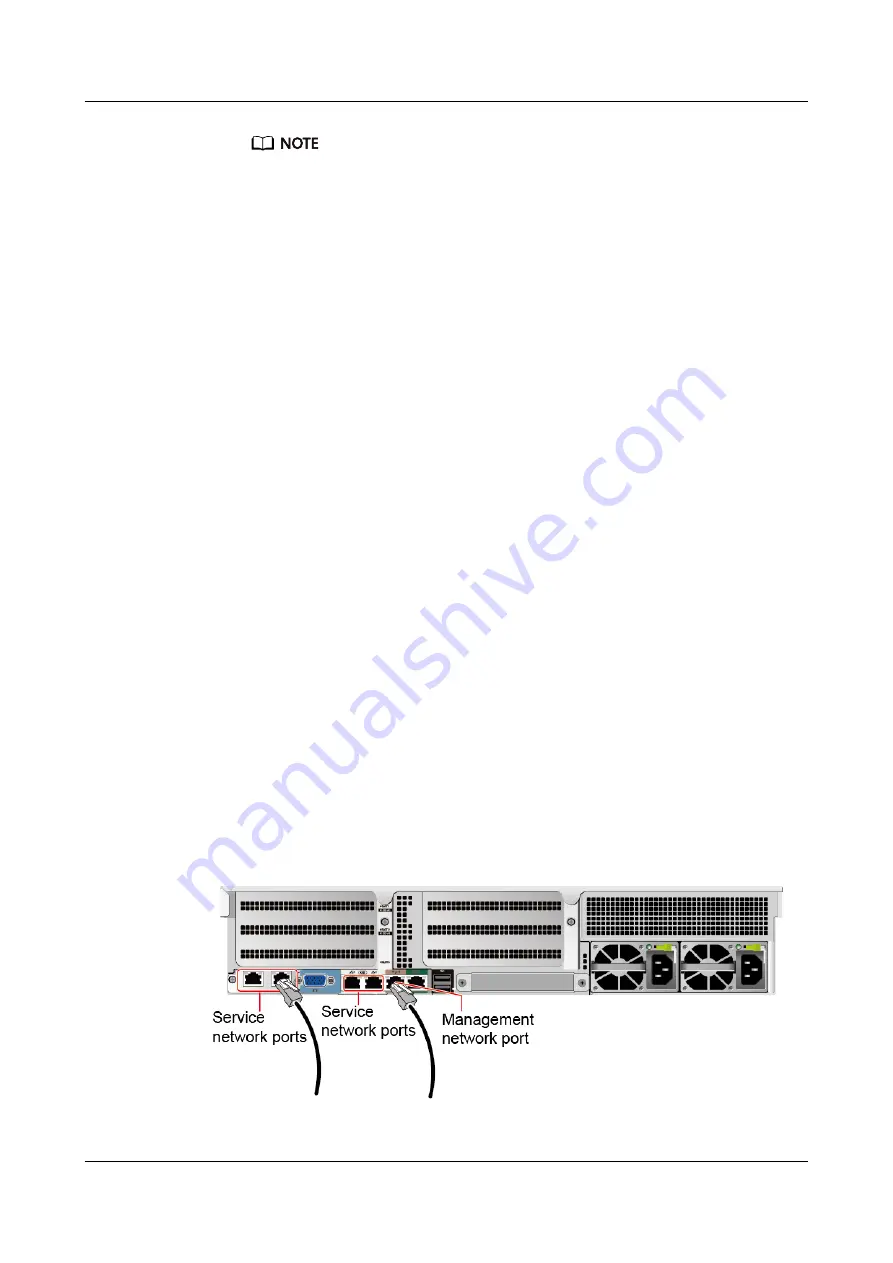
Connect the new network cable to the NIC or board.
l
Connect the new network cable to the same network port as the removed one.
l
Before installing a network cable to a network port, ensure that the network cable
connector is intact and the pins have no sundries or deformation.
l
Connect the network cable to the network port securely.
Figure 7-15
Connecting a network cable
Step 6
Connect the new network cable to the peer network port.
FusionServer Pro 2288H V5 Server
User Guide
7 Installation and Configuration
Issue 08 (2019-10-30)
Copyright © Huawei Technologies Co., Ltd.
88


