Chapter 1 Safety Instructions
1 - 2
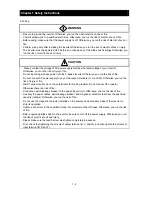
2. Wiring
WARNING
- Be sure to ground the inverter. Otherwise, you run the risk of electric shock or fire.
- Commit wiring work to a qualified electrician. Otherwise, you run the risk of electric shock or fire.
- Before wiring, make sure that the power supply is off. Otherwise, you run the risk of electric shock or
fire.
- Perform wiring only after installing the inverter. Otherwise, you run the risk of electric shock or injury.
- The inverter must be powered OFF before you change any of the slide switch settings.Otherwise, you
run the risk of electric shock or injury.
CAUTION
- Make sure that the voltage of AC power supply matches the rated voltage of your inverter.
Otherwise, you run the risk of injury or fire.
- Do not input single-phase power into the 3-phase inverter. Otherwise, you run the risk of fire.
- Do not connect AC power supply to any of the output terminals (U, V, and W). Otherwise, you run the
risk of injury or fire.
- NE-S1 series inverter do not have terminals for braking resistor. Do not connect the resistor.
Otherwise there is a risk of fire.
- Connect an earth-leakage breaker to the power input circuit. Otherwise, you run the risk of fire.
- Use only the power cables, earth-leakage breaker, and magnetic contactors that have the specified
capacity (ratings). Otherwise, you run the risk of fire.
- Do not use the magnetic contactor installed on the primary and secondary sides of the inverter to
stop its operation.
- Tighten each screw to the specified torque. No screws must be left loose. Otherwise, you run the risk
of fire.
- Before operating slide switch in the inverter, be sure to turn off the power supply. Otherwise, you run
the risk of electric shock and injury.
- Please make sure that earth screw was tighten completely in advance.
- First, check the tightening the screws of output terminal (U, V and W), and then tighten the screws of
input terminal (R,S and T)
!
!
Summary of Contents for NES1-002LB
Page 9: ......
Page 21: ......
Page 25: ......
Page 28: ...Chapter 3 Exterior Views 3 3 ...
Page 30: ......
Page 35: ......
Page 53: ......
Page 75: ......
Page 154: ......
Page 196: ......
Page 203: ...Chapter 10 Troubleshooting This chapter describes the troubleshooting methods ...
Page 204: ......
Page 211: ......
Page 219: ......
Page 229: ......
Page 289: ...Appendix Appendix A Appendix A 1 ...
Page 290: ......
Page 292: ...Appendix Appendix 2 ...

