


5
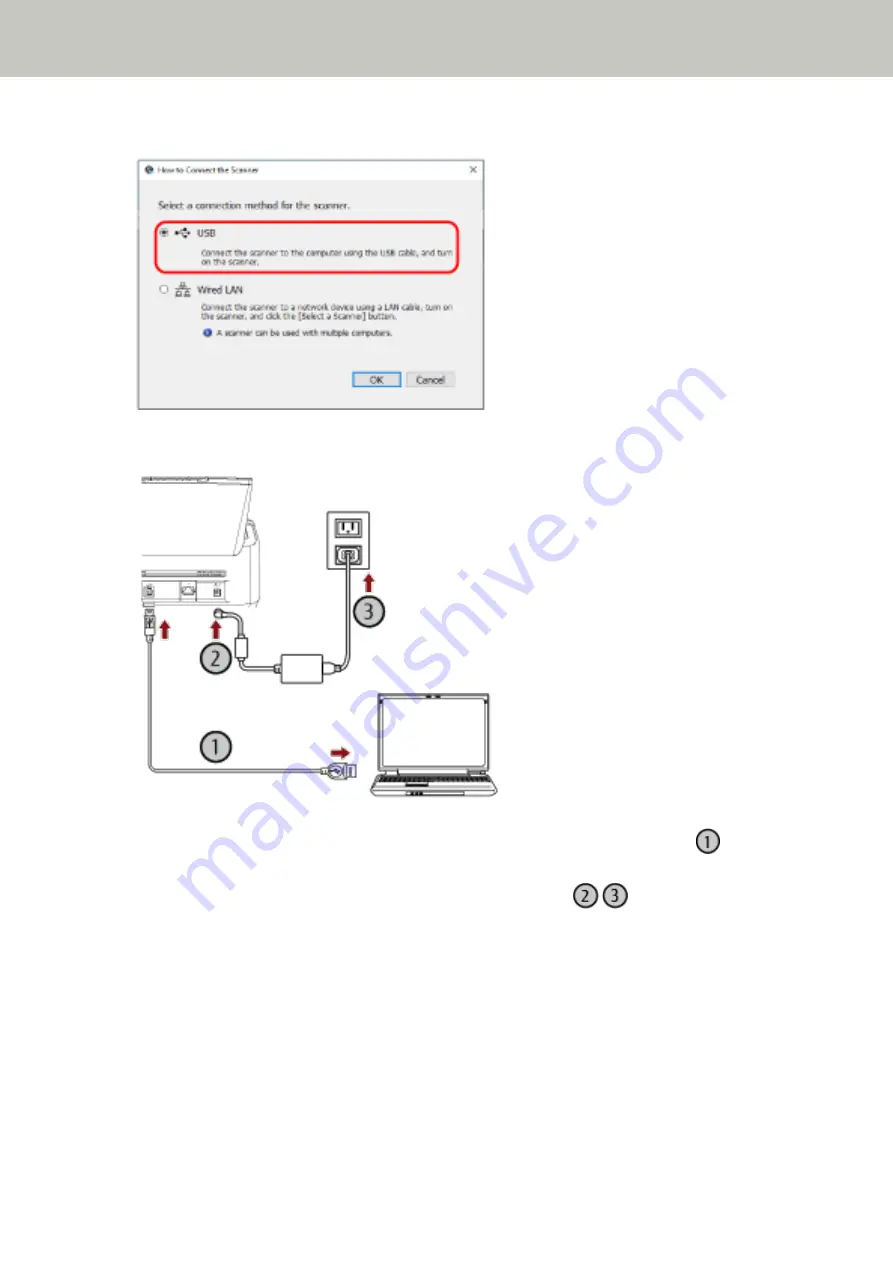
Select [USB].
6
Connect the scanner to the computer as follows.
a
Connect the scanner to the computer by using the USB cable that is supplied (
).
b
Connect the power cable to the scanner and the AC outlet (
,
).
c
Turn on the scanner.
For details, refer to
How to Turn the Power ON (page 72)
7
Click the [OK] button in the [How to Connect the Scanner] window.
8
Click the [Exit] button in the [fi Series Setup] window.
9
Start an image scanning application, and select the scanner to be used for scanning.
The scanner name depends on the scanner driver type and the scanner connection method.
Select the scanner name that is used for a USB connection. For details, refer to the help for the scanner driver.
Scanner Setup
59
Summary of Contents for fi-8150
Page 36: ...Parts and Functions Common Parts for All Models Inside ADF Scanner Overview 36 ...
Page 80: ...How to Close the Document Cover 1 Gently close the document cover Basic Operations 80 ...
Page 218: ... For fi 8290 fi 8270 fi 8250 fi 8250U Daily Care 218 ...
Page 235: ...5 Attach the shaft Replacing the Consumables 235 ...
Page 239: ...a Open the sheet guide by lifting the tab Replacing the Consumables 239 ...
Page 342: ...4 Click the OK button The password is set Scanner Settings Software Operation Panel 342 ...
Page 344: ...The password is cleared Scanner Settings Software Operation Panel 344 ...
Page 346: ...4 Click the OK button The password is set Scanner Settings Software Operation Panel 346 ...
Page 426: ...Outer Dimensions fi 8290 fi 8270 fi 8250 fi 8250U Unit mm in Appendix 426 ...


