Copying Procedure
49
Copy
2
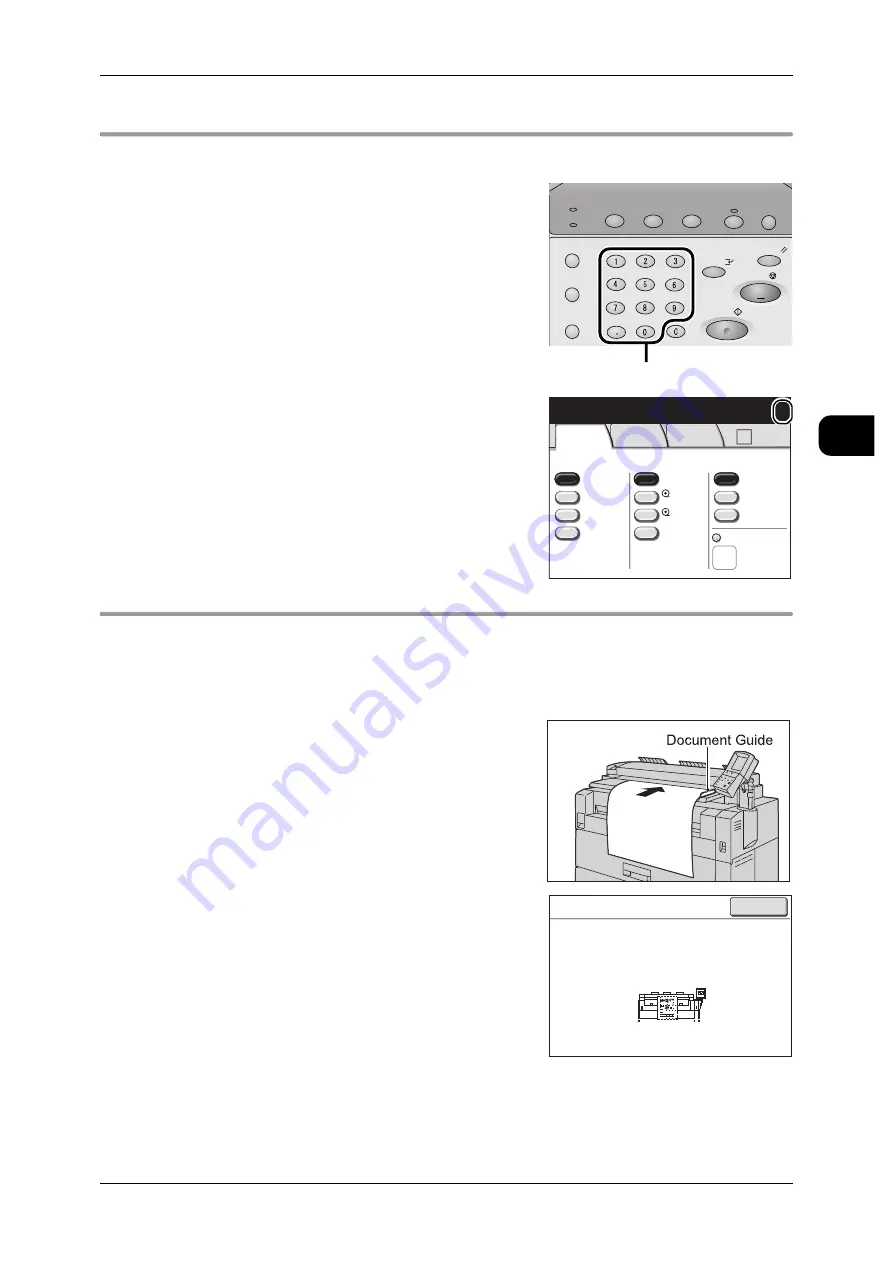
Step2 Entering the Quantity
Enter up to 99 for the number of copies.
1
Enter the required number of copies using the
numeric keypad.
Note
•
To correct a value, press the <C (Clear)> but-
ton and enter the correct value.
The number of copies entered appears on the
upper right of the touch screen.
Step3 Scanning Document
Insert the document and start copying.
Important •
Stopping, obstructing or pulling an document will cause an document jam.
•
When loading documents that contain holes, insert them so that the area with the holes is
the trailing edge, otherwise a jam may occur.
1
Align the document to the document guide and
then insert it with the side to be scanned facing
down, until its lead edge touches the machine.
Note
•
The document guide can be moved to the right
edge according to the width of the document.
Once placed, the document is automatically fed in
and then stops at a certain position.
Then the machine starts scanning automatically.
Important •
Hold the document until the scanning starts, or
a jam may occur.
Note
•
If the start method of document scanning has
been set to [Manual Start], press the <Start>
button.
For the setting of Manual Start, refer to "Scan
Start Mode" (P.217)
•
If a problem occurs, an error message appears
in the touch screen. Take proper action
according to the message.
2
Remove the ejected document.
Note
•
Documents are ejected forward when a U-turn Output Guide is installed.
Documents are ejected rearward when a Document Catch Tray (optional) is installed.
Job Status
Machine Status
Log In/Out
Clear All
Interrupt
Start
Stop
Transmitting
Copy Scan Menu
Job in memory
Copy from
Memory
Power Saver
Numeric Keypad
2 ISO A2
1 ISO A0
50.0%
A0
Auto R/E
More...
More...
Bond
Bond
Auto
Select
Auto%
100.0%
Bond
Media Supply
Reduce/Enlarge
Media Type
Vellum
Film
Media Cut Mode
Basic
Copy
Image
Quality
More
Features
Qty. 1
Ready to Copy
->A2
Copy
Quantity :
1
Pages :
1
A0
100.0%
Uncollated
Close


