


Using LFP Accounting
Tool
Basic Settings
You must perform the basic settings in advance for the
LFP Accounting Tool to obtain job information from
the printer for the calculation of costs and so on.
Perform setting in the following order. Follow the steps
described in the following section to perform the
setting.
1. Select the printer
2. Set the unit prices
3. Set the display conditions for job information
4. Set the units you want to summarize
Before doing the settings, check if the computer with the
LFP Accounting Tool is able to print from the printer.
For details of each setting screen, see the LFP
Accounting Tool help.
Select the printer
Select the printer for which you want to summarize cost
calculations and job information.
This section explains how to select the printer straight
after installing the LFP Accounting Tool.
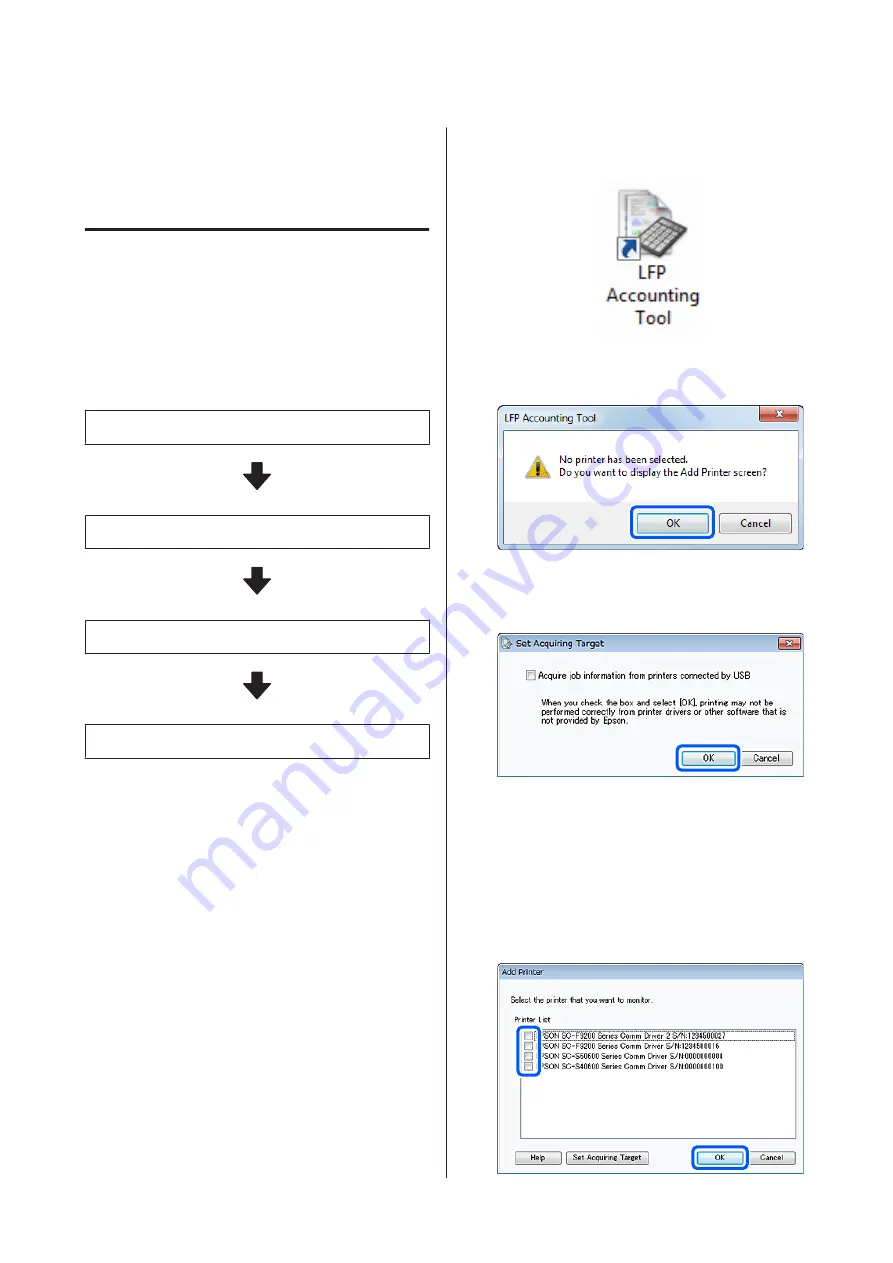
A
Double-click the LFP Accounting Tool shortcut
icon on the desktop.
B
When the following message is displayed, click
OK
.
C
When the following message is displayed, check
the content, decide what action to take, and then
click
OK
.
D
Select the printer from the
Add Printer
screen,
and then click
OK
.
If this software cannot communicate with the
printer, it is not displayed in the list. When you
want to summarize cost calculations and job
information for multiple printers, select the
target printers. We recommend setting up to four
printers for monitoring.
SC-F10000H Series/SC-F10000 Series User's Guide
Introduction
59


