Button
Function
A/V Mute
Turns the video and audio on or off.
s
"Hiding the Image and Sound Temporarily (A/V
B
Switch to the image from the selected input source. To display input sources that
are not shown in Source List, click (a) or (b) to scroll up or down. The current
video signal input source is displayed in blue.
You can change the source name if necessary.
C
You can perform the following operations when you click the buttons. To display
buttons that are not shown in Source List, click (c) or (d) to scroll left or right.
Button
Function
Freeze
Images are paused or unpaused.
s
Contrast
Adjusts the difference between light and shade in the
images.
Brightness
Adjusts the image brightness.
Color
Adjusts the color saturation for the images.
Sharpness
Adjusts the image sharpness.
Zoom
Click the [
z
] button to enlarge the image without
changing the projection size. Click the [
x
] button to
reduce an image that was enlarged with the [
z
] button.
Click the [
], [
], [
], or [
] buttons to change the
position of an enlarged image.
s
"Enlarging Part of the Image (E-Zoom)"
D
The [
], [
], [
], and [
] buttons perform the same operations as the [
],
[
], [
], and [
] buttons on the remote control. You can perform the
following operations when you click the other buttons.
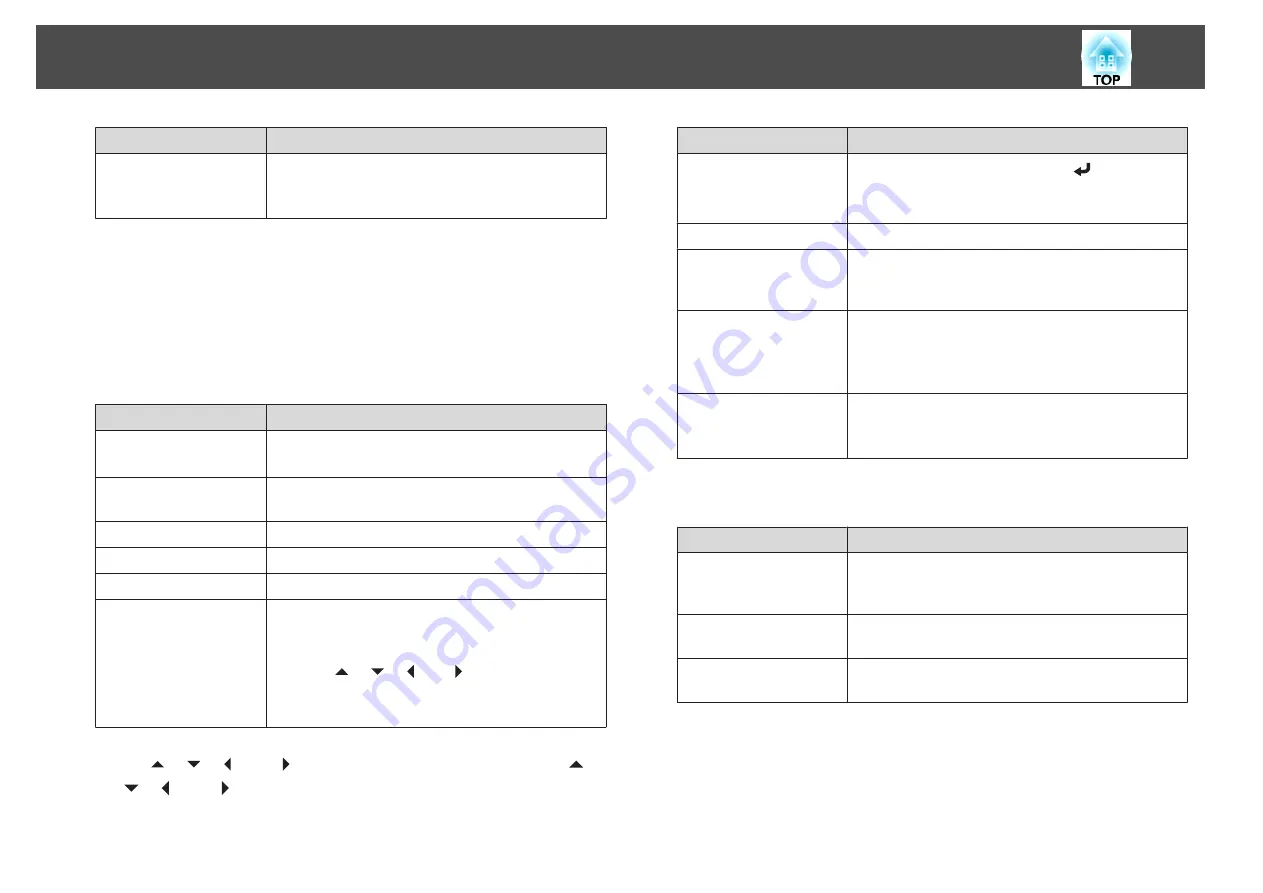
Button
Function
OK
Performs the same operation as the [
] button on the
remote control.
s
Menu
Displays and closes the Configuration menu.
Auto
If clicked while projecting analog RGB signals from the
Computer port, you can automatically optimize
Tracking, Sync., and Position.
Search
Changes to the next input source that is sending an
image.
s
"Automatically Detect Input Signals and Change the
Projected Image (Source Search)"
Esc
Performs the same operation as the [Esc] button on the
remote control.
s
E
You can perform the following operations when you click the tabs.
Tab
Function
Contact IT Help
Displays the Help Desk window. Used to send messages
to, and receive messages from, the administrator using
Crestron RoomView
®
Express.
Info
Displays information on the projector that is currently
connected.
Tools
Changes settings in the projector that is currently
connected. See the next section.
Using the tools window
The following window is displayed when you click the
Tools
tab on the
operation window. You can use this window to change settings in the
projector that is currently connected.
Monitoring and Controlling
145
Summary of Contents for EB-G6800
Page 1: ...User s Guide ...
Page 7: ...Introduction This chapter explains the names for each part ...
Page 18: ...c Pull the lens unit straight out as it is released Part Names and Functions 18 ...
Page 39: ...Basic Usage This chapter explains how to project and adjust images ...
Page 83: ...Configuration Menu This chapter explains how to use the Configuration menu and its functions ...
Page 137: ...Appendix ...


