h
Repeat procedures from 5 to 7 as needed to adjust any remaining
parts.
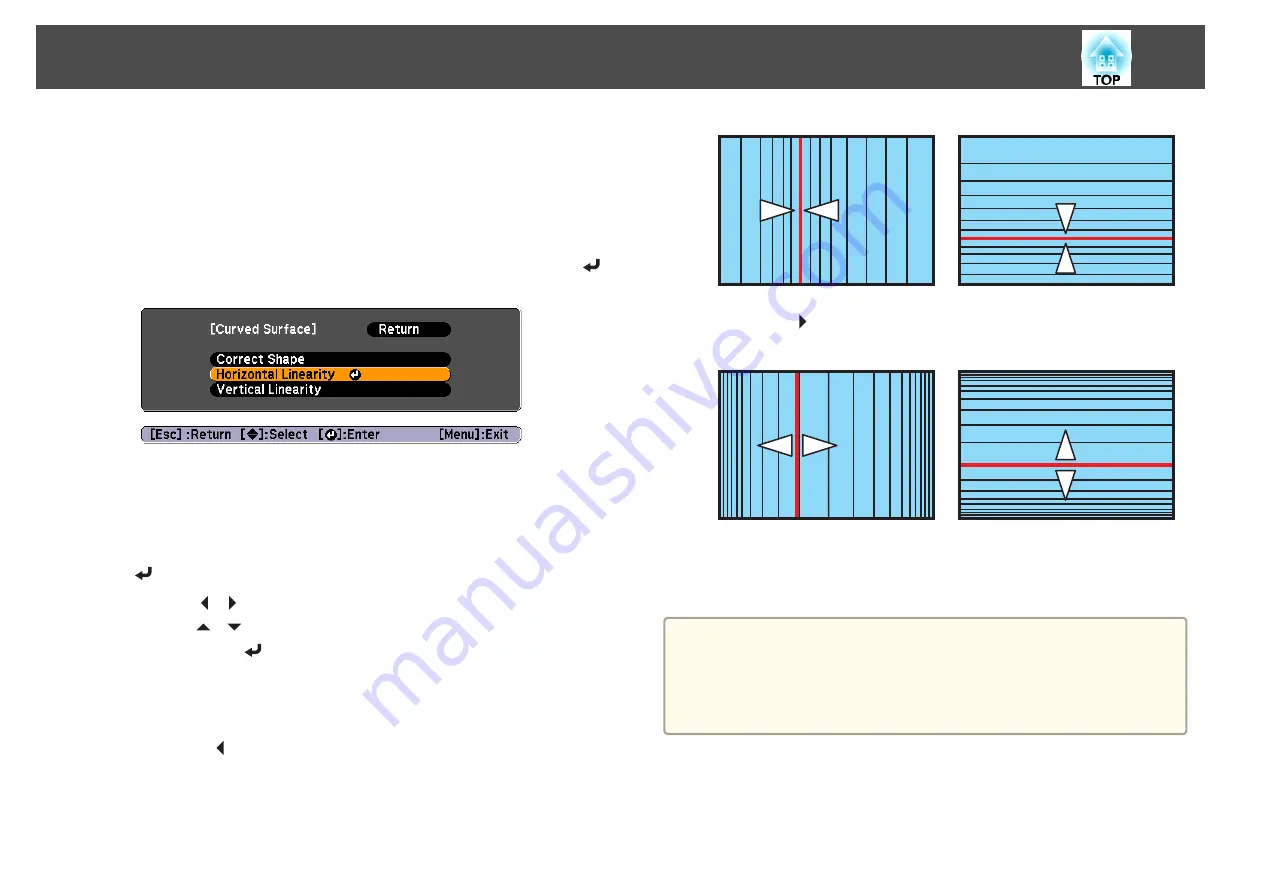
If the image expands and contracts, go to the next step and adjust
the linearity.
i
Press the [Esc] button to return to the screen in step 4. Select
Horizontal Linearity
or
Vertical Linearity
, and then press the [
]
button.
Select
Horizontal Linearity
to adjust the horizontal expansion or
contraction, and select
Vertical Linearity
to adjust the vertical
expansion or contraction.
j
Select the standard line for the adjustments, and then press the
[
] button.
Use the [ ][ ] buttons when selecting the
Horizontal Linearity
,
and the [
][
] buttons when selecting the
Vertical Linearity
, and
then press the [
] button.
The selected standard line is displayed in flashing red and white.
k
Adjust the linearity.
When the [ ] is pressed
Selecting the
Horizontal Linearity
Selecting the
Vertical Linearity
When the [ ] is pressed
Selecting the
Horizontal Linearity
Selecting the
Vertical Linearity
l
When you are done, press the [Menu] button to exit the correction
menu.
a
You can fine tune the results of Curved Surface using Point
Correction. Change
Geometric Correction
to
Point Correction
, and
then make adjustments after selecting
Keep the current geometric
correction settings
.
s
Adjusting Projected Images
46
Summary of Contents for EB-G6800
Page 1: ...User s Guide ...
Page 7: ...Introduction This chapter explains the names for each part ...
Page 18: ...c Pull the lens unit straight out as it is released Part Names and Functions 18 ...
Page 39: ...Basic Usage This chapter explains how to project and adjust images ...
Page 83: ...Configuration Menu This chapter explains how to use the Configuration menu and its functions ...
Page 137: ...Appendix ...


