


Pearl-2 User Guide
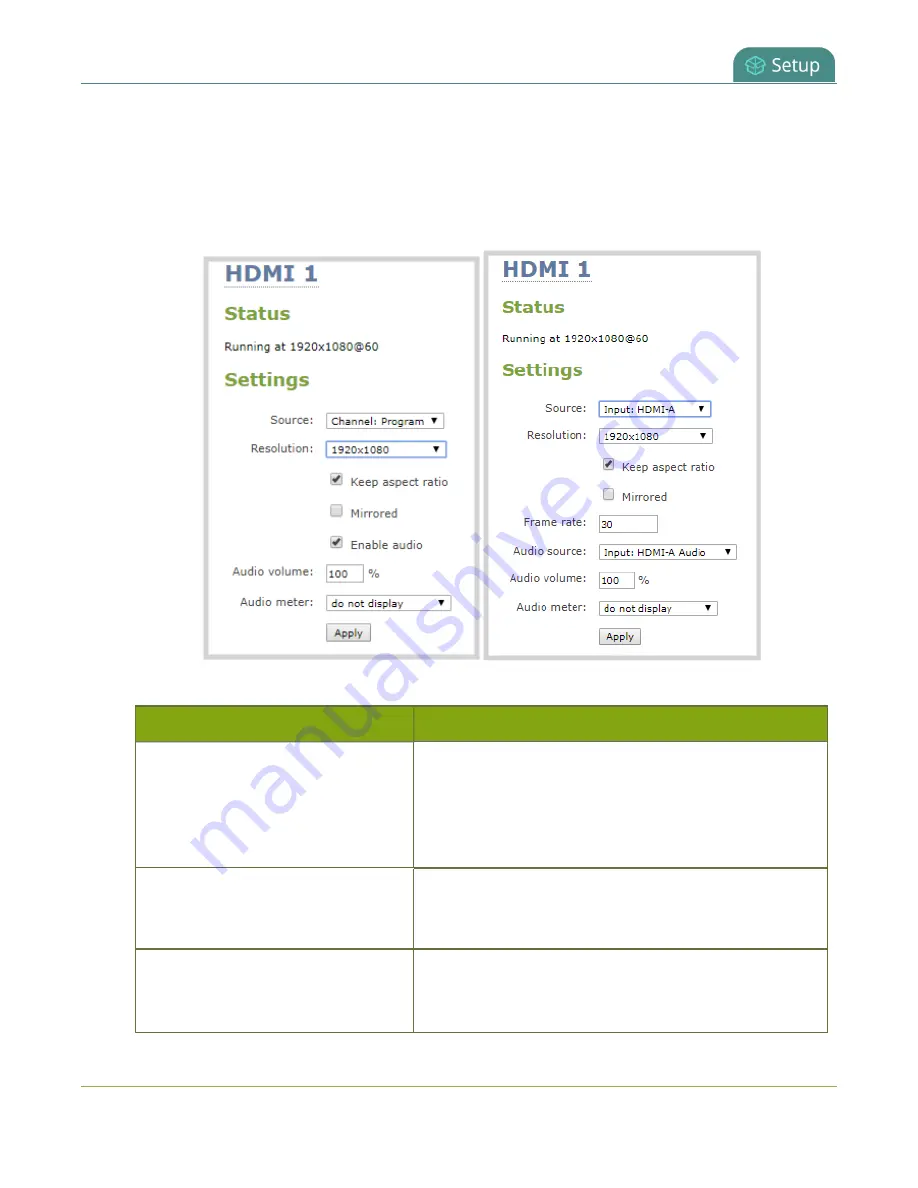
Show a channel or video source on the output port
1. Login to the Admin panel as
admin
2. From the Outputs menu, click the output port (
HDMI 1
or
HDMI 2
). The video output port
configuration page opens.
3. In the
Source
field, select a channel (prefixed by the word
Channel
) or a video source (prefixed by the
word
Input
).
4. In the
Resolution
field, select the resolution for the video output port.
Value
Description
Same as source
Set the output to the same resolution as the channel or
video source. If that resolution is not supported by the
display, the video output port will negotiate a new
resolution with the display (generally this ends up being the
display's default resolution).
Destination default
This is the default value. Each display has a preferred
resolution, and when you choose this setting, the video
output port will use the display's default resolution.
640×360, 640×480, 960×540,
1024×768, 1280×720, 1280×960,
1360×768, 1400×1050, 1920×1080,
Choose a specific resolution for the output port. For an
explanation of the different choices, see
video source on the output port
.
130
Summary of Contents for Pearl-2 Rackmount
Page 139: ...Pearl 2 User Guide Mute audio 4 Click Apply 126 ...
Page 151: ...Pearl 2 User Guide Mirror the video output port display 138 ...
Page 156: ...Pearl 2 User Guide 4K feature add on 143 ...
Page 180: ...Pearl 2 User Guide Delete a configuration preset 167 ...
Page 440: ...Pearl 2 User Guide Register Pearl 2 427 ...
Page 488: ...l Pro audio inputs l 512 GB data storage SSD l Touchscreen ...
Page 497: ... and 2019 Epiphan Systems Inc ...


