


Pearl-2 User Guide
Control recording using AV Studio
Updates may take a little time to show in AV Studio. Refresh your browser to see the updated
status.
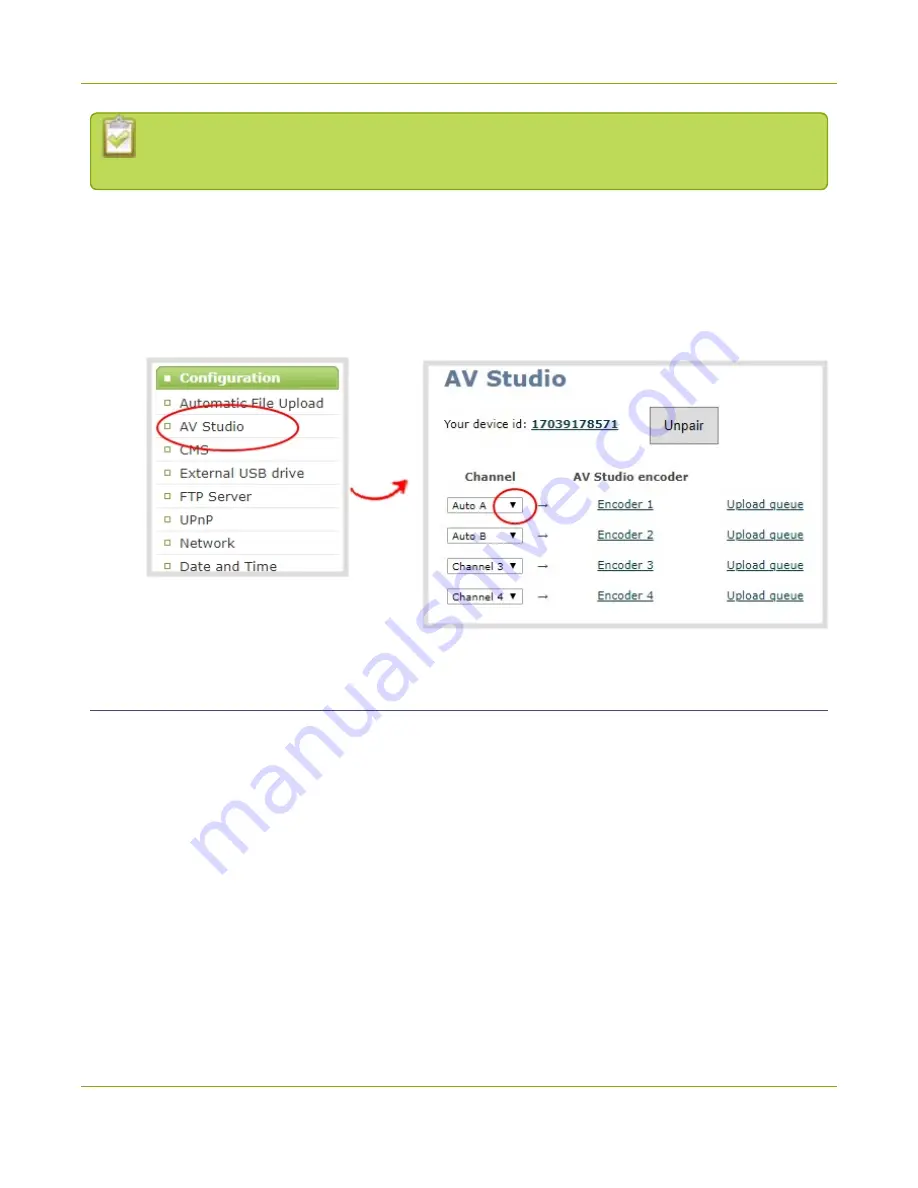
To select channels for remote control:
1. Login to the Admin panel as
admin
2. From the Configuration menu, select
AV Studio
. The AV Studio status page opens.
3. From the Channel drop down menu, select a different channel. The status of the channels update on
the AV Studio status page in the Admin panel and in the AV Studio interface.
Control recording using AV Studio
You can remotely start and stop recording the channels on Pearl-2 directly in AV Studio from either the
Encoders page or from the Encoder's detailed status page.
Important considerations
l
Recordings do not automatically upload to AV Studio by default. You can manually start uploading
using AV Studio. Once uploading is enabled, recordings continue to upload automatically until you
select stop uploading.
l
Some costs are incurred when uploading recordings to a pay-as-you-go AV Studio account.
l
If you use the Admin panel to delete a selected channel while Pearl is paired, no channel appears
selected. However, you can still access any recordings or scenes that were created with that channel in
AV Studio. To select another channel, see
Select channels for remote control
90
Summary of Contents for Pearl-2 Rackmount
Page 139: ...Pearl 2 User Guide Mute audio 4 Click Apply 126 ...
Page 151: ...Pearl 2 User Guide Mirror the video output port display 138 ...
Page 156: ...Pearl 2 User Guide 4K feature add on 143 ...
Page 180: ...Pearl 2 User Guide Delete a configuration preset 167 ...
Page 440: ...Pearl 2 User Guide Register Pearl 2 427 ...
Page 488: ...l Pro audio inputs l 512 GB data storage SSD l Touchscreen ...
Page 497: ... and 2019 Epiphan Systems Inc ...


