2
3. Function/operating
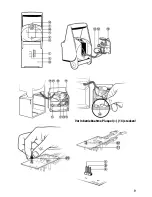
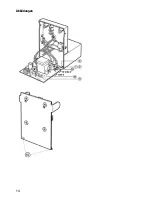
Note: Position number in () see sketches on page 25-26.
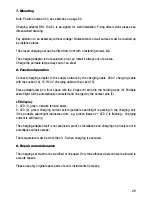
Activate portable lamp
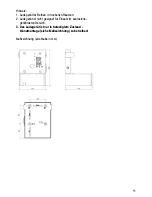
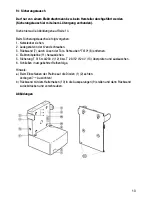
Please plug positive pole onto the ac-cumulator!!
For that open the housing:
• Unscrew 3 Torx screws on the left and right at the case and on the bottom (5).
• Extract back panel (8) from the case.
• Plug positive pole (4) onto the termi-nal lug.
• Re-close the case and screw it up
Operation
The portable lamp can be switched on and off by the push-button key (0) installed in the lamp
head.
Switching steps: ON-Flashing-OFF
Focusing
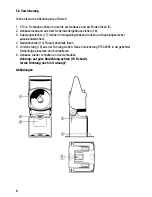
The main lamp can be very simply focused from outside (9) on point light and wide-spread light.
Lamp monitoring
a) Incandescent filament breakage check outside of charging set: In case of defec-tive main lamp
there will be an auto-matic change-over to economy lamp.
b) Incandescent filament breakage check in parked charging set: Defective condi-tion will be
indicated by flashing of a LED at the charging chair.
c) Setting in and removing the portable lamp into and/or from the charging chair there will be a
short flashing of main and economy lamp as a visual inspection of lamp function.
Charging condition display (7)
Charging condition of battery will be indi-cated by 5 luminous diodes.
Capacity of battery Colour of luminous diode
Note
> 75 %
green
¢¢¢¢¢
> 50 %
green
¢¢¢¢
> 25 %
green
¢¢¢
< 25 %
yellow
¢¢
Charging desired
< 0 %
red
¢
Charging urgent
9
Total discharge
g
repeated flashing of
LED
Summary of Contents for SHL 100-EX
Page 10: ... Vor Inbetriebnahme Pluspol 14 stecken ...
Page 15: ...14 Abbildungen ...
Page 17: ...16 12 EG Baumusterprüfbescheinigung ...
Page 18: ...17 ...
Page 27: ...26 Plug the positive pole 14 preoperational ...
Page 32: ...31 Illustrations ...
Page 34: ...33 12 EC type examination certificate ...
Page 35: ...34 ...
Page 44: ...43 Fichez le pôle positif 14 avant la mise en fonctionnement ...
Page 49: ...48 Illustrations ...
Page 51: ...50 12 Attestation d examen CE de type ...
Page 52: ...51 ...
Page 61: ...60 Sluit voor gebruik de positieve pool aan 14 ...
Page 66: ...65 Afbeeldingen ...
Page 68: ...67 12 EG verklaring van typeonderzoek ...
Page 69: ...68 ...
Page 78: ...77 Prima della messa in funzione inserire il polo positivo 14 ...
Page 83: ...82 Illustrazioni ...
Page 85: ...84 12 Attestato di certificazione ...
Page 86: ...85 ...
Page 95: ...94 Conecte el polo positivo 14 antes del uso ...
Page 100: ...99 Ilustraciones ...
Page 102: ...101 14 Certificado de ensayo de tipo de construcción CE ...
Page 103: ...102 ...
Page 112: ...111 Ligue o pólo positivo 14 antes da colocação em funcionamento ...
Page 117: ...116 Desenhos ...
Page 119: ...118 15 N do Certificado do modelo CE ...
Page 120: ...119 ...
Page 129: ...128 Innan du startar skall pluspolen anslutas ...
Page 134: ...133 Bilder ...
Page 136: ...135 14 EG konstruktionskontrollintyg ...
Page 137: ...136 ...

