background image

52

ED900

02-2020

08125330

dormakaba ED900 Installation Instructions – Double egress door

Chapter 15

15.4  Connect customer 115 Vac to ED900 mounting plate terminal block

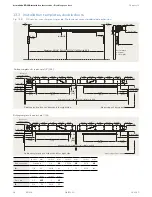
Fig. 15.4.1  Double door mounting plate installation with standard covers

ED900 mounting 
plate

115 Vac terminal 
block

15.4.1  ED900 115 Vac electrical 

installation.

WARNING

Work on electrical equipment and 
115 Vac wiring installation must 
be performed only by qualified 
personnel

!

WARNING

Electrical shock hazard! 115 Vac 
branch circuit disconnect for 
ED900's must be Off prior to 
start of electrical installation.

WARNING

115 Vac wiring to ED900 operators 
must conform to local and national 
electrical codes.

Fig. 15.4.2  Double door mounting plate installation – optional full width cover

1

1

3

3

ED900 mounting 
plate, inactive door

115 Vac terminal 
block

ED900 mounting 
plate, aactive door

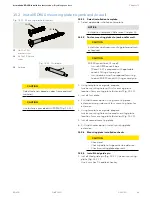
15.4.2  ED900 installation with standard 

covers.

•  Customer 115 Vac power wiring required 

to  terminal block (3) on each mounting 
plate (Fig. 15.4.1).

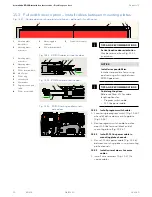
15.4.3  ED900 installation with full width 

cover option.

•  Customer 115 Vac power wiring required  

at terminal block (3) on inactive door 
mounting plate (Fig. 15.4.2).

•  Active and inactive door assignments 

may be reversed from Fig. 15.4.2).

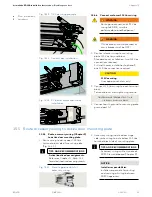
1

2

4

3

5

ED900 mounting 
plate extension

Conduit box (option)

Summary of Contents for ED900

Page 1: ...ED900 Low Energy Swing Door Operator Fine cover Double egress doors Installation Instructions 08125330 02 2020 EN ...

Page 2: ...e egress swing door 25 10 3 Safety Information label low energy swing doors 26 Table of contents 11 Recommended tools and torque chart 27 11 1 Recommended tools 27 11 2 Standard tightening torque 27 11 3 Drill bits 27 12 ED900 installation overview 28 12 1 Installation preparation 28 12 2 ED900 operator installation with standard covers 30 12 3 ED900 operator installation with full width cover opt...

Page 3: ...rators 80 25 Connect accessory wiring and test 81 25 1 Install accessory wiring 81 25 2 Test all accessories 81 26 Set track bumper stop 82 26 1 Set track bumper stop position 82 27 Install push arm door stop 83 27 1 Install push arm door stop optional assembly 83 28 Install ED900 cover end caps and spindle caps 84 28 1 Install cover and end caps 84 28 2 Install spindle caps 85 28 3 Full width cov...

Page 4: ...dimensions are given in inches and mm 1 1 5 Building codes and standards ED900 installation observe applicable national and local building codes 1 General information 1 1 General information 1 1 6 Symbols used in these instructions WARNING This symbol warns of hazards which could result in personal injury or threat to health CAUTION This symbol warns of a potentially unsafe procedure or situation ...

Page 5: ...r hold open time WARNING To reduce risk of injury to persons use this ED900 operator only with a swing door for which the ED900 is designed for Reference Chapter 6 Technical data TIPS AND RECOMMENDATIONS Insure operator door configuration is qualified for use on the respective smoke or fire rated door 2 1 3 ED900 maximum door specifications Reference Para 6 2 Operating specifications 2 1 4 ED900 h...

Page 6: ...0 controlled by its own power switch and program switches Fig 2 3 1 ED900 installation separate covers Fig 2 3 2 ED900 installation full width cover option installation example 2 3 2 Full width cover option installation 1 Inactive door ED900 power switch controls power to both ED900 operators 2 ED900 single program switch located on active door controls both ED900 operators Power switch Program sw...

Page 7: ...cal processes by use of control settings elements or procedures not documented in this manual WARNING Electric shock hazard By use of control elements settings or procedures not documented in this manual WARNING Work on electrical equipment and 115 Vac wiring installation must be only be performed by qualified personnel WARNING Metallic doors must be grounded per national and local codes 3 Safety ...

Page 8: ...stem example 1 ED900 operator 2 T track arm assembly 3 Axle extension 4 Standard cover 5 End cap program switch 6 End cap power switch 7 Mounting plate 7 1 115 Vac terminal block 8 Spindle cap 9 Spindle cap 1 2 3 4 5 6 7 7 1 8 8 9 1 ED900 operator 2 J pull arm assembly 3 Axle extension 4 Standard cover 5 End cap program switch 6 End cap power switch 7 Mounting plate 7 1 115 Vac terminal block 8 Sp...

Page 9: ...ess door Chapter 4 4 3 ED900 double egress door configurations Fig 4 3 1 ED900 LH double egress Fig 4 3 2 ED900 RH double egress Standard width cover 27 686 0 8 0 203 5 1 8 130 Fig 4 3 3 ED900 LH double egress full cover option Fig 4 3 4 ED900 RH double egress full cover option ...

Page 10: ...otentiometer power fail closing speed adjustment 12 Terminal jumper socket push or pull mounting 15 RJ45 socket double door operator synchronization 16 Com 1 service connector 17 Accessories terminal board 18 Mounting plate 19 Customer ground terminal 20 Guide pin 21 Ribbon cable 22 Ribbon cable socket 23 Upgrade card socket 24 Motor 25 Encoder socket and cable 26 Motor socket and cable 27 Control...

Page 11: ...11 ED900 02 2020 08125330 dormakaba ED900 Installation Instructions Double egress door Blank page This page left intentionally blank ...

Page 12: ...fullyopen foraminimumof5seconds beforebeginningtoclose 3 Doorshouldcloseataslow smoothpace 4ormore seconds andstopwithout impact 4 Inspectthefloorarea It shouldbecleanwithno loosepartsthatmightcause usertotriporfall Keep trafficpathclear 5 Inspect door s overall condition Theappropriate signageshouldbepresent andthe hardware should be in good condition 6 Havedoorinspectedbyan AAADMcertifiedinspect...

Page 13: ...eveal Fig 5 4 5 T Splined pull arm assembly 0 1 reveal 1 Drive arm 2 CPD lever 3 Track 1 4 2 1 2 2 3 Fig 5 4 1 J8 Splined push arm assembly 225 mm 0 8 reveal Fig 5 4 2 J12 Splined push arm assembly 500 mm 8 12 reveal 1 2 3 1 2 3 1 3 1 5 1 5 2 3 4 5 5 Axle extension sleeves and extensions Fig 5 5 1 20 mm 08125201 Fig 5 5 2 30 mm 08125202 Fig 5 5 3 60 mm 08125203 1 20 mm axle extension sleeve 1 1 20...

Page 14: ...End cap power switch 4 Spindle cap 5 Spindle cap 4 5 15 16 Mounting plate fastener kit 08120570 15 1 4 20 x 1 FH machine screw 16 No 14 x 1 FH wood screw 12 15 12 16 Fig 5 7 1 Two sets Push arm screw kit Fig 5 7 2 Two sets Pull arm screw kit 10 Pull arm screw kit 08122740 10 1 10 24 x 1 1 2 barrel nut 10 2 10 24 x 1 1 4 FHSCS flat head socket screw 10 3 14 x 1 1 4 pan head wood screw 9 Push arm sc...

Page 15: ... 3 conductor cable 1 3 conductor cable 3 Ring lug 5 Connector 1 2 3 3 5 5 1 5 9 ED900 full width cover mounting plate extension and cables option 1 2 2 13 4 8 9 7 6 14 4 16 4 15 Fig 5 9 1 Full width cover kit 08125264 1 Fine cover double 08120370 2 End and spindle cap set 08121260 4 Mounting plate connectors 6 Front cover extension 08121870 7 dormakaba logo plate 08125241 8 M6 x 10 mm SHS with was...

Page 16: ...k 08120774 2 Plate bumper mounting 1 2 thick 08120770 3 Rubber bumper 08120750 4 Shoulder bolt 08104231 5 1 1 4 20 x 1 1 4 Phillips FHS black oxide SS 5 2 No 14 x 1 1 4 Phillips FHMS for sheet metal zinc plated steel 5 1 5 2 1 or 2 3 4 2 3 2 Key switch panel with RJ45 3 Key switch panel 4 Communication cable for program switch panel comm port 10 ft Fig 5 10 1 Key switch panels Wiring diagrams Refe...

Page 17: ... egress door Chapter 5 Fig 5 12 2 Power cord wiring kit 08121110 1 Power cord 08075390 2 Wire nut 3 Cord grip 08121130 4 Conduit box 08120730 5 120 Vac label Fig 5 12 1 Conduit box 4 Conduit box 08120730 4 11 16 119 2 3 4 70 4 1 2 3 4 5 5 12 Conduit box and wiring kit options ...

Page 18: ...ycle counter CC parameter 0 to 1 000 000 Power assist function hA hF hS parameters Drive support for manual opening of door Push go function PG parameter Auto opening of door at 4 open 6 1 ED900 Technical data 6 1 1 Required operating conditions Ambient temperature 5 to 122 F Suitable for dry rooms only Relative air humidity 93 maximum non condensing Power supply 115 Vac 10 50 60 Hz 6 6 A maximum ...

Page 19: ...Doors 7 2 2 Low energy power operated door A manual door with a power mechanism that opens the door upon receipt of a knowing act activating signal does not generate more kinetic energy than specified in ANSI 156 19 and is closed by a power mechanism or by other means TIPS AND RECOMMENDATIONS Parameter descriptions can be found in Chapter 22 Parameters Axle extensions mm inches 20 13 16 30 1 3 16 ...

Page 20: ...et 3s 2 Quitprocess 3s Both buttons together 1 Acknowledgeerrors pressbothbuttons 3s 2 Reset pressboth buttons 3s Upbutton 1 Scrollthroughparameters anderrormessages 2 Increaseparametervalue Downbutton 1 Scrollthroughparameters anderrormessages 2 Reduceparametervalue 3 Openingpulse press button 3s 4 Learningcycle press button 3s 5 Resetwithfactorysetting pressbutton 8s program switchesoff 6 Identi...

Page 21: ...power is On Off internal 24 Vdc power is Off TIPS AND RECOMMENDATIONS Information on LED status codes and maintenance intervals can be found in Appendix B Troubleshooting 1 RedLED 2 Yellow LED 3 Green LED 4 Power switch 1 2 1 2 3 4 1 2 3 8 3 1 Program switch control modes Auto door opens following pulse generation by a knowing act device or push pull Door will close after hold open time adjustable...

Page 22: ...n 9 2 System accessories 9 2 6 Activators Typical activators 1 Pushbuttons key switches 2 Access control systems 3 Telephone systems 4 Intercoms TIPS AND RECOMMENDATIONS Refer to Chapter 6 Technical data for electrical interface requirements 9 2 7 Locking devices Typical locking devices 1 Electric strike plates 2 Electromagnetic locks 3 Electric locks To insure that operator and locking device wor...

Page 23: ...s installed 6 DCW upgrade card plug n a 7 Fireprotection upgradecard plug 97 98 99 30 31 32 34 33 3 3 35 1 3 6 1 4 4a 3 B A 1 57 57a 1 42 3 1 41 3 1 15 17 3 1 11 13 3 43 3 64 63 62 1G 3 24 V Signal input 0 V Partial Open Permanent Open Exit Only Automatic Off N C COM Test output X5 X4 X3 X6 X9 X1 X7 24 V X8 0 V X10 8 24 AC DC 5 Wet DCW bus Swing side Approach side Safety sensors Activation inputs ...

Page 24: ...d to initiate operation of door operator door shall be provided with sign on each side of door where switch is operated with message ACTIVATE SWITCH TO OPERATE 10 1 4 Push Pull used to initiate door operation 1 PUSH TO OPERATE PULL TO OPERATE decals When push pull is used to initiate operation of door operator doors shall be provided with the message PUSH TO OPERATE on push side of door and PULL T...

Page 25: ...ITCH TO OPERATE 1 CAUTION DOOR AUTOMATIC DD0586 010 1 ACTIVATE SWITCH TO OPERATE CAUTION DOOR AUTOMATIC DD0586 010 ACTIVATE SWITCH TO OPERATE 1 CAUTION DOOR AUTOMATIC DD0586 010 1 ACTIVATE SWITCH TO OPERATE 1 ActivateSwitchto Operate 10 2 2 Push pull used to initiate door operation CAUTION DOOR AUTOMATIC DD0586 010 3 DD0762 020 PULL TO OPERATE CAUTION DOOR AUTOMATIC DD0586 010 2 DD0762 010 PUSH TO...

Page 26: ...inimumof5seconds beforebeginningtoclose 3 Doorshouldcloseataslow smooth pace 4 or more seconds andstopwithout impact 4 Inspectthefloorarea It shouldbecleanwithno loosepartsthatmightcause usertotriporfall Keep trafficpathclear 5 Inspect door s overall condition Theappropriate signageshouldbepresent andthe hardware should be in good condition 6 Havedoorinspectedbyan AAADMcertifiedinspector at least ...

Page 27: ...6 Torque wrench 3 to 50 ft lb min 6 1 Metric hex key sockets 7 Open end wrench 13 mm 8 Screwdriver flat blade M2 1 16 to 3 32 Fastener size ft lb M5 3 7 M6 7 M8 17 M10 34 M12 58 11 2 Standard tightening torque 11 2 1 Standard tightening torque Fastener Drill bit size 10 wood screw Hardwood 9 64 Softwood 1 8 12 wood screw Hardwood 5 32 Softwood 9 64 14 wood screw Hardwood 11 64 Softwood 5 32 1 4 20...

Page 28: ...2 1 3 Accessories 1 Verify accessories planned for or in place for the door Chapter 9 system accessories list typical accessory types for ED900 operators TIPS AND RECOMMENDATIONS Accessory wiring to ED900 operator should be planned for prior to operator installation 12 1 4 ED900 mounting plate installation preparation CAUTION Using applicable ED900 installation template Chapter 13 holes for mounti...

Page 29: ...29 ED900 02 2020 08125330 dormakaba ED900 Installation Instructions Double egress door Blank page This page left intentionally blank ...

Page 30: ...ng double door commissioning Reference Chapter 24 Door type Parameter value Parameter description 0 Single door 1 Double door with astragal Active door operator door opens first 2 Double door with astragal Inactive door operator 3 Double door without astragal Active door operator Both doors open simultaneously 4 Double door without astragal Inactive door operator Both doors open simultaneously Fac...

Page 31: ...rogram switches are disabled in double door operation 12 5 2 ED900 installation with optional full width covers Fig 12 5 2 Single program switch installed on active door ED900 controls operation of both ED900 controllers Standard program switches are disabled in double door operation Reference Para 14 7 for single program switch installation Fig 12 5 2 ED900 installation with optional full width c...

Page 32: ... 22 2 1 8 54 3 4 20 2 51 3 1 4 83 1 21 32 42 2 29 32 74 1 3 16 30 2 13 32 61 3 21 32 93 2 1 16 52 3 5 16 84 2 3 8 60 3 9 16 91 4 27 32 123 3 7 32 82 4 1 2 114 A C B D Reveal depth maximum 1 3 16 30 Upper edge door Space for cable feed Door with rabbet Upper edge door 5 7 8 150 4 3 16 106 1 3 4 45 1 1 4 32 3 15 16 100 1 3 4 45 2 1 2 63 4 3 4 120 4 3 4 120 4 3 4 120 3 3 4 95 Ø 1 4 6 6 17 3 4 451 1 1...

Page 33: ...3 3 4 20 2 51 3 7 32 82 1 21 32 42 2 7 8 73 1 3 16 30 2 13 32 61 3 5 8 92 2 1 16 52 3 1 4 83 2 3 8 60 3 9 16 91 4 13 16 122 3 7 32 82 4 7 16 113 B D A C Reveal depth maximum 2 3 8 60 Upper edge door Upper edge door Space for cable feed 5 7 8 150 4 3 16 106 1 3 4 45 1 1 4 32 3 15 16 100 1 3 4 45 4 3 4 120 4 3 4 120 4 3 4 120 3 3 4 95 7 11 16 195 Ø 1 4 6 6 2 1 2 63 17 3 4 451 1 1 4 31 1 8 3 When CPD...

Page 34: ...32 96 2 3 8 60 3 9 16 91 5 5 16 135 3 7 32 82 4 31 32 126 Fig 13 2 3 Assembly on hinge side pull version with slide channel CPD and long pivot pin B D A C Upper edge door Upper edge door Space for cable feed 5 7 8 150 4 3 16 106 1 3 4 45 1 1 4 32 3 15 16 100 2 1 2 63 4 3 4 120 4 3 4 120 4 3 4 120 3 3 4 95 1 3 4 45 Ø 1 4 6 6 17 3 4 451 1 8 3 1 3 4 44 When CPD lever is used about 1 3 16 30 must be d...

Page 35: ...9 1 3 8 35 2 3 4 70 2 3 8 60 2 29 32 74 4 5 16 109 2 9 16 65 3 15 16 100 Fig 13 3 1 Assembly on opposite hinge side push version with slide channel and short pivot pin B D A C Lower edge frame Lower edge frame Space for cable feed Reveal depth maximum 2 3 8 60 The maximum opening width is 95 5 7 8 150 4 3 16 106 1 3 4 45 1 1 4 32 3 15 16 100 4 3 4 120 4 3 4 120 4 3 4 120 3 3 4 95 Ø 1 4 6 6 17 3 4 ...

Page 36: ...6 30 1 7 8 48 3 3 16 81 1 13 32 39 2 13 16 72 2 3 8 60 3 1 16 78 4 3 8 111 2 23 32 69 4 102 Fig 12 4 1 Assembly on opposite hinge side push version with J arm assembly B D C A Lower edge frame Lower edge frame Space for cable feed 5 7 8 150 4 3 16 106 1 3 4 45 1 1 4 32 3 15 16 100 9 5 8 245 Ø 1 4 6 6 1 5 16 33 1 31 32 50 4 3 4 120 4 3 4 120 4 3 4 120 3 3 4 95 1 3 4 45 2 1 2 63 ED100 0 11 13 16 0 3...

Page 37: ... 62 1 3 16 30 1 7 8 48 3 3 16 81 1 13 32 39 2 13 16 72 2 3 8 60 3 1 16 78 4 3 8 111 2 23 32 69 4 102 B D C A Lower edge frame Lower edge frame ED 100 0 mm 300 mm ED 250 0 mm 500 mm Space for cable feed Note lever position 1 1 4 32 9 7 8 250 8 1 8 206 3 15 16 100 4 3 4 120 4 3 4 120 4 3 4 120 3 3 4 95 2 1 2 63 1 3 4 45 Ø 1 4 6 6 1 5 16 33 1 31 32 50 12 13 16 325 5 11 16 145 Fig 13 4 2 Assembly on o...

Page 38: ...4 45 5 7 8 150 4 3 16 106 1 1 4 31 5 2 1 2 63 3 15 16 100 4 3 4 120 4 3 4 120 4 3 4 120 3 3 4 95 17 3 4 451 Minimum 55 1 8 1400 57 1 16 1450 with ESR Upper edge of door panel Cable entry location on either the left or right side 17 3 4 451 5 7 8 150 6 1 8 155 4 3 16 106 3 8 9 1 3 4 45 6 1 8 155 Drilling template long pivot pin 1 25 Center of operator axle 1 3 4 45 5 7 8 150 4 3 16 106 1 1 4 31 5 2...

Page 39: ...imum 55 1 8 1400 57 1 16 1450 with ESR 3 3 4 95 4 3 4 120 4 3 4 120 4 3 4 120 3 15 16 100 17 3 4 451 5 7 8 150 4 3 16 106 7 11 16 195 3 8 9 1 3 4 45 Ø1 4 6 6 Drilling template pivot pin long 25 mm Center of operator axle 3 15 16 100 4 3 4 120 4 3 4 120 4 3 4 120 3 3 4 95 1 3 4 45 5 7 8 150 4 3 16 106 1 1 4 31 5 2 1 2 63 7 11 16 195 17 3 4 451 1 3 4 44 A Minimum 55 1 8 1400 57 1 16 1450 with ESR 3 ...

Page 40: ...4 95 1 3 8 35 A 3 15 16 100 4 3 4 120 4 3 4 120 4 3 4 120 3 3 4 95 Ø1 4 6 6 17 3 4 451 6 1 8 155 5 7 8 150 4 3 16 106 Bottom edge of reveal 1 3 4 45 1 1 4 31 5 2 1 2 63 5 7 8 150 4 3 16 106 6 1 8 155 Center of operator axle 17 3 4 451 1 7 8 48 A Ø1 4 6 6 3 15 16 100 4 3 4 120 4 3 4 120 4 3 4 120 3 3 4 95 3 15 16 100 4 3 4 120 4 3 4 120 4 3 4 120 3 3 4 95 Ø1 4 6 6 3 8 9 1 3 4 45 5 7 8 150 6 1 8 155...

Page 41: ...4 120 4 3 4 120 4 3 4 120 3 3 4 95 3 8 9 1 3 4 45 8 1 8 206 9 7 8 250 12 13 16 325 1 31 32 50 12 13 16 325 1 31 32 50 5 11 16 145 2 1 2 63 1 1 4 31 5 8 1 8 206 9 7 8 250 Minimum 55 1 8 1400 57 1 16 1450 with ESR 1 5 16 33 3 15 16 100 4 3 4 120 4 3 4 120 4 3 4 120 3 3 4 95 Ø1 4 6 6 Ø1 4 6 6 Bottom edge of reveal Cable entry location on either the left or right side Drilling template arm EN 3 6 1 3 ...

Page 42: ...ight captive ED900 M6 socket head cap screws SHCS using a 5 mm hex T handle TIPS AND RECOMMENDATIONS Insure all eight fasteners are free of the mounting plate 2 Remove operator from mounting plate TIPS AND RECOMMENDATIONS Guide pin resistance may require screwdriver to start operator removal from end of mounting plate Fig 14 1 3 Fig 14 1 1 115 Vac plug removal 1 ED900 operator 2 Mounting base 3 M6...

Page 43: ...ate 14 2 2 ED900 installation with full width cover option Fig 14 2 2 1 Customer 115 Vac is connected to inactive door terminal block and ground stud 14 2 2 Remove 115 Vac terminal block on inactive door mounting plate 1 Remove M3 x 5 screw securing 115 Vac terminal block assembly to mounting plate 2 Remove 115 Vac terminal block assembly TIPS AND RECOMMENDATIONS Removing 115 Vac terminal block on...

Page 44: ... cord wiring kit Fig 14 3 4 Eliminates need for hard wiring Permits ED900 to plug directly into 115 Vac receptacle Power cord length 15 from end of conduit box to center of plug CAUTION Insure power cord installation conforms to local and national electrical codes 1 115 VAC terminal block 2 Ground terminal 3 Mains terminal torque and wire label 5 M3 5 screw 6 115 Vac plug to operator L 115 Vac N N...

Page 45: ...late 3 Thread M3 Phillips head screw into conduit box mounting hole and tighten screw CAUTION Terminal block M3 screw torque Tighten M3 screw to a torque of 5 7 in lb Insure screw is threaded into conduit box mounting hole 4 Mounting plate assembly is ready for installation Fig 14 3 5 115 Vac terminal block mounting Fig 14 3 6 Conduit box installed on mounting plate 1 115 VAC terminal block 2 Grou...

Page 46: ...5 8 14 4 1 Remove terminal board from active door ED900 1 Press in 3 tabs 2 that secure terminal board 1 to ED900 lift up terminal board and swing away from end of housing 14 4 2 Remove ED900 115 Vac plug 1 Swing open upper bracket 3 2 Remove ED900 115 Vac plug 5 from power supply circuit board socket 6 14 4 3 Remove power supply circuit board 1 Remove power supply circuit board 4 from its slot in...

Page 47: ... mm SHS with washer 8 2 M6 x 10 mm PFHS 9 Do not tighten screws 14 4 7 Check cover fit over ED operators 1 Place the ED operators onto their mounting plates 2 Place end caps 2 at end of each operator 3 Place cover over end caps and ED operator 4 Adjust mounting plates as necessary for cover fit over end caps 5 Remove end caps and operators 6 Tighten mounting plate connector fasteners 14 4 8 Mounti...

Page 48: ...uit box option 15 ED900mountingplateandoperator installation Fig 15 1 1 Double egress door mounting plate installation standard covers example 1 1 2 2 3 3 1 ED900 mounting plate 2 115 Vac terminal block Fig 15 1 2 Double egress door mounting plate installation optional full width cover example 1 ED900 mounting plate inactive door 2 ED900 mounting plate active door 3 Mounting plate extension 4 115 ...

Page 49: ... Full width cover option Using mounting plate extension as a guide mark four mounting holes for extension 4 Using template as a guide prepare twelve mounting holes at second mounting plate location for mounting plate fasteners Fig 15 2 1 5 Install second mounting plate 6 Full width cover option Install mounting plate extension 15 2 4 Mounting plate installation checks CAUTION Check level Check spi...

Page 50: ...ngth options Reference Para 4 12 for cable length options for Program switch cable 115 Vac power cable 15 3 1 Install program switch cable 1 Locate single program switch Fig 15 3 5 at end of active door mounting plate Fig 15 3 3 2 Route program switch cable to active door 115 Vac terminal block end of mounting plate Fig 15 3 4 15 3 2 Install 115 Vac power cable in mounting plate channels 1 Route 1...

Page 51: ...nal tooth lockwasher and flat washer Fig 15 3 8 Inactive door 115 Vac cable ground wire 1 5 8 8 1 1 Activedoormounting plate 5 Groundstud 8 115Vacpowercable 8 1 Groundwire Fig 15 3 9 Active door 115 Vac cable ground wire 5 Groundstud 6 M5nut 7 Flatwasher 8 1 115Vacpowercable groundwire 8 2 Groundwireringlug 9 Externaltoothlock washer 5 8 1 6 8 2 7 9 Fig 15 3 10 Ground stud wiring 2 8 5 8 1 2 Inact...

Page 52: ... to start of electrical installation WARNING 115 Vac wiring to ED900 operators must conform to local and national electrical codes Fig 15 4 2 Double door mounting plate installation optional full width cover 1 1 3 3 1 ED900 mounting plate inactive door 4 115 Vac terminal block 2 ED900 mounting plate aactive door 15 4 2 ED900 installation with standard covers Customer 115 Vac power wiring required ...

Page 53: ...nate at ED900 terminal board Chapter 9 NOTICE Installer responsibilities Installer responsible for routing and securing all wiring between ED900 operators 15 4 4 Connect customer 115 Vac wiring WARNING Routing and connection of 115 Vac wiring to ED900 must be performed by a qualified person WARNING 115 Vac branch circuit disconnect or circuit breaker must be OFF 1 Route customer wiring to mounting...

Page 54: ...mm hex T handle 3 Tighten the eight M5 SHCS 15 7 2 Insert 115 Vac plug into socket 1 Insert 115 Vac plug from mounting plate 115 Vac terminal block into ED900 socket Fig 15 7 2 15 7 3 Inactive door 1 Repeat steps in 15 7 1 and 15 7 2 CAUTION Full width cover option single program switch and cable As ED900 operator is lowered onto mounting plate route program switch and cable into ED900 housing Ref...

Page 55: ... door ED900 operator 1 Connect program switch cable wires to X1 terminal connector Fig 14 7 4 Fig 15 8 2 Program switch and cable 7 Program switch and cable 10 Program switch terminals 6 Slots for switch 7 Program switch and cable Fig 15 8 3 Program switch installation 7 6 Fig 15 8 4 Program switch cable installation active door ED900 7 Program switch cable Terminal Wire color Function 31 Brown Au...

Page 56: ...et female connection 5 115 Vac pair power cable plug male connection 15 9 1 Inactive door 1 Insert 115 Vac interconnecting cable plug 5 into ED900 power supply circuit board socket 4 Fig 15 9 2 1 3 Fig 15 9 1 Inactive door cables 3 115 Vac interconnect cable plug male connection Fig 15 9 4 ED900 115Vac pair power cable active door 6 7 6 ED900 power cord male connection 7 115 Vac pair power cable p...

Page 57: ...lined push arm assembly 8 7 8 225 1 Splined drive arm 2 Socket 4 Adjustment arm 11 1 4 285 5 Adjustment arm tube 12 1 4 311 6 Shoe 7 M6 x 10 mm flanged button head screw 8 Ball head 11 Shoe screw cover 12 M8 x ___ SHCS 13 Cap Fig 16 2 2 J12 Splined push arm assembly 19 11 16 500 1 Splined drive arm 2 Socket 6 Shoe 7 M6 x 10 mm flanged button head screw 8 Ball head 9 Adjustment arm 17 3 4 450 10 Ad...

Page 58: ...rench with hex key socket to tighten SHCS to 17 ft lb 23 Nm 16 2 3 Drill two holes in door for adjustment arm shoe Installation templates Chapter 13 document location of shoe on door 1 Drill two holes in door for adjustment arm shoe Fastener type based on door material TIPS AND RECOMMENDATIONS Reference Chapter 5 Accessory kits for arm fasteners 16 2 4 Secure adjustment arm assembly to door 1 Fast...

Page 59: ...ghtening the two M6 x 10 mm flanged button head screws CAUTION Recheck that adjustment arm is at 90 angle to door 5 Install shoe screw covers 1 Drive Arm 2 Socket 4 Adjustment arm 11 1 4 285 5 Adjustment arm tube 12 1 4 311 6 Shoe 7 M6 x 10 mm flanged button head screw 90 angle 1 5 10 1 8 5 10 4 9 6 7 2 Fig 16 2 7 Arm assemblies attached to door and ED900 8 Ball head 9 Adjustment arm 17 3 4 450 Fi...

Page 60: ...spring pin 8 Pull arm cap 9 Slide shoe 10 Pivot pin 11 Retaining ring 12 Bumper 13 M8 x 1 25 x 40 SHCS 14 Wood screws 15 Machine screws 16 Bumper stop 17 M5 x 13 FHMS cross recessed Fig 17 3 1 Track assembly Fig 17 2 1 T275 Splined arm with CPD lever and track assembly LH 1 Drive arm 2 CPD 3 Track Fig 17 2 2 T275 Splined arm with CPD lever and track assembly RH Fig 17 2 3 T Splined arm and track a...

Page 61: ...e track hardware based on RH or LH installation 1 Remove both end caps 2 and one fixing piece 3 from track 1 Slide bumper stop 16 bumper 12 and slide shoe assembly 9 into track Do not tighten bumper stop M5 screw 17 2 Secure fixing piece to end of track with M5 x 15 screw 3 1 Use No 2 Phillips do not over tighten Fig 17 5 1 RH track assembly 1 Track 3 Fixing piece 9 Slide shoe 12 Bumper Fig 17 5 2...

Page 62: ... Select fastener based on door material 2 Drill holes in door hole size based on selected screw or fastener Ref Chapter 5 Accessory kits 3 Mount track to door thread fasteners through fixing pieces 2 into door and tighten CAUTION Check track for level when tightening fasteners 1 2 2 15 15 2 Fixing piece 3 Track 15 Fastener 1 2 2 12 9 14 14 16 Fig 17 6 1 Track assembly 1 Track 2 Fixing piece 9 Slid...

Page 63: ...ecure CPD lever to arm with M6 x 10 SHCS Fig 17 8 5 Arm assembly LH pull RH push Fig 17 8 4 Arm assembly RH pull LH push 6 CPD lever 6 1 M6 x 10 SHCS 7 Slotted spring pin 16 Arm 7 6 1 M6 x 10 SHCS 11 Slotted spring pin Fig 17 8 1 Slotted spring pin Fig 17 8 3 CPD lever and slotted spring pins 6 CPD lever 7 Slotted spring pin 1 17 7 Arm assembly Fig 17 7 1 Arm assembly 1 Arm 7 6 6 CPD lever 6 1 M6 ...

Page 64: ...ad back to zero rotations fully CCW 3 Push the drive arm onto the spindle at an angle of approximately 12 to the ED operator Fig 17 9 1 4 Rotate the drive arm spindle approximately 10 in the door s opening direction Fig 17 9 2 5 Remove the drive arm from the spindle Fig 17 9 3 6 Position the drive arm one tooth in the door s closing direction Fig 17 9 4 7 Push the drive arm axle extension onto the...

Page 65: ... socket head into drive arm and tighten CAUTION Use torque wrench with hex key socket to tighten M8 screw to 5 9 7 4 ft lb 8 10 Nm 17 9 3 Set operator spring tension CAUTION A minimum of ten spring tension revolutions are required to operate system Reference Chapter 19 for spring tension adjustment procedure Fig 17 9 9 Drive arm fastened to track Fig 17 9 7 Fastening drive arm to pivot pin Fig 17 ...

Page 66: ...lue 18 1 1 Door width parameter Door width is set in increments of 100 mm 4 Example Measured width of 40 1016 Tb value of 10 18 1 Door width parameter Tb 18 3 Tb parameter values Door width measurement Inches mm Tb Width Inches mm 28 31 15 16 711 811 7 28 711 32 35 15 16 813 912 8 32 813 36 39 15 16 914 1014 9 36 914 40 43 15 16 1016 1116 10 40 1016 44 47 15 16 1118 1218 11 44 1118 48 51 15 16 121...

Page 67: ...imately 1 3 16 equals rd parameter value of 3 18 4 1 Measure reveal depth parameter Reveal depth measurement required for each ED900 operator Reveal measurement Inches mm rd 5 1 2 140 14 5 7 8 150 15 6 5 16 160 16 6 11 16 170 17 7 180 18 7 1 2 190 19 7 7 8 200 20 8 1 4 210 21 8 5 8 220 22 Reveal measurement Inches mm rd 9 230 23 9 7 16 240 24 9 13 16 250 25 10 1 4 260 26 10 5 8 270 27 11 280 28 11...

Page 68: ...system CAUTION Any change to spring tension setting requires a new learning cycle Chapter 23 Fig 19 1 1 Spring tension adjustment Door width Inches 32 36 42 48 mm 813 914 1067 1219 Spring setting revolutions ED900 10 14 16 18 19 1 1 Spring tension setting revolutions TIPS AND RECOMMENDATIONS System checks spring tension during learning cycle Chapter 23 Learning cycle will be canceled if spring is ...

Page 69: ...ning required for both ED900 operators Operator braking circuit plug is positioned in its 3 pin socket for a push or pull installation WARNING Braking circuit will not work correctly if braking circuit plug is improperly positioned or if an incorrect plug is used Door may close at high speed and or be difficult to open 17 1 2 Factory installed plug position Braking circuit plug is factory installe...

Page 70: ...oor closing speed upon power failure 1 Turn ED900 power switch OFF 2 Manually open door to 90 angle and let it close 3 If door closes in less than 5 seconds turn potentiometer 1 4 turn CW and retry test 4 Continue retrying test after potentiometer adjustment until the door closing time is a minimum of 5 seconds 21 1 3 Repeat setting closing speed for second door NOTICE Error message E73 If door cl...

Page 71: ...2 Configuration parameters Configuration parameters Para 22 1 5 are set during first commissioning Chapter 23 Reference Para 22 1 7 for configuration parameter detail 22 1 3 Driving parameters Driving parameters can be set once first commissioning has been completed Reference Para 22 1 6 for a list of driving parameters Reference Appendix A for driving parameter detail 1 Programswitch es closeposi...

Page 72: ...ehavior following a power reset 25 S2 Internal program switch switch function on delay 26 du Door unlocking during business hours 27 Sr Status relay function terminal block X7 22 1 6 Driving parameters Driving parameter Description 28 bE Input 4 4a and X3 1G 24V locking device output configuration 29 CC Cycle counter number displayed 10000 30 EC Delete error log 31 CS Reset service interval displa...

Page 73: ... lever Fig 22 1 5 approximately 1 3 16 30 mm must be deducted from actual reveal 3 Tb ED900 7 to 12 12 Door width 10 Door width is set in increments of 100 mm 4 9 900 mm 35 4 ED900 700 1219 28 48 22 1 9 Arm with track push installation Application specific 1 For doors without fire or smoke detection requirements 2 Maximum reveal depth of 2 3 8 60 3 Maximum opening width at a reveal depth of 2 3 8 ...

Page 74: ...Control unit self check Two segments jumping back and forth Horizontal dashes move up and down Step 3 Press 4 button keypad down button While 2 digit display segments move up and down letters and numbers will change if required to display correct orientation Display scrolls Device ID Ed 900 Firmware version format F x x x x Program mode display Program mode will be displayed indicating system requ...

Page 75: ...ng hinge side 1 Push arm wall mounting on approach opposite hinge side 2 Push arm with track wall mounting on approach opposite hinge side Application specific Factory setting 23 2 Set configuration parameters Fig 23 2 1 4 button keypad 2 digit display 3 Four button keypad 4 Two digit display Step 7 Press Scroll to rd parameter Step 8 Press Displays 00 factorysetting Step 9 Press 00 starts flashin...

Page 76: ...rence Chapter 18 for door width parameter values TIPS AND RECOMMENDATIONS Parameter dL factory setting is 0 single door 4 3 3s Reset 3s Quit 3s PRG 3s LEARN Fact Setup 3s 8s 23 3 Set parameter PS program switch type 23 3 1 Full width cover or Key switch panel option set parameter PS to 1 Step 1 Press Press and hold PRG 3 s to enter program mode AS parameter displayed Step 2 Press Scroll to PS Prog...

Page 77: ...ting for door opening angle to be set Step 1 Secure motion range of door Step 4 Manually move door to desired opening angle Maximum door angle is 110 Step 5 Press Momentarily press down button to continue learning cycle Door performs several movements and display shows a sequence of symbols Movements of door must not be interrupted Operator spring tension too low Display with small rotating o and ...

Page 78: ...switch to CLOSE Step 1 Press Press and hold PRG 3 s to enter program mode AS parameter displayed Step 2 Press Scroll to PS Program switch type parameter Step 3 Press Displays 00 factorysetting Step 4 Press 00 starts flashing Step 5 Press Scroll to select parameter value 1 External mechanical program switch connected to operator terminal board Fig 24 2 1 Single program switch located on active door...

Page 79: ...ps flashing Step 7 Press Returns to door type parameter Step 8 Press Scroll to Ad parameter Step 9 Press Displays 30 factory setting Step 10 Press Scroll to select parameter value 10 as an example Step 11 Press Saves value entered Display stops flashing Step 12 Press Returns to caster angle parameter Step 13 Press Exits program mode Operator is ready for operation Fig 24 2 2 Program switches in CL...

Page 80: ...ress Returns to door type parameter Step 25 Press Exits program mode Operator is ready for operation 24 3 Connect communication cable between operators Fig 24 3 1 Double door operators communication cable 1 RJ45 jack horizontal for communication cable 2 Communication cable 2 Communication cable 08125243 Fig 24 3 3 Communication cable 24 3 1 Install communication cable 1 Set program switch to CLOSE...

Page 81: ...g TIPS AND RECOMMENDATIONS Use documentation provided with each device for electrical installation Do not connect system accessories to board until operator has been commissioned and learning cycle performed Chapter 23 24 2 Use diagram in Chapter 9 to locate connector to its socket CAUTION Terminal jumpers Jumpers Fig 25 1 1 12 must be in place on monitoring circuits 25 Connect accessory wiring an...

Page 82: ...umper stop toward slide shoe until bumper is 3 16 from edge of slide shoe Fig 26 1 3 4 Tighten bumper stop M5 screw Do not overtighten CAUTION Using program switch close then open door to verify gap between bumper and slide shoe with door at full open position 26 1 Set track bumper stop position Fig 26 1 2 Door at set opening angle Fig 26 1 3 Setting bumper stop location Fig 26 1 1 Program switch ...

Page 83: ... 1 With door at its full open position locate door stop assembly bumper on door frame 1 8 beyond arm 2 Mark mounting plate hole locations on frame Plate hole diameter is 1 4 3 Select fasteners based on door frame material 4 Attach door stop assembly to frame CAUTION Using program switch close then open door to verify arm does not contact door stop with door at full open position 5 1 5 2 1 3 4 2 Fi...

Page 84: ...red as necessary TIPS AND RECOMMENDATIONS Optional full width cover 28 1 2 Install end caps 1 Install ED900 operator end caps TIPS AND RECOMMENDATIONS Program switch end cap insertion depth is adjustable to compensate for minor tolerances is length of operator cover Fig 28 1 1 ED900 standard cover Fig 28 1 3 Cover and end cap installation 3 2 Fig 28 1 2 ED900 operator end caps 2 End cap program sw...

Page 85: ...ig 28 2 1 Spindle caps 4 5 4 Spindle cap 5 Spindle cap 28 2 1 Install spindle caps 1 Install spindle caps on ED900 cover Fig 28 2 2 Spindle cap installation ED900 cover top Fig 28 2 3 Spindle cap installation ED900 cover bottom 28 2 Install spindle caps 4 5 4 Spindle cap 4 4 Spindle cap 5 Spindle cap ...

Page 86: ...End cap installation Fig 28 3 2 ED900 full width cover option Fig 27 3 4 Full cover installation 28 3 1 Install end caps 1 Install power switch and program switch end caps TIPS AND RECOMMENDATIONS Active door and inactive door may be reversed from Fig 28 3 3 orientation 28 3 2 Install full length cover 2 End cap program switches 1 End cap power switch Fig 28 3 1 ED900 end caps 1 2 ...

Page 87: ... Installation Instructions Double egress door Chapter 29 29 Install door signage 29 1 Install door signage 29 1 1 Install door signage based on type of door operation Install applicable door signage as outlined in Chapter 10 ED900 door signage ...

Page 88: ...tivationisused thedoorshallremainatthefullyopened positionfornotlessthan3seconds hS Reference AppendixAfor parameter detail Supportformanualmodein doorclosedposition 4 5 Doors shall open with a manual force Not to exceed 15 lbf 67 N to release a latch if equipped with a latch To set a door in motion 30 lbf 133 N To fully open the door 15 lbf 67 N Forces shall be measured 1 25 5 from latch edge of ...

Page 89: ...30 1 2 A156 19 Table I Minimum opening and closing times 30 1 3 A156 19 Table II Total opening time to 90 degrees Backcheckat60 Backcheckat70 Backcheckat80 TableIplus2s TableIplus1 5s TableIplus1s Ifdooropensmorethan90 itshallcontinueatthesamerateasbackcheckspeed Backcheckoccurringatapointbetweenpositionsshalluselowestsetting 30 1 4 Other door weights and widths Closing time T D W 188 D Width of d...

Page 90: ... module is removed all previously enabled functions will be deactivated after a certain time 31 2 3 Operator control unit replacement If the control unit is replaced the container module is removed from the old control unit and inserted into the new control unit The new control unit synchronizes with the container module and all upgrade card functions are available 31 2 4 Inserting an upgrade card...

Page 91: ...rameter F1 F8 for card Reference Chapter 22 Parameters 1 Remove container module from upgrade card slot 6 1 2 Insert next upgrade card into upgrade card slot 4 6 Card function is copied to control module upgrade card is then invalidated Yellow LED indicates procedure is complete 6 1 3 Remove upgrade card from upgrade card slot 4 Reinsert container module into upgrade card slot Control unit recogni...

Page 92: ...any to have door repaired or serviced See Owner s manual or instructions for details on each of these and other safety items If you need a copy of the manual contact the manufacturer These minimum safety checks in addition to those in the Owner s Manual should be made each day and after any loss of electrical power Fig 32 1 1 Safety information label 32 1 Safety label low energy swing doors 32 1 1...

Page 93: ... they may damage cover surface 32 2 4 Water and other liquids WARNING No water or other liquids must be sprayed or spilled on ED900 Table 32 2 1 Operator environmental requirements Fig 32 2 1 ED900 low energy installation 32 3 Yellow LED service level Fig 32 3 1 Service level indicator 32 3 1 Service level indicator Yellow LED on operator power switch side is service level indicator Operator syste...

Page 94: ... mounting screws 4 Replace end caps 32 4 2 Track maintenance 1 Set program switch to OPEN 2 Track Check for wear or damage 3 Slide shoe and pivot pin Check for wear or damage 4 Bumper stop M6 screw Check bumper stop position bumper location approximately 1 8 from slide shoe Check tightness of screw 32 4 3 CPD lever 1 Check tightness of M6 SHCS Fig 32 4 5 Program switch 1 Track 2 Bumper stop 2 1 M6...

Page 95: ...rm M8 SHCS torque 1 Set program switch to CLOSE 2 Remove cap over M8 SHCS 3 Check torque 4 Replace cap CAUTION Using torque wrench with 5 mm hex key socket check M8 SHCS torque 17 ft lb 23 Nm 32 5 2 Check pivot pin M8 socket head torque 1 Check torque CAUTION Use torque wrench with hex key socket M8 screw torque 5 9 7 4 ft lb 8 10 Nm Fig 32 5 3 Pivot pin M8 socket head 3 Pivot pin M8 socket head 3...

Page 96: ...mounting screws 1 Remove screw cover caps Fig 32 6 1 2 Check for tightness of mounting screws Fig 32 6 3 3 Replace screw cover caps 27 6 3 Drive arm to ED50 spindle 1 Remove spindle cap 2 Check tightness of M8 SHCS CAUTION Using torque wrench with 5 mm hex key socket torque M8 SHCS to 17 ft lb 23 Nm Fig 32 6 1 Push arm assembly Fig 32 6 4 Arm socket and ball head 10 4 M6 x 10 button head screws 5 ...

Page 97: ...Air gap setting between brake and brake disc 0 1 mm to 0 3 mm 0 004 to 0 012 1 Using 2 5 mm hex key loosen three M3 x 3 set screws securing brake disc to motor shaft 2 Insert feeler gauge air gap setting for sizing between brake disc and brake 3 Move brake disc against shim s 4 Screw M3 x 3 set screws against motor shaft but do not tighten 5 Remove feeler gauge 6 Tighten M3 x 3 set screws CAUTION ...

Page 98: ... assembly removed from brake 2 5 1 1 Brake assembly 2 Brake disc assembly 5 Motor shaft 1 2 6 6 Fig 32 7 5 M3 x 5 SHCS 1 Brake assembly 2 Brake disc assembly 6 M3 x 5 SHCS 32 7 2 Torque setting of M3 x 5 SHCS 5 3 in lb 0 9 in lb 0 6 Nm 0 1 Nm 2 6 6 1 1 Brake assembly 2 Brake disc assembly 6 M3 x 5 SHCS Fig 32 7 8 Brake coil wiring 43 3 64 63 62 1G 3 1G Red 3 Blk ...

Page 99: ... 2 Hold open time values from 5 to 30 s are set in increments of 1 second 3 In low energy mode a minimum hold open time of 5 seconds is required 4 Hold open time can be re triggered 7 0 30 s 5 Night bank hold open time 1 Night bank key switch hold open time is set using this parameter 2 Night bank Hold open time starts once contact on night bank activator input is opened and door is in an open pos...

Page 100: ... 12 0 1 0 0 Safety sensor s input is disregarded as soon as door is closed 1 Safety sensor can trigger an opening pulse while door is closed Suppression of safety sensor on swing hinge side during initialization drive 13 0 1 0 0 Safety sensor on swing side is active during an initialization drive after a power on reset 1 1 With SP set to 1 operator will disregard swing side safety sensor during in...

Page 101: ...atic force on door closing edge can be changed using this parameter 2 Internal monitoring system checks if parameter setting is admissible If setting exceeds admissible value the setting is alternately displayed with the permissible value 3 After parameter set verify setting meets ANSI BHMA standard A156 19 low energy See Chapter 30 4 ED900 low energy operator static force range is reduced 17 2 15...

Page 102: ...nnector must be removed 3 Program switch control by TMS Soft control software 4 1 DCW electronic program switch EPS is installed and operator is also connected by the building management system to TMS Soft control software 2 When PS is set to 4 the program switch functions can be changed from DCW EPS to TMS Soft DCW Electronic program switch EPS behavior following power reset 24 0 1 0 0 1 In event...

Page 103: ...digit operator display 6 1 Status relay activated when door is opened further than opening angle parameter OA set during learning cycle 2 Parameter OA value can only be changed using dormakaba handheld or by performing another learning cycle Locking device output configuration output X3 1G 24V and input X6 4 4a Reference Chapter 7 28 0 1 0 0 Locking device output terminal X3 1G 24V is independent ...

Page 104: ...d down button for greater than 8 s 1 All parameters reset to factory settings 2 Procedure completed when 8 on 2 digit displays blinks twice 3 Installed upgrade cards remain valid and do not require reinstallation 4 Learning cycle required 2 Extended factory settings Program switches CLOSE Door closed Press 4 button keypad down button for greater than 8 s 1 All parameters reset to factory settings ...

Page 105: ...ion only available with hd parameter 1 manual mode 3 0 power assist function OFF power assist function enabled for available values greater than 0 4 Power assist function enabled when power assist activation angle hA reached 5 The greater the value of hF the easier the door can be manually opened from power assist activation angle hA 6 If power assist set too high door can open automatically 7 Pow...

Page 106: ...nge to 1 2 Function must be activated by changing parameter F5 to 2 3 For double doors this function enables Separate door opening only active door nurse Both doors open active inactive doors bed 4 The activator connected to the external detector terminal board X4 41 and 3 controls the active door nurse function Only the active door will open 5 The activator connected to the internal detector term...

Page 107: ...49 0 1 0 0 1 NO contact night bank function is triggered when NO contact is closed 2 Typically used when using a key switch or an access control system 1 1 NC contact night bank function is triggered when NC contact is opened 2 Typically used when connected to building management system to trigger doors signal normally present Release of hold open system 50 0 1 1 1 1 Upgrade care Fire Protection i...

Page 108: ...can then access door manually B 1 3 User information display User interface display or or dormakaba handheld displays Information ln codes Error message E codes B 1 4 Viewing error messages To access and view error messages briefly press the right button on the 4 button keypad B 1 5 Red LED on operator Red LED adjacent to operator power switch displays blinking codes for Certain ln information E e...

Page 109: ...tting Flashing 7 times E71 Systemerror1 test second shutdownoption Flashing 7 times E72 Systemerror2 test current measuringcircuit Flashing 7 times E73 Systemerror3 test brakingcircuit Flashing 12 times E12 EEPROMerror Flashing 13 times E13 Motorovercurrent Flashing 15 times E15 Faultylearningcycle B 2 1 Red LED status codes B 1 7 Error message memory 1 There are ten error message memory locations...

Page 110: ...en reinstalled or is defective 1 Installed upgrade card cannot be removed from ED900 2 If more than one upgrade card is installed the first card installed becomes the container module Reference Chapter 25 for Upgrade cards installation The container module must be installed last after all other Upgrade cards are installed 3 If container module is defective first upgrade card container module must ...

Page 111: ...g DCW device 2 If this is not possible reactivate the drive Reactivation can be done by Switching program switch to Close off Pressing both 4 button keypad left and right buttons greater than 3s B 4 Troubleshooting chart E codes No Display Red LED Description Troubleshooting error codes 1 E 02 Flashing 2 x Locking device error Operator is attempting to open or close a locking device with feedback ...

Page 112: ...ashing 6 x Incompatible fire protection setting double door system 1 For double door systems the Upgrade card fire protection must be installed in both control units 11 E 71 Flashing 7 x System error 1 2nd shutdown option 1 In order to reliably switch off the drive unit several switching elements are used and their functions are tested periodically 2 If the function test always results in the erro...

Page 113: ...or C 1 2 Handheld key functions 1 OFF ON switches Handheld on or off 2 Function keys F1 F3 trigger functions shown in bottom line of display e g RPT for repeat UP and DOWN to switch lines UpDoLd for file up and download CHANGE to change values OPEN to trigger opening pulses 3 Arrow keys allow navigation within the display Use left arrow to get back to previous screen 4 ENTER selects individual men...

Page 114: ...On Sensor can trigger pulse with door closed 14 Lock delay 3 Delayed opening time for locking mechanism 0 3 100 msec 15 Unlock force 0 Preload prior to unlocking 0 9 12 Test PR module 0 Test off 1 Test once every 24 hrs 23 Program switch Internal External DCW 24 PGS power up DCW Last Off 25 PGS delay Off On 26 Daytime unlock Off On Locking device remains permanently unlocked while door is in close...

Page 115: ...c force in opening direction wind load control 20 67 N L E mode 18 Limit force close 60 Static force in closing direction wind load control 20 67 N L E mode 7 Hold open time 5 Hold open time automatic mode 0 30 s 8 Nurse bed function 10 Hold open time nurse bed function 0 30 s Parameter and default Description Selections 5 Offenhaltez man 1 Hold open time manual mode 0 30 s 10 Wall blanking 80 Ang...

Page 116: ...e Bed func locked Upgrade card professional Not used unlocked active fehlt 38 Fire protection r o locked Upgrade card fire protection unlocked active fehlt Parameter and default Description Selection 39 Full energy r o locked Upgrade card full energy Not used unlocked active fehlt 44 DCW r o locked Upgrade card DCW Not used unlocked active fehlt 43 Disabled restr r o locked Upgrade card Barrier fr...

Page 117: ...erval Enter maintenance interval 6 24 months 12 Service cycle interval Enter number of opening and closing cycles until next maintenance 200 1000 1000 200 Parameter name Description Setting Wartungs datum Maintenance data x x y y month year Cycles total r o Displays total opening and closing cycles Zyklen max h r o Displays maximum number of cycles in one hour h Zyklen h r o Displays number of cyc...

Page 118: ...1 Inp Sfty push side r o Status of safety sensor opposite hinge side X5 11 0 1 Inp Activ extern r o Status of external activation sensor X6 41 0 1 Inp Activ intern r o Status of internal activation sensor X6 42 0 1 Inp enable operator r o Status of Emergency close input X6 4 and 4a 0 1 Inp smoke detector r o Status of smoke detector input X9 3 and 1 0 1 Inp lock status r o Status of locking device...

Page 119: ...ection menu 6 Press F3 to select Änd Amendments 7 Scroll down SPRACHEN menu to Englisch Press once to highlight Englisch 8 Press ENTER to select Englisch Fig C 6 1 dormakaba handheld Fig C 6 9 Englisch highlighted Fig C 6 10 SETTINGS menu TIPS AND RECOMMENDATIONS Handheld programmer will retain English setting when unit is turned off Change to English only required the first time the programmer is...

Page 120: ...1 and power on Handheld will boot up and display main menu C 7 1 Firmware update procedure CAUTION For all firmware changes set program switch to CLOSE and allow door to close completely before any updates are made 2 With Communication highlighted press ENTER 3 Enter handheld user code and press ENTER MAIN MENU Files User code Communication MAIN MENU Files User code Communication Searching text in...

Page 121: ... 7 7 Start transmission 7 Press any key to start firmware transmission Connected with FW Version 01 30 Revision 000 ED900_US Again UpDoLd Door DOWN UPLOAD Upload file Download data Firmware upload Door Operator Vers Rev Top Down ED900_US V01 30 000 ED900_US V01 20 000 ED900_US V01 40 000 Connected with FW Version 01 80 Revision 000 ED900_US Again UpDoLd Door Fig C 7 8 Firmware uploading 8 Firmware...

Page 122: ... X3 24 0V 0V 24 Swing side 0V 0V Test Signal Approach side Signal Test 24 0V Feedback contact 0V 0V Door status 35 33 32 3 30 3 34 31 X1 0V 0V Off Automatic Exit Only Permanent Open WHT GRN ORG RED BLK 22 AWG stranded 7 x 30 Length 80 inches AUTO CLOSE OPEN EXIT ONLY D1 1 1 Key switch panel option Set parameter PS to 1 CAUTION Key switch panel option Program switch wired to active door ED900 termi...

Page 123: ...xit Only Permanent Open WHT GRN RED BLK 22 AWG stranded 7 x 30 Length 80 inches AUTO CLOSE OPEN Fig D2 1 2 Key switch panel wiring diagram active door D2 1 1 Key switch panel option Set parameter PS to 1 CAUTION Key switch panel option Program switch wired to active door ED900 terminal board 1 Parameter PS Program switch type must be set to 1 Reference Appendix A Parameter detail and Para 23 3 Set...

Page 124: ...www dormakaba com dormakaba USA Inc 1 Dorma Drive Drawer AC Reamstown PA 17567 USA T 717 336 3881 F 717 336 2106 ...

Reviews: