•
If you are using the optional rack configuration, assemble the rails and install the system in the rack following the
safety instructions and the rack installation instructions provided with your system. For more information on
converting the system to rack mode, see
Converting The System From Tower Mode To Rack Mode
.
1.
Install the server module(s).
CAUTION: Do not turn on the server module(s) until you have configured the I/O module.
2.
Connect the network cable to the I/O module to provide network connection to the server.
NOTE: If you have a pass-through module installed in the enclosure, each server module requires its own
network cable.
3.
Connect the power supply units to a PDU or electrical outlet using the power cables.
4.
Optionally, connect the keyboard, video, and mouse to the enclosure.
5.
Press the power button on the enclosure's front panel.
Alternatively, you can also turn on the chassis from the CMC Web interface after completing step 7.
6.
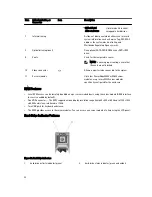
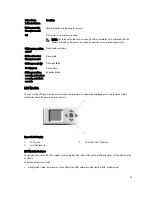
Using the LCD panel on the front of the system, provide CMC with a static IP address or configure it for DHCP.
The LCD configuration wizard allows you to quickly configure the CMC and iDRAC management interfaces and
manage the enclosure remotely. You can also use a management station and the RACADM CLI to configure the
CMC.
NOTE: For a detailed description on configuring the CMC settings, see the
Dell Chassis Management
Controller for Dell PowerEdge VRTX User’s Guide
at dell.com/esmmanuals.
7.
Connect to the CMC IP address through the Web browser using the default logon credentials.
The default user name is
root
and password is
calvin
.
8.
Provide each iDRAC with an IP address in the CMC Web interface and enable the LAN and IPMI interface.
NOTE: iDRAC LAN interface on some server modules are disabled by default.
9.
Provide the switch module with an IP address in the CMC Web interface.
NOTE: No configuration is required if you are installing a pass-through module.
10. Connect to each iDRAC through the Web browser and provide final configuration of iDRAC.
The default user name is
root
and password is
calvin
.
11. Connect to the switch module through the Web browser and provide final configuration of the switch module.
NOTE: No configuration is required if you are installing a pass-through module.
12. Turn on the server modules and install the operating system.
Logging In To The CMC
You can perform the initial network configuration of CMC before or after CMC has an IP address.
You can log in to CMC as a CMC local user, as a Microsoft Active Directory user, or as an LDAP user. You can also log in
using Single Sign-On or Smart Card.
For more information on managing the chassis and configuring the settings, see the
Dell Chassis Management Controller
for Dell PowerEdge VRTX User’s Guide
at dell.com/esmmanuals.
36
Summary of Contents for PowerEdge M520
Page 1: ...Dell PowerEdge VRTX Enclosure Owner s Manual Regulatory Model E22S Regulatory Type E22S001 ...
Page 8: ...8 ...
Page 34: ...34 ...
Page 66: ...Figure 45 Securing the Power Cable Without Wheel Assembly 1 power cable 2 strap 66 ...
Page 148: ...148 ...
Page 151: ...Figure 94 System Board Connectors Back 1 midplane planar connectors 3 151 ...
Page 152: ...152 ...
Page 158: ...158 ...

