STEERING AND FRONT SUSPENSION
Front Suspension Components
2001 Pioneer 900 Gasoline Vehicle Maintenance and Service Manual Page 7-17
7
FRONT SUSPENSION COMPONENTS
Read WARNING on page 7-1.
MULTI-LEAF SPRING REMOVAL
1. Loosen lug nuts on both front wheels and raise front of vehicle with a chain hoist or floor jack. Place
jack stands under the front cross tube of the vehicle frame and lower the vehicle onto the jack stands.
2. Remove both front wheels.
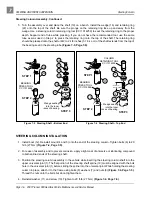
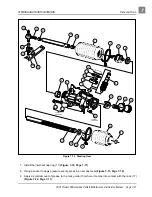
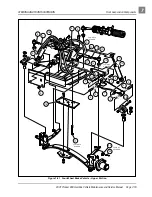
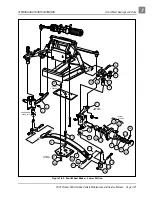
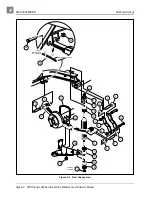
3. Remove the nuts (14) and bolts (25) from the bottom of each king pin (26) (Figure 7-22, Page 7-21).
4. Remove the four bolts (30), four nuts (32), four lock washers (31), and bottom spring plate (29) (Figure
5. Remove multi-leaf spring (6) (Figure 7-22, Page 7-21).
6. Check the condition of the urethane bushings (27) and steel sleeves (28) (Figure 7-22, Page 7-21).
Replace any that are worn or damaged.
MULTI-LEAF SPRING INSTALLATION
1. Install urethane bushings (27) and steel bushings (28) into leaf spring eyes (Figure 7-22, Page 7-21).
2. Install multi-leaf spring (6), bottom spring plate (29), four bolts (30), four lock washers (31), and four
nuts (32) (Figure 7-22, Page 7-21). Using a crisscross pattern sequence, tighten bolts to 23 ft-lb (31
N·m).
3. Install spring in king pins (26) with bolts (25) and nuts (14) (Figure 7-22, Page 7-21). Tighten to 17 ft-lb
(23 N·m).
4. Install the wheels and finger tighten the lug nuts.
5. Lower the vehicle and finish tightening lug nuts (using a crisscross pattern) to 55 ft-lb (74.6 N·m).
6. Adjust camber and toe-in as instructed on page 7-15.
KINGPIN AND STEERING SPINDLE REMOVAL
1. Remove the front hub. See Front Wheel Bearings and Hubs on page 7-20.
2. Disconnect the front brake cables.
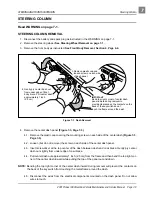
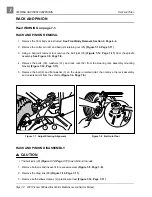
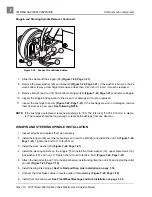
2.1. Remove the cotter pins (1), brake cable clevis pins (2), and E-clips (3). Remove the brake cables
(4) from the spindle brackets (Figure 7-20, Page 7-18).
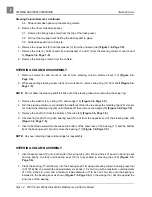
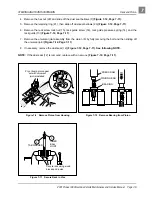
3. Remove cotter pins (22) and nuts (20), then remove ball joints from the spindles (Figure 7-21, Page 7-
19). Remove drag link ball joint. See also Tie Rod and Drag Link Removal on page 7-13.
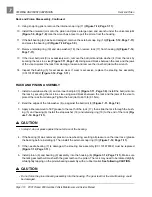
4. Remove the nut (17) and lock washer (18) from the top of the kingpin (26) (Figure 7-22, Page 7-21).
5. Raise the upper clevis (16) from the kingpin (Figure 7-22, Page 7-21).
6. Remove the thrust washer (19) (Figure 7-22, Page 7-21).

