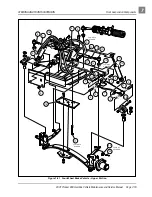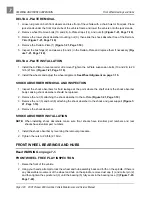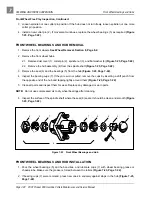
REAR SUSPENSION
Snubber
2001 Pioneer 900 Gasoline Vehicle Maintenance and Service Manual Page 9-5
9
MULTI-LEAF SPRING INSTALLATION
NOTE: When installing rear leaf springs, make sure that both springs have identical part numbers.
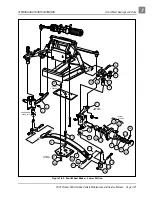
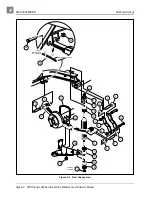
1. Install rubber bushings (4) and steel sleeves (3) into leaf spring eyes if bushings were removed (Figure
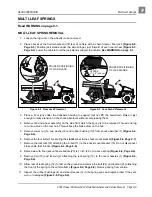
2. Place front of leaf spring (12) into vehicle frame and insert bolt (24) through frame and leaf spring eye.
Install locknut (25) and tighten to 15 ft-lb (20.3 N·m) (Figure 9-4, Page 9-4).
3. Align the other end of leaf spring with the holes in the spring shackles (1). Insert bolt (15) through leaf
spring eye and shackles. Install locknut (2) and tighten to 15 ft-lb (20.3 N·m). Lower transaxle onto leaf
spring (12) (Figure 9-4, Page 9-4).
∆ CAUTION
• When placing transaxle on spring, be sure to position locating bolt on the spring in the locating hole in
the transaxle saddle (23) (Figure 9-4, Page 9-4).
4. Install shock mount bracket (16) onto locating bolt at bottom center of leaf spring (Figure 9-4, Page 9-
4). See preceding CAUTION.
5. Install U-bolt (11) and locknuts (14). Tighten U-bolt to 25 ft-lb (34 N·m) (Figure 9-4, Page 9-4).
6. Install the four bolts (14) to secure the stabilizer bar to the shock mount bracket. Tighten lock nuts (15)
to 75 in-lb (8.4 N·m) (Figure 9-6, Page 9-7).
7. Install shock absorber. See Shock Absorber Installation on page 9-2.
NOTE: When installing shock absorbers, make sure rear shocks have identical part numbers.
SNUBBER
Read WARNING on page 9-1.
SNUBBER REMOVAL
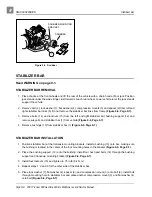
1. Support the powertrain with a floor jack under the engine mounting plate so that the snubber is raised
slightly and does not rest on the vehicle frame.
2. Remove the two bolts (2) and two locknuts (1) securing the snubber bracket to the engine mounting
3. Slide snubber and bracket assembly toward battery to remove it from vehicle.
SNUBBER INSTALLATION
1. Install in the reverse order of removal.
2. Tighten snubber bracket mounting nuts (1) to 13 ft-lb (17.6 N·m) (Figure 9-5, Page 9-6).

