UNITIZED TRANSAXLE
Unitized Transaxle Removal
Page 16-10 2001 Pioneer 900 Gasoline Vehicle Maintenance and Service Manual
16
Unitized Transaxle Removal, Continued:
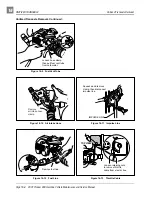
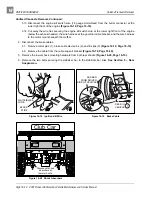
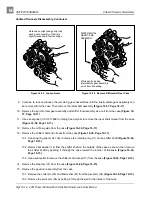
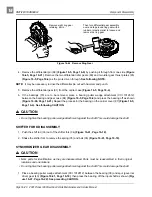
3.13. Disconnect the engine kill switch wire (18 gauge white/black) from the bullet connector at the
lower right front of the engine (Figure 16-18, Page 16-10).
3.14. Cut away the wire ties securing the engine kill switch wire at the lower right front of the engine
(below the exhaust header), the wire harness at the governor cable bracket, and the wire harness
to the motor mount beneath the muffler.
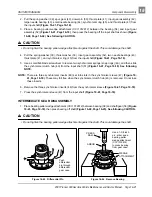
4. Disconnect the brake cables.
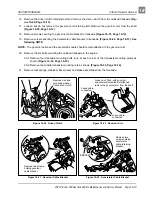
4.1. Remove cotter pins (1), brake cable clevis pins (2), and E-clips (3) (Figure 16-19, Page 16-10).
4.2. Remove the cable from the cable support bracket (Figure 16-19, Page 16-10).
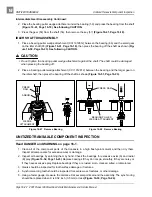
5. Remove the lower shock mounting hardware from both rear shocks (Figure 16-20, Page 16-10).
6. Remove the two bolts securing the stabilizer bar to the stabilizer bar links. See Section 9 – Rear
Figure 16-18 Ignition Kill Wire
Figure 16-19 Brake Cable
Figure 16-20 Shock Absorbers
WHITE/BLACK
WIRE
BLACK
WIRE
REAR OF
VEHICLE
4
2
1
AS SEEN
FROM DRIVER
SIDE OF VEHICLE
3
Club Car
Disconnect shock
absorbers at
lower mounts.


