


24-18
User Guide for Cisco Security MARS Local Controller
78-17020-01
Chapter 24 System Maintenance
Hardware Maintenance Tasks—MARS 100, 100E, 200, GCM, and GC
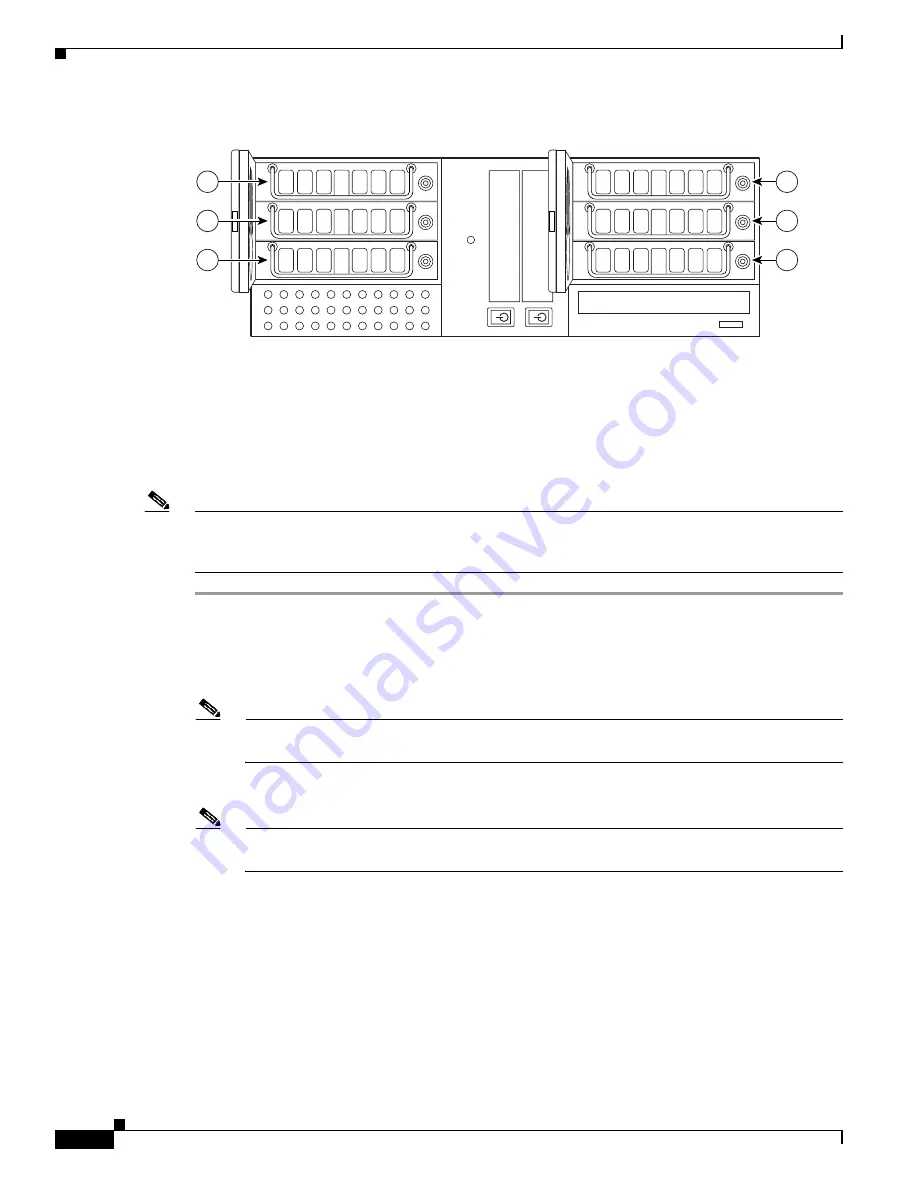
Figure 24-5
Hard Drive Slot Numbering for the Local Controller 100 and 100E
Hotswap Procedure To Remove and Add a Hard Drive
This section pertains only to the MARS 100, 100E, 200, GCM, and GC appliances.
Use the
hotswap
{
add
|
remove
}
disk
CLI command before you remove and before you insert a hard
drive.
Note
The
hotswap
command specifies the hard drive slot number in the chassis. The
raidstatus
CLI
command refers to port numbers and physical port numbers. See
Table 24-2
to map hard drive slot
numbers to port numbers (a port number is the same as a physical port number).
Step 1
Establish a console connection with MARS.
Step 2
At the CLI prompt, enter
hotswap
remove
disk,
where
disk
is the hard drive slot number of the hard
drive to remove.
A message informs you that it is safe to remove the hard drive.
Note
Make sure that you remove the correct physical hard drive. If you remove the wrong one
accidently then reinsert it, that drive will register as a degraded drive.
Step 3
Unlock the MARS drive bay door with the supplied key.
Note
A ring with two keys is supplied in the MARS 100, 100e, 200, and Global Controller accessory
kits, one key is for the hard drives and one is for the drive bay doors.
Step 4
Unlock the drive you want to replace with the supplied key.
Step 5
Pull out the hard drive.
Step 6
At the CLI prompt, enter
hotswap
add
disk
. Be sure to use the same slot number (
disk
) as in
Step 2
.
A message informs you that the hard drive (disk) is added successfully (to the logical array).
Step 7
Insert the new Cisco field-replaceable hard drive unit.
Step 8
Lock the hard drive into place.
Step 9
Close and lock the drive bay door.
210172
1
2
3
4
5
6


