


Wrinkling media
Introduction
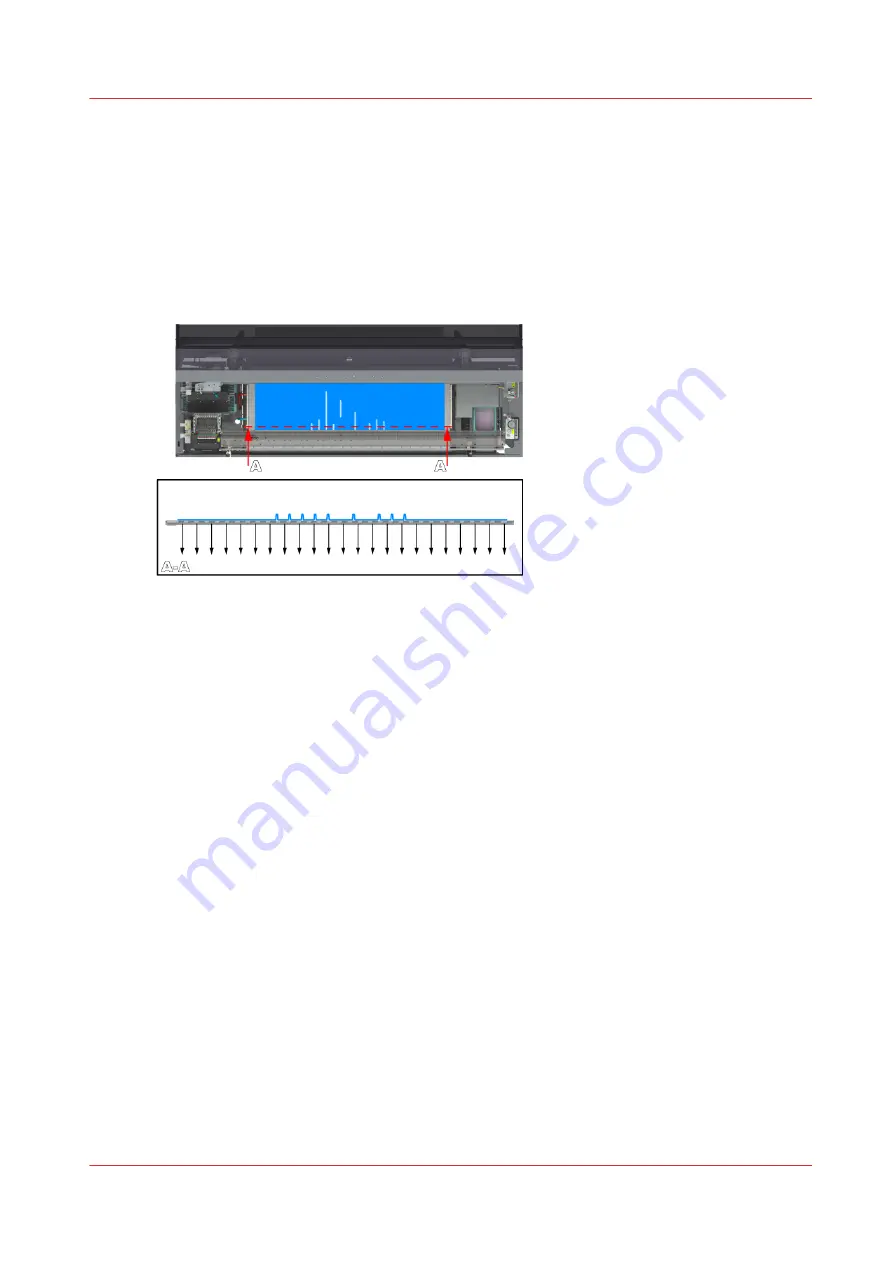
Solve media touches or print quality artefacts caused by the wrinkling of media in the transport
direction. When you are using a weaker media such as textile or canvas which is not fed in the
printer correctly or you are using a media type that is humid-sensitive, the media can start to
wrinkle on the platen in the transport direction. Follow the procedure below. You can stop at any
time in the procedure when the problem is solved.
Procedure
1.
When you see the wrinkling of media in the first meters of the print (incident based, after period
of inactivity):
1.
The wrinkling is caused by humidity or moisture. Enable the [Moist sensitivity] setting in the
RIP.
Change the media settings on page 65
2.
When you see the wrinkling of media in the first meters of the print (structurally):
1.
Set the [Carriage elevation] setting in the RIP to [Highest].
2.
Increase the [Vacuum power] settings in the RIP. Increase with steps of 10%. For each step
you increase and have changed the setting: reload the media before you continue printing.
Observe the media movement on the platen first, before you increase the vacuum power
again.
Change the media settings on page 65
3.
When you have set the [Vacuum power] setting correctly, set the [Carriage elevation] setting
in the RIP back to [Automatic].
Change the media settings on page 65
.
4.
Calibrate the media on page 118
.
3.
When you see the wrinkling of media after 1 to 3 meters:
1.
Load the media roll on position 1.
Load a media roll (position 1) on page 82
.
2.
Feed the media manually.
3.
Manually cut the leading edge of the media.
4.
Use a different media type.
Wrinkling media
Chapter 9 - Troubleshooting and support
355
Summary of Contents for Colorado 1650
Page 1: ...Colorado 1650 Extended operation guide 2020 2022 Canon Production Printing ...
Page 9: ...Chapter 1 Introduction ...
Page 17: ...Chapter 2 Safety information ...
Page 28: ...Safety System 28 Chapter 2 Safety information ...
Page 29: ...Chapter 3 Explore the system ...
Page 36: ...The components of the printer top cover open 36 Chapter 3 Explore the system ...
Page 37: ...Chapter 4 Handle the media ...
Page 81: ...FLXfinish in the RIP Chapter 4 Handle the media 81 ...
Page 162: ...Unload a media roll from the drawer 162 Chapter 4 Handle the media ...
Page 163: ...Chapter 5 Print a job ...
Page 172: ...Use the PRISMAsync Remote Control app 172 Chapter 5 Print a job ...
Page 173: ...Chapter 6 Maintain the system ...
Page 263: ...Chapter 7 Improve quality ...
Page 273: ...Chapter 8 Configure the network and security settings ...
Page 304: ...Enable system installation from USB 304 Chapter 8 Configure the network and security settings ...
Page 305: ...Chapter 9 Troubleshooting and support ...
Page 369: ...Chapter 10 Regulation Notices ...
Page 383: ......


