


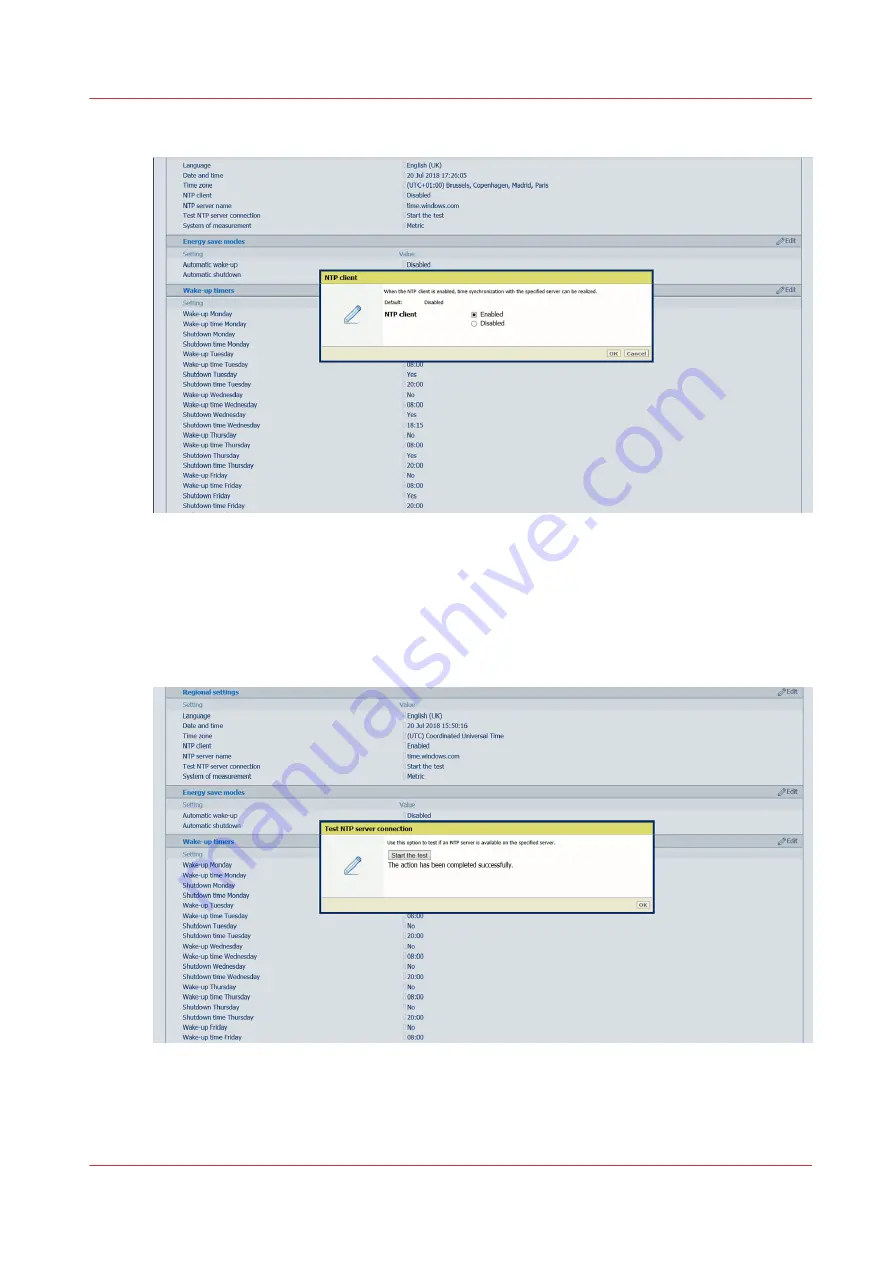
4.
Select [Enabled] and click on [OK].
5.
Click on the value next to [NTP server name]. A window opens.
6.
Fill in a valid IP address or domain name and click on [OK].
If you do not know the server name, ask your IT administrator.
7.
Click on [Start the test] next to [Test NTP server connection]. A windows opens.
8.
Click on [Start the test].
9.
Check that the result of the test is successful and click on [OK].
When the result is not successful, make sure the server name is correct. If you cannot solve the
problem, ask your IT administrator.
Configure time synchronization
Chapter 8 - Configure the network and security settings
281
Summary of Contents for Colorado 1650
Page 1: ...Colorado 1650 Extended operation guide 2020 2022 Canon Production Printing ...
Page 9: ...Chapter 1 Introduction ...
Page 17: ...Chapter 2 Safety information ...
Page 28: ...Safety System 28 Chapter 2 Safety information ...
Page 29: ...Chapter 3 Explore the system ...
Page 36: ...The components of the printer top cover open 36 Chapter 3 Explore the system ...
Page 37: ...Chapter 4 Handle the media ...
Page 81: ...FLXfinish in the RIP Chapter 4 Handle the media 81 ...
Page 162: ...Unload a media roll from the drawer 162 Chapter 4 Handle the media ...
Page 163: ...Chapter 5 Print a job ...
Page 172: ...Use the PRISMAsync Remote Control app 172 Chapter 5 Print a job ...
Page 173: ...Chapter 6 Maintain the system ...
Page 263: ...Chapter 7 Improve quality ...
Page 273: ...Chapter 8 Configure the network and security settings ...
Page 304: ...Enable system installation from USB 304 Chapter 8 Configure the network and security settings ...
Page 305: ...Chapter 9 Troubleshooting and support ...
Page 369: ...Chapter 10 Regulation Notices ...
Page 383: ......


