


44
6
The "Confirm Operation" screen will open. Enter the confirmation number, then click
OK
.
Changing the RAID Mode While Adding a Drive
Select the drive you want to add to the RAID array and choose the mode for the array. Enter the "Confirm Operation"
number and click
OK
.
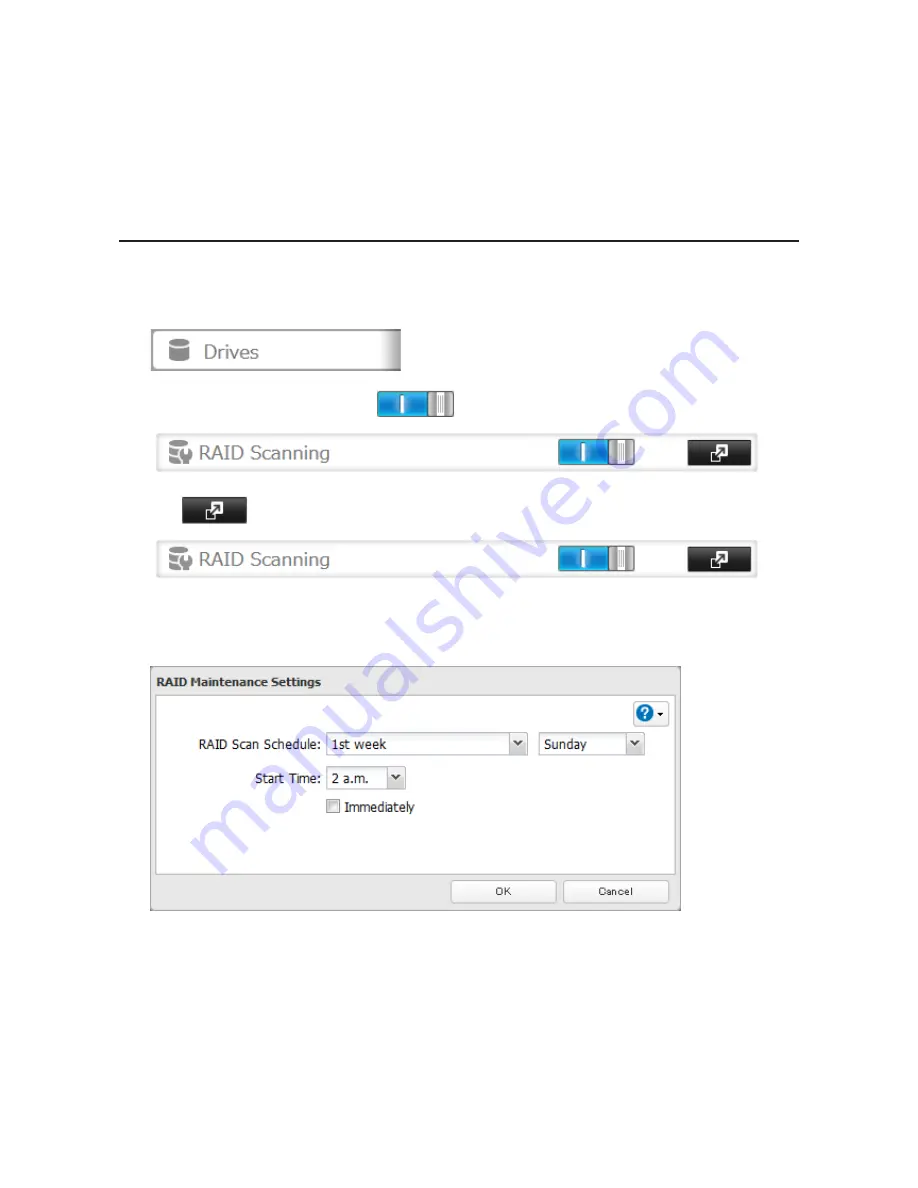
RAID Scanning
RAID maintenance scans your RAID array for bad sectors and if it finds any it automatically repairs them. RAID 1,
RAID 10, RAID 5, and RAID 6 arrays are supported. For best results, run RAID maintenance regularly.
1
In Settings, click
Drives
.
2
Move the RAID scanning switch to the
position to enable RAID scanning.
3
Click
to the right of "RAID Scanning".
4
Click
Edit
.
5
Select when to run the scan and click
OK
.
Notes:
• Check "Immediately" to run RAID maintenance immediately.
• To stop a RAID scan, click
Cancel RAID Scan
.
Summary of Contents for TeraStation TS3200D
Page 22: ...21 4 Configure the desired settings then click OK...
Page 84: ...83 2 Click to the right of Backup 3 Click List of LinkStations and TeraStations...
Page 86: ...85 3 Click Create New Job Note Up to 8 backup jobs can be configured...
Page 119: ...118 6 Click OK then OK again 7 Move the iTunes server switch to the position...
Page 124: ...123 4 Open the License tab then click Activate Free License To deactivate the license click...
Page 126: ...125 3 Click Next 4 Click Find Cameras...
Page 132: ...131 2 Select the search criteria on the left side of the search screen then click Search...
Page 133: ...132 3 The search results are displayed Click a thumbnail to start the media viewer...
Page 214: ...213 For Customers in Taiwan BSMI For Customers in China CCC A...


