


201
Changing the IP Address
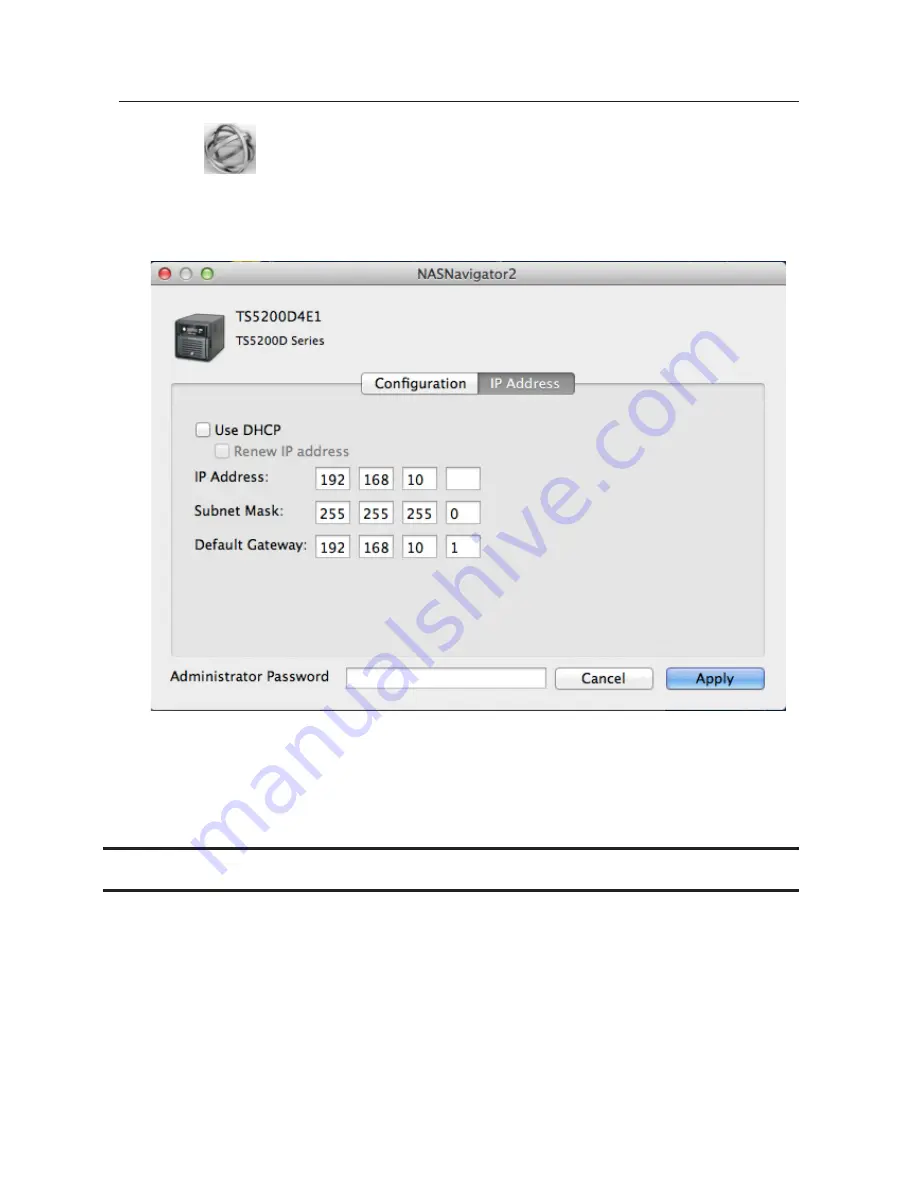
1
Click the
icon in the Dock to start NAS Navigator2.
2
Click the TeraStation icon while holding down the control key, then choose
Configure
-
IP Address
.
3
Uncheck "Use DHCP"; enter the desired settings and the administrator password, then click
Apply
.
Note:
The following IP addresses are reserved and should not be used. If you configure one of them by accident,
initialize all settings with the init button on the TeraStation.
Local loopback address: 127.0.0.1, 255.255.255.0
Network address: 0.0.0.0, 255.255.255.0
Broadcast address: 255.255.255.255, 255.255.255.0
The IP address range from 224.0.0.0 to 255.255.255.255
iSCSI Connection Tool
The iSCSI Connection Tool is a Windows utility that lets you use the TeraStation as an iSCSI drive.
To launch it, click
Start
-
All Programs
-
BUFFALO
-
iSCSI Connection Tool
-
iSCSI Connection Tool
.
Summary of Contents for TeraStation TS3200D
Page 22: ...21 4 Configure the desired settings then click OK...
Page 84: ...83 2 Click to the right of Backup 3 Click List of LinkStations and TeraStations...
Page 86: ...85 3 Click Create New Job Note Up to 8 backup jobs can be configured...
Page 119: ...118 6 Click OK then OK again 7 Move the iTunes server switch to the position...
Page 124: ...123 4 Open the License tab then click Activate Free License To deactivate the license click...
Page 126: ...125 3 Click Next 4 Click Find Cameras...
Page 132: ...131 2 Select the search criteria on the left side of the search screen then click Search...
Page 133: ...132 3 The search results are displayed Click a thumbnail to start the media viewer...
Page 214: ...213 For Customers in Taiwan BSMI For Customers in China CCC A...


