2004 Buell Lightning: Engine
3-71
HOME
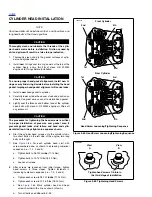
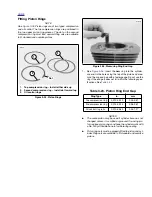
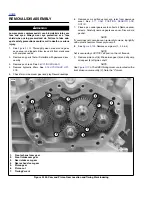
5.
See
Figure 3-107.
Make sure the piston ring end gaps
are properly positioned as shown.
6.
See
Figure 3-108.
Turn engine until piston is resting on
top of PISTON SUPPORT PLATE (Part No. HD-42322).
7.
Lubricate cylinder wall, piston, pin and rod bushing with
engine oil.
8.
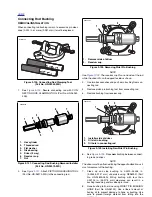
Remove protective sleeves from cylinder studs. Install a
new cylinder base gasket. Make sure the piston does not
bump the studs or crankcase.
9.
See
Figure 3-109.
Compress the piston rings using PIS-
TON RING COMPRESSOR (Part No. HD-96333-51C).
10. Install cylinder over piston.
11. Remove PISTON RING COMPRESSOR.
12. Assemble and install cylinder head. See
3.6 CYLINDER
HEAD
.
13.
Install assembled engine. See
3.4 STRIPPING MOTOR-
CYCLE FOR ENGINE SERVICE.
Figure 3-107. Ring End Gap Position
Figure 3-108. Piston Support Plate
Position ring end gaps at arrows–
minimum of 90° apart
FRONT
Piston
pin
REAR
a0101x3x
8672
Figure 3-109. Compressing Piston Rings Using Piston
Ring Compressor (Part No. HD-96333-51C)
8671
Summary of Contents for 2004 XB9S
Page 2: ......
Page 35: ...D 2 2004 Buell Lightning Appendix D HOME Rear Brake Systems Top View b1115xbsx ...
Page 36: ...2004 Buell Lightning Appendix D D 3 HOME Rear Brake Systems Left Side View b1116xcsx ...
Page 44: ...2004 Buell Lightning Appendix D D 11 HOME Clutch Cable Right Side View b1124xasx ...
Page 47: ...HOME NOTES ...
Page 49: ......
Page 103: ......
Page 201: ...HOME NOTES ...
Page 203: ......
Page 275: ...HOME NOTES ...
Page 307: ...HOME NOTES ...
Page 311: ...HOME NOTES ...
Page 351: ...HOME NOTES ...
Page 441: ......
Page 463: ...HOME NOTES ...
Page 465: ......
Page 517: ...HOME NOTES ...
Page 519: ......
Page 595: ...HOME NOTES ...
Page 597: ......

