


•
Remove the dirt, mud, dust and foreign objects from the vehicle before disassembling com-
ponents. Wherever required, use the special tools designed for this vehicle.
DISASSEMBLING COMPONENTS
•
Do not loosen and/or tighten the screws and nuts using pliers or other tools, but always use
the specific wrench.
•
Mark the positions on all the connection joints (hoses, cables, etc.) before separating them
and identify them with different distinctive marks.
•
Each piece should be clearly marked in order to be identified during the installation phase.
•
Carefully clean and wash the disassembled components with detergents with a low flam-
mability grade.
•
Keep the coupled parts together because they have "adapted" to one another following
normal wear.
•
Some components must be used together or replaced entirely.
•
Keep away from heat sources.
REASSEMBLING COMPONENTS
CAUTION
BEARINGS MUST ROTATE FREELY, WITHOUT JAMMING AND/OR NOISE, OTHERWISE, THEY
NEED TO BE REPLACED.
•
Only use ORIGINAL Aprilia SPARE PARTS.
•
Comply with lubricant and consumables use guidelines.
•
Lubricate parts (whenever possible) before reassembling them.
•
When tightening nuts and screws, start either from the components with the largest diameter
or from the innermost components, proceeding diagonally. Tighten nuts and screws in suc-
cessive steps before applying the tightening torque.
•
Always replace self-locking nuts, washers, sealing rings, circlips, O-rings (OR), cotter pins
and screws with new parts if the thread is damaged.
•
When assembling the bearings, make sure to lubricate them well.
•
Check that each component is assembled correctly.
•
After a repair or routine maintenance, carry out pre-ride checks and test the vehicle on
private grounds or in an area with low traffic.
•
Clean all mating surfaces, oil seal rims and gaskets before refitting. Smear a thin layer of
lithium-based grease on the oil seal rims. Reassemble oil seals and bearings with the brand
or batch number facing outward (visible side).
ELECTRICAL CONNECTORS
Electric connectors must be disconnected as described below; failure to comply with this procedure
causes irreparable damage to both the connector and the wiring harness:
Press the relative safety clips, if applicable.
RSV4 1100 Factory
Characteristics
CHAR - 9
Summary of Contents for RSV4 1100 Factory
Page 1: ...SERVICE STATION MANUAL 2Q000401 RSV4 1100 Factory ...
Page 4: ......
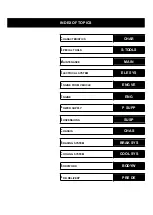
Page 6: ...INDEX OF TOPICS CHARACTERISTICS CHAR ...
Page 55: ...INDEX OF TOPICS SPECIAL TOOLS S TOOLS ...
Page 63: ...INDEX OF TOPICS MAINTENANCE MAIN ...
Page 89: ...INDEX OF TOPICS ELECTRICAL SYSTEM ELE SYS ...
Page 245: ...INDEX OF TOPICS ENGINE FROM VEHICLE ENG VE ...
Page 270: ...INDEX OF TOPICS ENGINE ENG ...
Page 384: ...INDEX OF TOPICS POWER SUPPLY P SUPP ...
Page 387: ... Remove the fuel pump Injection RSV4 1100 Factory Power supply P SUPP 387 ...
Page 393: ...INDEX OF TOPICS SUSPENSIONS SUSP ...
Page 417: ...INDEX OF TOPICS CHASSIS CHAS ...
Page 455: ...INDEX OF TOPICS BRAKING SYSTEM BRAK SYS ...
Page 457: ...Operating diagram ABS functional diagram key RSV4 1100 Factory Braking system BRAK SYS 457 ...
Page 488: ...INDEX OF TOPICS COOLING SYSTEM COOL SYS ...
Page 499: ...INDEX OF TOPICS BODYWORK BODYW ...
Page 540: ...INDEX OF TOPICS PRE DELIVERY PRE DE ...
Page 546: ... Fit the two seater saddle Pre delivery RSV4 1100 Factory PRE DE 546 ...


