


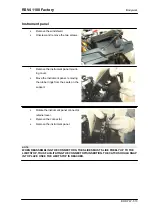

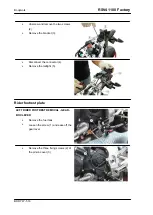


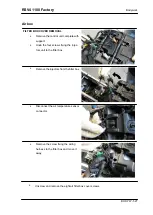

Instrument panel
•
Remove the windshield.
•
Unscrew and remove the two screws.
•
Remove the instrument panel mount-
ing cover.
•
Move the instrument panel, removing
the rubber rings from the seats on the
support.
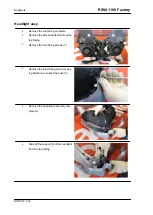
•
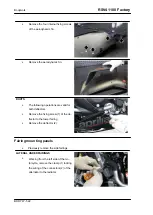
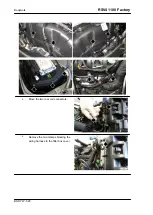
Rotate the instrument panel connector
retainer lever.
•
Remove the connector.
•
Remove the instrument panel.
NOTE
WHEN REASSEMBLING THE CONNECTORS, THE SLIDES MUST SLIDE FREELY UP TO THE
LIMIT STOP, THUS FACILITATING THE CONNECTOR'S INSERTION. THE CATCH SHOULD SNAP
INTO PLACE ONCE THE LIMIT STOP IS REACHED.
RSV4 1100 Factory
Bodywork
BODYW - 513
Summary of Contents for RSV4 1100 Factory
Page 1: ...SERVICE STATION MANUAL 2Q000401 RSV4 1100 Factory ...
Page 4: ......
Page 6: ...INDEX OF TOPICS CHARACTERISTICS CHAR ...
Page 55: ...INDEX OF TOPICS SPECIAL TOOLS S TOOLS ...
Page 63: ...INDEX OF TOPICS MAINTENANCE MAIN ...
Page 89: ...INDEX OF TOPICS ELECTRICAL SYSTEM ELE SYS ...
Page 245: ...INDEX OF TOPICS ENGINE FROM VEHICLE ENG VE ...
Page 270: ...INDEX OF TOPICS ENGINE ENG ...
Page 384: ...INDEX OF TOPICS POWER SUPPLY P SUPP ...
Page 387: ... Remove the fuel pump Injection RSV4 1100 Factory Power supply P SUPP 387 ...
Page 393: ...INDEX OF TOPICS SUSPENSIONS SUSP ...
Page 417: ...INDEX OF TOPICS CHASSIS CHAS ...
Page 455: ...INDEX OF TOPICS BRAKING SYSTEM BRAK SYS ...
Page 457: ...Operating diagram ABS functional diagram key RSV4 1100 Factory Braking system BRAK SYS 457 ...
Page 488: ...INDEX OF TOPICS COOLING SYSTEM COOL SYS ...
Page 499: ...INDEX OF TOPICS BODYWORK BODYW ...
Page 540: ...INDEX OF TOPICS PRE DELIVERY PRE DE ...
Page 546: ... Fit the two seater saddle Pre delivery RSV4 1100 Factory PRE DE 546 ...


