Touch Panel Accessories
25
NXD/T-1200V Wall/Flush Mount Touch Panel
2.
Install the NXT-BP battery. label-side down.
3.
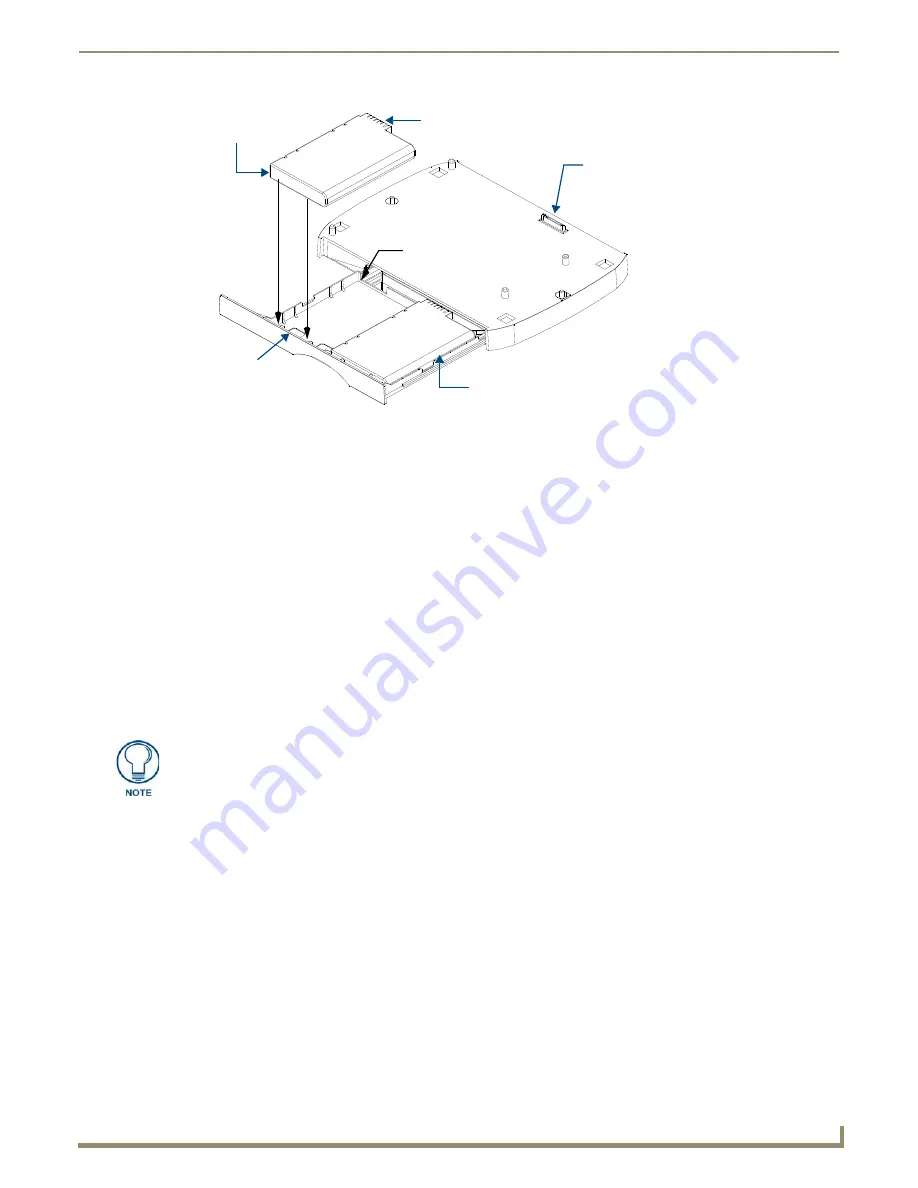
Align the battery connectors with the corresponding battery connector port (located inside the battery
compartment), as shown in FIG. 30.
4.
Insert the NXT-BP battery until the connectors securely fit into the battery connector port.
5.
Repeat steps 2 through 4 for the other battery.
6.
Apply a small amount of pressure to close the battery compartment until the compartment latches.
After a few seconds, the panel will turn On and the AMX logo will appear (indicating the panel is receiving
power.
Charging the NXT-BP batteries with the NXA-BASE/B
1.
Follow the procedures from the previous sub-section to attach the NXT touch panel to the
NXA-BASE/B.
2.
Insert each battery into the battery compartment shown in FIG. 30.
3.
Insert a 2-pin connector from a power supply to the rear PWR connector on the NXT Modero panel.
The charge status bargraph indicators, on the Battery Base page, indicate when the batteries are fully charged.
FIG. 30
Battery installation procedure
Battery
Compartment
NXT-BP Battery #2
Battery
Connectors
Battery
Connector
Port
Interface
connector
FRONT
NXT-BP Battery #1
Battery #2
slot
The NXA-BASE/B will only charge batteries when the NXT panel is in Sleep mode.
Summary of Contents for Modero NXD-1200V
Page 40: ...Touch Panel Accessories 28 NXD T 1200V Wall Flush Mount Touch Panel...
Page 80: ...Configuring Communication 68 NXD T 1200V Wall Flush Mount Touch Panel...
Page 92: ...Upgrading Modero Firmware 80 NXD T 1200V Wall Flush Mount Touch Panel...
Page 164: ...Programming 152 NXD T 1200V Wall Flush Mount Touch Panel...
Page 170: ...Appendix 158 NXD T 1200V Wall Flush Mount Touch Panel...
Page 175: ...Troubleshooting 163 NXD T 1200V Wall Flush Mount Touch Panel...


