


Touch Panel Accessories
18
NXD/T-1200V Wall/Flush Mount Touch Panel
2.
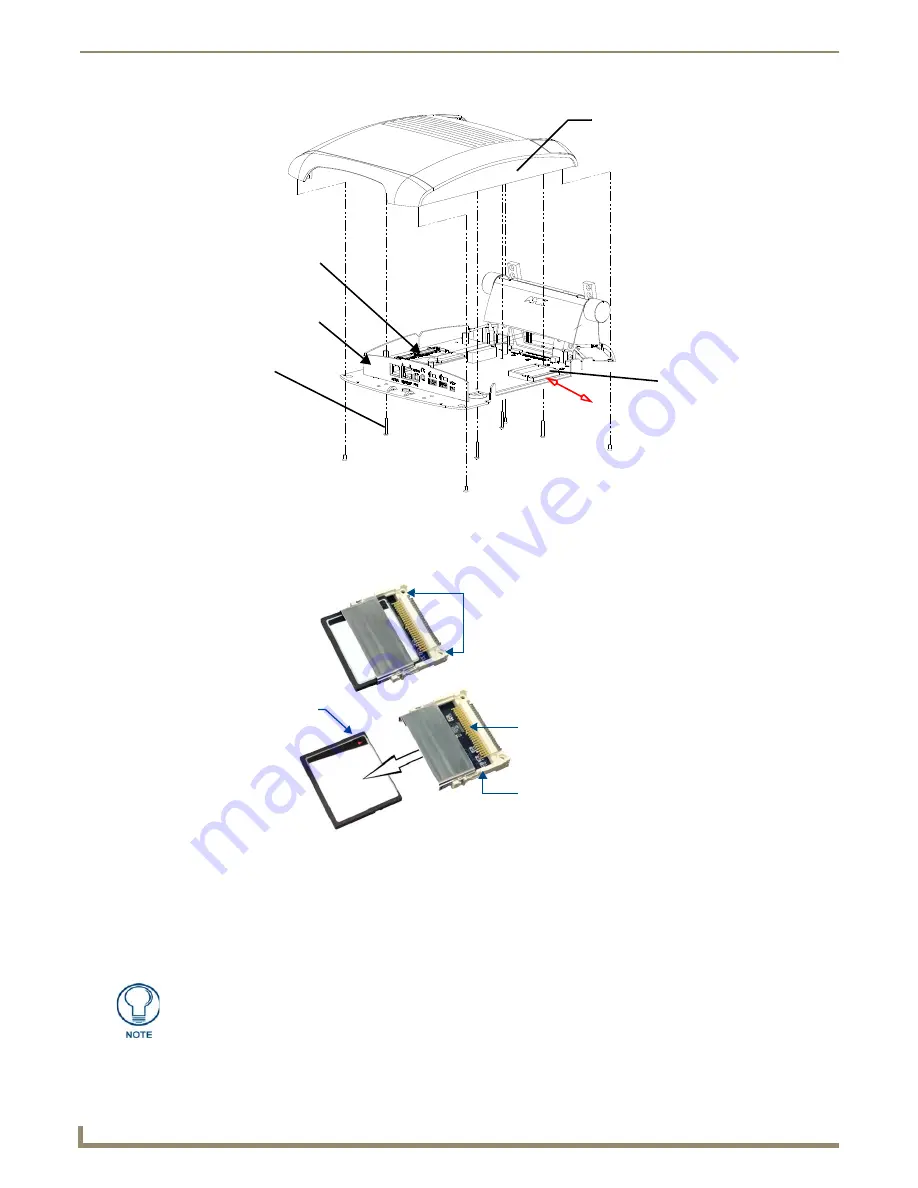
Insert the tip of a grounded flat-head screwdriver into one of the card removal grooves (located on either side of the
existing card), and gently pry the card out of the slot (FIG. 22). Repeat this process on the opposite card removal
groove. This alternating action causes the card to "wiggle" away from the on-board connector pins.
3.
Grip the old card by its sides and then carefully pull it out of the slot.
4.
Remove the new CF memory card from it’s anti-static bag.
5.
Grip the sides of the new CF memory card and firmly insert it into the slot opening (with the arrow facing towards
the pins) until the contact pins are completely inside the flash card and it is then securely attached to the pin sockets.
6.
To complete the upgrade process, close and resecure the panel enclosure using the procedures in the following step.
FIG. 21
Location of the Compact Flash card and I/O plate on NXT
FIG. 22
Removing/installing a Compact Flash Memory card
I/O connector
Compact Flash card
Outer Housing
plate
Eight Housing
Screws
NXA-PCI80211G
wireless card
Card removal grooves
Insert with arrow
facing towards the pins
On-board Compact
Flash connector (with pins)
Connector opening
Any new internal card upgrade is detected by the panel only after power is cycled.
Summary of Contents for Modero NXD-1200V
Page 40: ...Touch Panel Accessories 28 NXD T 1200V Wall Flush Mount Touch Panel...
Page 80: ...Configuring Communication 68 NXD T 1200V Wall Flush Mount Touch Panel...
Page 92: ...Upgrading Modero Firmware 80 NXD T 1200V Wall Flush Mount Touch Panel...
Page 164: ...Programming 152 NXD T 1200V Wall Flush Mount Touch Panel...
Page 170: ...Appendix 158 NXD T 1200V Wall Flush Mount Touch Panel...
Page 175: ...Troubleshooting 163 NXD T 1200V Wall Flush Mount Touch Panel...


