background image

CHAPTER 28. SYNCHRONIZATION AND REWIRE

480

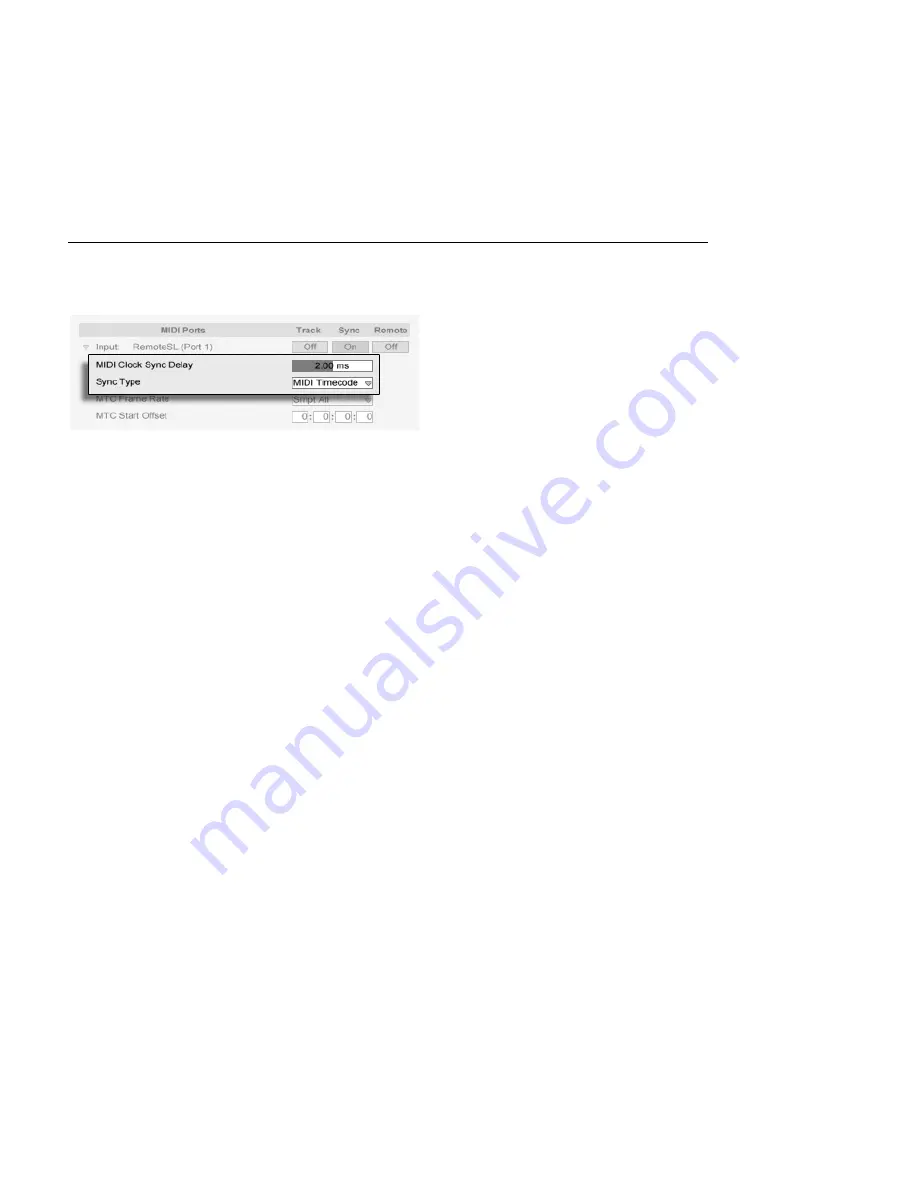
pronounced percussive sounds. While listening to the output from both, adjust the Sync
Delay control until both sounds are in perfect sync.

Adjusting Sync Delay.

28.2

Connecting via ReWire

Live supports the

ReWire

interface for connecting with another ReWire-compatible audio

program running on the same computer.

The ReWire technology, developed by

Propellerhead Software

, provides ReWire-compatible

programs with:

ˆ

common access to the audio hardware;

ˆ

shared transport functionality;

ˆ

synchronization to audio word clock and song positioning;

ˆ

exchange of audio streams.

The programs in a ReWire connection play distinct roles: The

ReWire master

accesses the

audio hardware and provides mixing facilities; the

ReWire slave(s)

have no direct link to the

audio hardware, but instead send their audio output into the Master's mixer.

Common ReWire master applications are Digidesign Pro Tools, Steinberg Cubase and Nu-
endo, Emagic Logic Audio, MOTU Digital Performer, Cakewalk Sonar and Cycling 74 Max/
MSP. Common ReWire slave applications are Propellerheads Rebirth, Propellerheads Rea-
son, Arturia Storm, Cakewalk Project 5 and Cycling 74 Max/MSP. Live can act as both a
ReWire master and slave.

Note that the ReWire protocol itself does not consume much CPU power. However, as
expected, running two audio-intensive programs on the same computer requires more

Summary of Contents for Live

Page 1: ...Ableton Reference Manual Version 8...

Page 2: ...reserved Made in Germany This manual as well as the software described in it is furnished under license and may be used or copied only in accordance with the terms of such license The content of this...

Page 3: ...ate music with unlimited depth and sophistication This effort continues even as you read these lines in fact a new improved Live version might already be available for download Please check on our web...

Page 4: ...real time A large library of grooves is provided and grooves can be extracted from clips and then reapplied to other clips 1 2 3 Work ow Enhancements Crossfades are now available for adjacent clips i...

Page 5: ...optional add on effect Latin Percussion optional add on sample library Looper provides classic tape loop style overdubbing with drag and drop export to clips MIDI mappable controls optimized for use...

Page 6: ...ed parameter whenever possible a High Quality mode has been added to the Flanger effect Third party plug in support has been improved to allow access to an arbitrary number of parameters it is now pos...

Page 7: ...essons to take you step by step through the key features of the program The lessons are organized in a table of contents which can be opened directly in the program via the Help menu We highly recomme...

Page 8: ...e manual contains the names of all user interface elements and will lead you to the relevant section 2 2 Setting up Preferences Live s Preferences window is where you can nd various settings that dete...

Page 9: ...n external device into Live for MIDI input or how to send MIDI to an external device please see the Routing and I O chapter Controlling parts of the interface remotely This subject is covered in detai...

Page 10: ...Browser Selector To hide one of Live s views and free up screen space click on the triangle shaped button next to it To restore the view click the button again A View Show Hide Button You can run Live...

Page 11: ...CHAPTER 2 FIRST STEPS 9 Adjusting the Main Window Split...

Page 12: ...e aware that the standard Live license grants you the right to use Live on only one computer at a time You can however authorize Live more than once under the legal and technical conditions described...

Page 13: ...oftware another time Live does not need to be reauthorized when computer peripherals are replaced audio or MIDI hardware printers modems But you may need to authorize again if the motherboard processo...

Page 14: ...can still load and perform a Live Set with no time limitation You cannot however save or export your work When you go on tour consider taking along your Live program CD and a CD with the last state of...

Page 15: ...s basic principles will help you fully exploit Live s potential for your music making 4 1 Live Sets The type of document that you create and work on in Live is called a Live Set Live Sets reside in a...

Page 16: ...emixes DJ sets or stage shows A Live Set consists of two environments that can hold clips The Arrangement is a layout of clips along a musical timeline the Session is a real time oriented launching ba...

Page 17: ...he creation of new clips through recording sound synthesis effects processing and mixing A Track in the Arrangement View The Session and Arrangement share the same set of tracks In the Session View th...

Page 18: ...or This button lights up to indicate that one or more tracks are currently not playing the Arrangement but are playing a clip from the Session instead We can click this button to make all tracks go ba...

Page 19: ...nnot live on MIDI tracks and vice versa Information about inserting reordering and deleting audio and MIDI tracks is found here 4 5 Audio Clips and Samples An audio clip contains a reference to a samp...

Page 20: ...yed in the Clip View Many powerful manipulations arise from Live s warping capabilities Warping means chang ing the speed of sample playback independently from the pitch so as to match the song tempo...

Page 21: ...nd the original le is not referenced thereafter In the Live File Browsers a MIDI le appears as a folder that can be opened to reveal its individual component tracks which can be selectively dragged in...

Page 22: ...ng a track s title bar brings up the Track View which shows the track s device chain The Track View Displaying a MIDI Track s Device Chain Live s built in audio effects MIDI effects and instruments ar...

Page 23: ...ug In Devices Are Available from the Plug In Device Browser Consider an audio clip playing in an audio track The audio signal from the clip reaches the leftmost device in the chain This device process...

Page 24: ...sion View Right The mixer has controls for volume pan position and sends which adjust the contribution each track makes to the input of any return tracks Return tracks only host effects and not clips...

Page 25: ...any number of audio effects as in an audio track A MIDI Effect an Instrument and an Audio Effect in a MIDI Track If a MIDI track has no instrument and no audio effects then the track s output is a pla...

Page 26: ...d more Track Routing Is Set up Using the In Out Section in the Arrangement Left or Session View Right Signals from the tracks can be sent to the outside world via the computer s audio and MIDI interfa...

Page 27: ...Appear in the Session View It is also possible to record into Session View slots on the y This technique is very useful for the jamming musician as Session recording does not require stopping the mus...

Page 28: ...rol s value while not in Record Mode is similar to launching a Session clip while the Arrangement is playing It deactivates the control s automation in favor of the new control setting The control wil...

Page 29: ...ox Your assignments take effect immediately after you leave MIDI Map Mode Session clips can be mapped to a MIDI key or even a keyboard range for chromatic playing MIDI keys and controllers that have b...

Page 30: ...p and want to use it in multiple Live Sets Exporting audio from Live can be done from both the Session and Arrangement Views Live will export the audio coming through on the Master output as an audio...

Page 31: ...kmark Bookmarks can be selected by clicking the Browser s title bar to open the Bookmark menu Choosing the Library Bookmark The rst time you run Live it will automatically install its Library to your...

Page 32: ...CHAPTER 4 LIVE CONCEPTS 30 enjoy the Essential Instrument Collection a multi gigabyte library of meticulously sampled and selected instruments...

Page 33: ...such as Live Clips and Live Sets This chapter will explain everything you need to know about working with each of these le types in Live However we should rst take a look at Live s File Browsers thro...

Page 34: ...Date Live Pack etc which you can show and hide using the PC Ctrl Mac context menu options Showing Hiding Browser Columns Columns can be reordered by drag and drop To resize the columns drag their divi...

Page 35: ...Folder in the Browser Moving through the les in Live s Browser can be done with either the mouse or the computer keyboard Scroll up and down in the Browser with and the mousewheel or by clicking and d...

Page 36: ...the Live Library To bookmark the current Browser root choose the Bookmark menu s topmost item the Bookmark Current Folder command Note that if the current Browser root is already bookmarked the topmo...

Page 37: ...bass but also those located in folders with names containing the word bass Compressed sample metadata tags are also included in the search making it possible to search for songs from a speci c album...

Page 38: ...older view at any time by closing the search eld Closing the Search Field If you select a le from the search results and then close the search eld Live makes sure that le remains selected in the folde...

Page 39: ...pe your search terms 3 Return to Go 4 to jump to the search results 5 and to scroll the search results 6 Ctrl F PC F Mac to close the search eld and go back to the folder view 5 1 4 Previewing Files L...

Page 40: ...ll not play automatically You can click on the tab or press to preview them With the Raw button enabled les will preview at their original tempo and will not loop With Raw disabled Live will try to pr...

Page 41: ...a Clip to Create a New Track In the Session View double clicking or pressing Return on a le in the Browser will automatically create a new track to the right of the other tracks and load it with the...

Page 42: ...e Browser Live offers a Hot Swap Mode to save you mouse travel Hot Swap Mode establishes a temporary link between the Browser and for example a virtual instrument While in Hot Swap Mode you can step t...

Page 43: ...if the Hot Swap button is pressed again Hot swapping can also be cancelled with a press of the Esc key or by pressing the close button in the Hot Swap bar at the top of the Browser When Hot Swap Mode...

Page 44: ...t depth without prior conversion To play a compressed sample Live decodes the sample and writes the result to a temporary uncompressed sample le This usually happens quickly enough that you will be ab...

Page 45: ...for analysis of longer samples you can pre analyze them via the Browser as we will see in a moment An analysis le can also store default clip settings for the sample Clicking the Clip View s Save butt...

Page 46: ...nger samples 5 2 3 File Pre Analysis To avoid waiting for longer samples to be analyzed the rst time they are imported into Live you may want to pre analyze them To pre analyze all the les contained i...

Page 47: ...track When Export Audio Video is invoked while the Arrangement View is up Live will render the selected time range If you would like to render the current Arrangement loop choose the Select Loop comm...

Page 48: ...available headroom Render as Loop If this is activated Live will create a sample that can be used as a loop For example suppose your Live Set uses a delay effect If Render as Loop is on Live will go...

Page 49: ...r to 32 bit to avoid the need for dithering at this stage In particular the Pow r modes should never be used for any material that will be sent on to a further mastering stage these are for nal output...

Page 50: ...ding progress bar Real Time Rendering in Progress Auto Restart on drop outs Rendering in real time requires somewhat more CPU power than non real time rendering and in some cases drop outs small gaps...

Page 51: ...s you have installed Edit Video Encoder Settings This button opens the settings window for the selected encoder Note that the settings options will vary depending on the encoder you have chosen Certai...

Page 52: ...es appear as folders in the File Browser opening the folders gives you access to the le s individual tracks also called voices or instruments A MIDI File and its Tracks in the Browser Note that while...

Page 53: ...its clip and envelope settings but also the original track s devices In order to recreate a Live Clip s device chain either import it into a track containing no clips or devices or drag it into the s...

Page 54: ...nd to open existing ones In the File Browser you can double click or press Return on a Live Set to open it The File menu s Save command saves the current Live Set exactly as it is including all clips...

Page 55: ...Sets Arrangement View Drop Area for Importing Live Sets If you prefer to import individual tracks from a Set you can unfold the Live Set in the File Browser just as if it were a folder Unfolding a Se...

Page 56: ...Sets You can export a selection of Session View clips as a new Live Set by dragging them to the File Browser To export a Set rst click and drag or use the or Ctrl PC Mac modi ers to select more than...

Page 57: ...lay one line for each sample used by the Live Set To list all clips or instruments in the Live Set where the sample is actually used click the triangle to expand the line Here is what you can do Repla...

Page 58: ...the Live Library a Project or somewhere else external When unfolded the entry shows the speci c places in the Set where the sample is used The Sample Reference List s Location Column 5 6 Live Project...

Page 59: ...ome audio into a new Live Set We now save the Live Set under the name Tango on the Desktop Here is the result as displayed by the Live Browser A Live Set and its Recordings in a Live Project Folder Th...

Page 60: ...abblings we decide to save it outside the Tango Project folder say on the Desktop Live creates a new project folder named Samba Project next to Tango Project A New Project Was Added Next to Tango Proj...

Page 61: ...roblem There is actually no need to keep a Project s Live Set exactly one level below the Project itself Within a project folder you can create any number of sub folders and move les around to organiz...

Page 62: ...ject sub folder You can drag a preset to this folder after saving it or simply drag the title bar of the device and drop it there directly When saving presets that contain samples to a new location Li...

Page 63: ...and Live Device Presets that are available to all Live Projects In Live s File Browsers the Library is accessible through a bookmark Choosing the Library Bookmark Clips can be conveniently saved in L...

Page 64: ...of ways Loading an entire construction kit loads a new Live Set You can also unfold the Set in the Browser and import individual tracks or clips into a Set that s already in progress Defaults presets...

Page 65: ...d from the List You can also use the Browse button next to this chooser to create a new Library by pointing to an empty folder or creating a new one Once you ve selected a Library path one of several...

Page 66: ...oject folder in the File Browser and select the Manage Project command 5 8 Locating Missing Samples If you load a Live Set Live Clip or preset that references samples which are missing from their refe...

Page 67: ...the respective line in the list of missing les Note that Live will not care if the sample you offer is really the sample that was missing 5 8 2 Automatic Repair Live offers a convenient automatic sea...

Page 68: ...matic search function may nd any number of candidates Let s consider the following cases No candidate found you can choose another folder and try again or locate the sample manually One candidate foun...

Page 69: ...ences Live provides the option of collecting i e copying them into the Set s project folder This is accomplished via the File Manager Choose the Manage Files command from the File menu Click the Manag...

Page 70: ...ry Note that this can cause a lot of copying especially if your Live Set uses large multisample collections 5 9 1 Collect Samples on Export When you save Live Clips device presets or tracks by draggin...

Page 71: ...therwise your changes will be discarded 5 11 Finding Unused Samples Live s File Manager can nd the unused samples in a Project for you You can then review them and decide to delete them individually o...

Page 72: ...on to bring up a le select dialog where you can specify the name and location of a new Live Pack le Creating a new Live Pack from a Project does not affect the Project If you want the Project deleted...

Page 73: ...Project that was created when you saved the rst version of the Live Set If a Project contains multiple Live Sets it will only collect one copy of any samples used by the various versions which can sav...

Page 74: ...the samples 4 Since you know that your samples are all in the Project folder unfold Automatic Search Then enable the Search Project and Fully Rescan Folders options Finally click Go to initiate the s...

Page 75: ...ement which contains music laid out along a song timeline like a multitrack tape A Piece of Music in the Arrangement View The Arrangement View is a powerful editing tool that easily lets you combine a...

Page 76: ...r Double clicking in the beat time ruler also zooms to the current selection If nothing is selected double clicking the beat time ruler zooms out to show the entire Arrangement 3 The Arrangement Overv...

Page 77: ...yback by clicking the Stop button Arrangement playback can also be toggled on and off by pressing the keyboard s space bar The Play and Stop Buttons in the Control Bar 2 You can set the Arrangement pl...

Page 78: ...numerically using the Control Bar s Arrange ment Position elds Setting the Play Position in the Arrangement Position Fields The Arrangement Position elds show the song position in bars beats sixteenth...

Page 79: ...ote that the position of a new locator is quantized according to the Control Bar s Quantization menu setting The Locator Controls You can recall jump to locators by clicking on them or with the Previo...

Page 80: ...any point in the Arrangement by using time signature markers These can be added at the insert marker position via the Create menu or anywhere below the beat time ruler using the PC Ctrl Mac context m...

Page 81: ...in the timeline and their positioning is only constrained by the editing grid This means that it is possible to place meter changes in impossible places such as before the end of the previous measure...

Page 82: ...angement activate the Arrangement loop by clicking on the Control Bar s Loop switch The Loop Start Fields Left and the Loop Length Fields Right You can set loop length numerically using the Control Ba...

Page 83: ...ging its length The loop s PC Ctrl Mac context menu s Set Song Start Time Here command can be used to overrule the default play starts at selection rule when this command is checked play starts at the...

Page 84: ...hape of the fade s curve 1 2 3 4 Fades in the Arrangement View You can also set the length of a fade by selecting a range of time within the clip that includes the clip s beginning or end and executin...

Page 85: ...ate Fades on Clip Edges option is that adjacent audio clips will get automatic 4 ms crossfades These can then be edited just like manually created crossfades There are some limits to the length of fad...

Page 86: ...nsert mark can then be moved in time with the and keys or between tracks via and Holding Ctrl PC Alt Mac while pressing the and keys snaps the insert mark to locators and the edges of clips in the sel...

Page 87: ...context menu available in either the Arrangement View track area or the Clip View display The following shortcuts to Options menu commands allow quickly working with the grid Use Ctrl 1 PC 1 Mac to n...

Page 88: ...ea closer together in the timeline This command reduces the length of your Arrangement by whatever amount of time you have cut Note that the Cut Time command affects all tracks not only the selected o...

Page 89: ...at the position where you want the clip to be split 3 Execute the Split command To isolate a part of a clip do the following 1 Unfold the track 2 In the waveform or MIDI display drag a selection over...

Page 90: ...for real time arrangement purposes When operating on audio clips Consolidate actually creates a new sample for every track in the selection The new samples are essentially recordings of the time warp...

Page 91: ...when DJing the order of pieces the length of each piece and the order of parts within each piece is generally not known in advance In the theatre sound has to react to what happens on stage When work...

Page 92: ...with the computer keyboard or a MIDI controller They can even be mapped to MIDI note ranges so that they play chromatically Clips can be played at any time and in any order The layout of clips does no...

Page 93: ...op buttons Clicking in any group slot selects all of the clips it refers to Group Slots and Group Launch Buttons 7 2 Tracks and Scenes Each vertical column or track can play only one clip at a time It...

Page 94: ...so enter your own info text for a scene via the Edit Info Text command in the Edit menu or in the scene s PC Ctrl Mac context menu The context menu also contains a color palette where you can choose a...

Page 95: ...Track Status Fields You can tell a track s status by looking at the Track Status eld just above the active track s mixer controls A Track Playing a Looping Session Clip The pie chart icon in a clip t...

Page 96: ...View Grid Clips arrive in the Session View by being imported from the File Browsers or through recording Dropping Multiple Clips Into the Session View If you are dragging multiple clips into the Sessi...

Page 97: ...he grid using the Edit menu s Add Remove Stop Button command This is useful for pre con guring the scene launch behavior If for instance you don t want scene 3 to affect track 4 remove the scene 3 tra...

Page 98: ...hed scenes To nish recording press the Record button again or stop playback The Arrangement Selector To view the results of your recording bring up the Arrangement View As you can see Live has copied...

Page 99: ...other which makes it easy to improvise into the Arrangement over and over again until it s right Furthermore you can move clips not only within the Session grid but also from the Session View to the A...

Page 100: ...r 8 Clip View The Clip View is where clip properties can be set and adjusted The Clip View The Clip View is opened by clicking on the Clip Overview or double clicking a clip in the Session or Arrangem...

Page 101: ...ti selection depend on the contents of the clips generally only properties which the clips have in common are shown Creating a Clip Multi Selection Controls such as sliders and knobs behave slightly d...

Page 102: ...e manual chapter Audio clips have these additional Clip View controls The Sample Display toggles with the Envelope Editor on the right hand side of the Clip View and controls Live s sample warping cap...

Page 103: ...Envelopes and Sample or MIDI boxes using the Clip View Box selector in the Clips box You can also toggle between the Sample Display MIDI Editor and the Envelope Editor by clicking in the title bars of...

Page 104: ...y default a clip s name matches the name of the le it references but in general the clip name is independent from the le name You can also rename a clip by selecting it in the Session grid or Arrangem...

Page 105: ...ed for the clip from the grooves available in the Groove Pool The Clip Groove Chooser The Open Groove Pool entry in this chooser can be used to open the Groove Pool if it is closed If you want to quic...

Page 106: ...a Clip These buttons can also be mapped to keys or MIDI controllers In MIDI Map Mode a scrub control will appear between the Nudge buttons and can be assigned to a rotary encoder wheel for continuous...

Page 107: ...c pieces etc in sync with the current song tempo The Control Bar s Tempo Field To verify this note that a warped sample s speed follows the tempo as you change the Control Bar s Tempo control Live off...

Page 108: ...er scrolling only happens in the beat time ruler and the bottom half of the waveform Click and drag vertically in these areas to smoothly change the zoom level and horizontally to scroll the display T...

Page 109: ...aunched is set with the clip s region and loop controls An unlooped clip will play from its start marker to its end marker or until it is stopped The Clip Start and End Markers These markers can be cl...

Page 110: ...will make clip playback jump to that point The Clip Scrub Area The size of this jump is quantized by the global quantization setting which can be quickly changed using the Ctrl 6 PC 6 Mac 7 8 9 and 0...

Page 111: ...ouse and its position changed with commands from the computer keyboard and nudge the loop brace to the left right by the current grid setting and shift the loop brace left right in steps the size of i...

Page 112: ...cking the Set Loop Length button moves the end of the loop to the current playback position This lets you capture the music in a loop on the y While the loop is still off you can click the Set Loop Le...

Page 113: ...h Sample Editor Button The Edit button opens the sample in an external sample editing application which you can specify in the File Folder Preferences To process a sample in an external program you ha...

Page 114: ...settings with the sample is different from saving the clip as a Live Clip which also saves devices and device settings 8 2 6 High Quality Interpolation The High Quality Switch If the High Quality swit...

Page 115: ...h The Clip Fade switch when enabled applies a short fade to the clip start and end to avoid clicks at the clip edges The length of the fade is signal dependent and ranges from 0 4 milliseconds This sw...

Page 116: ...uter is using the hard disk for swapping out RAM contents that have not been used in a while The more clips you are running in RAM Mode the higher the likelihood for them to be swapped out Live can ha...

Page 117: ...rsed clip and perform other actions in the program as soon as Live begins to draw the new waveform into the Sample Display Once a sample is reversed a link to the reversed sample will be maintained un...

Page 118: ...l clips and instruments referencing the sample will be affected You can also use the Show in Browser command in the PC Ctrl Mac context menu to reveal the le in the Browser 8 3 The Notes Box The Notes...

Page 119: ...es it can use If you do not want your clip to send program or bank change messages simply set the bank program choosers to None 8 3 3 MIDI Loop Region These controls manage how the contents of a MIDI...

Page 120: ...y Mixing and matching audio from different origins is therefore extremely easy 9 1 Tempo 9 1 1 Setting the Tempo The Control Bar s Tempo Field The Control Bar s Tempo eld allows you to change the play...

Page 121: ...Live Set will follow your tapping The Key Map Mode Switch It is better to assign the Tap button to a computer key than using the mouse Click on the Control Bar s KEY switch to enter Key Map Mode then...

Page 122: ...even move notes to other meter positions A clip s warping properties are set in the Sample box which is a sub section of the Clip View The Sample Box s Warping Controls The most signi cant control he...

Page 123: ...to the Master track for the duration of the tempo master clip You will notice that the Tempo eld in Live s Control Bar becomes disabled in this state this is because all tempo control is handed over t...

Page 124: ...an have Live scroll the Sample Display to follow playback Use the Control Bar s Follow switch to activate this feature It also might be helpful to vertically resize the Sample Display by dragging on t...

Page 125: ...the marker itself You can also select a range of time and create Warp Markers at all of the transients within the range via the Create menu s Insert Warp Markers command If there are no transients wi...

Page 126: ...tempo if you happen to know the tempo of the loop you can type it in here Sometimes Live s guess of the original tempo is wrong by half or double If so correct this by clicking on the buttons labeled...

Page 127: ...bar eight not bar nine To x this simply drag the ending marker to the correct position If Live s initial guess had been a four bar loop the eighth bar may not initially be visible In that case you can...

Page 128: ...y available for integration into your project You can use the Browser to import long samples or MP3 AAC Ogg Vorbis Ogg FLAC and FLAC les When you drag a le into Live that is too long to justify the as...

Page 129: ...ing Remember that the metronome in the Control Bar will probably come in handy as you warp longer pieces The Metronome Switch It might happen that Auto Warp guesses the tempo correctly but gets the do...

Page 130: ...loop is 8 bars at 90 BPM instead of 16 bars at 180 BPM Sometimes more accurate control of Auto Warp is necessary The best way to go about warping a clip that requires more detailed attention is in se...

Page 131: ...tempo as a reference Warp From Here Straight tells Auto Warp that this is a clip with no tempo variations common in electronically produced works Auto Warp will then set a single Warp Marker derived...

Page 132: ...ault settings or the settings that you previously applied To adjust your quantization parameters open the Quantization Settings dialog from the Edit menu Quantizing Audio Samples Using the options pre...

Page 133: ...s This setting uses the positions of the analyzed or user created transients to determine warping behavior To preserve speci c beat divisions regardless of the sample s contents choose one of the xed...

Page 134: ...dible repetitions 9 3 3 Texture Mode Texture Mode works well for sound textures with an ambiguous pitch contour e g poly phonic orchestral music noise atmospheric pads etc It also offers rich potentia...

Page 135: ...s slider adjusts the extent to which the formants of the sample are compensated when transposing At 100 the original formants will be preserved which allows for large changes in transposition while ma...

Page 136: ...transformed into playable instruments via the Slice to New MIDI Track command which is available in the Create Menu or the PC Ctrl Mac context menu for the Clip Warp Markers parameters Clip Envelopes...

Page 137: ...play specifying note pitch length position and dynamics referred to as velocity in the MIDI lexicon MIDI is composed and edited in Live s MIDI Editor 10 1 Creating an Empty MIDI Clip MIDI clips are c...

Page 138: ...locity Editor by dragging on the split line that runs between it and the Note Editor You can also show and hide the Velocity Editor using the triangular button on the left hand side of the split line...

Page 139: ...Note velocity is adjusted in the Velocity Editor by clicking and dragging on the associated markers You can also use Draw Mode in the Velocity Editor It will draw identical velocities for all notes wi...

Page 140: ...ruler to scroll from left to right 2 Click and drag vertically in the note ruler to change which octaves are shown or drag horizontally to change the vertical zoom size of MIDI notes and the keyboard...

Page 141: ...Note Editor can be set to scroll with playback using the Follow switch from the Control Bar When Permanent Scrub Areas is enabled in Live s Look Feel Preferences clicking in the scrub area below the b...

Page 142: ...iately hide all rows or key tracks that do not contain MIDI notes in any clips in the track This is very useful when working with percussion kits for example which are oftentimes mapped out along a ke...

Page 143: ...u do not necessarily want to set straight 10 4 4 Editing Notes Editing in the MIDI Editor is similar to editing in the Arrangement In both cases your actions are selection based you select something u...

Page 144: ...gging or with the arrow keys on your computer keyboard in either case they are subject to grid and offset snapping If you are playing the clip while you edit notes you can listen to them play in their...

Page 145: ...ew note s beginning 10 4 5 Changing Note Length Clicking and dragging on a note s left or right edges changes its length Note length can only be changed when Draw Mode is inactive and will be quantize...

Page 146: ...ide of the deleted area closer together in the timeline Insert Silence inserts as much empty time as is currently selected into the clip before the selection 10 4 7 Quantizing Notes There are three op...

Page 147: ...ze notes without giving them that quantized feel using the Amount control which will move notes only by a percentage of the set quantization value 10 4 8 Editing Velocities To change velocity for a MI...

Page 148: ...re all in the same key track press and click on the piano roll to select all notes within the desired key track make sure Draw Mode is activated and draw the ramp into the Velocity Editor while holdin...

Page 149: ...le the editor to show note off velocities via options in the editor s PC Ctrl Mac context menu The Velocity Editor Showing Note Off Velocities Please note that note off or release velocity is a somewh...

Page 150: ...r then the order of the stretched notes will be re ected in relation to their initial sequence this is sometimes referred to as retrograde behavior Any changes occurring to the notes included in the N...

Page 151: ...he Browser Groove Files in the Browser The easiest way to work with Library grooves is to drag and drop them from the Browser directly onto clips in your Set This immediately applies the timing charac...

Page 152: ...you can modify its behavior by adjusting its parameters in the Groove Pool which can be opened or closed via its selector button at the bottom of Browser The Groove Pool Selector Button You can also d...

Page 153: ...ards the positions of the groove notes At a base of 1 8th the groove s notes are measured from their nearest eighth note Notes in the groove that fall exactly on the grid aren t moved at all so the co...

Page 154: ...rameters will be applied at their assigned values Note that the Amount slider goes up to 130 which allows for even more exaggerated groove effects 11 1 2 Committing Grooves The Commit Groove Button Pr...

Page 155: ...es From Audio or MIDI Clips Grooves created by extracting will only consider the material in the playing portion of the clip 11 3 Groove Tips This section presents some tips for getting the most out o...

Page 156: ...ize and Base parameters to taste With only Quantize applied the actual content of the groove is ignored so this technique works the same regardless of which Groove le you use 11 3 3 Creating Texture W...

Page 157: ...s used to de ne how each Session View clip behaves when triggered or launched 12 1 The Launch Box Remember that clips in the Session View are launched by their Clip Launch buttons or remote control Cl...

Page 158: ...The Clip Launch Mode Chooser The Launch Mode chooser offers a number of options for how clips behave with respect to mouse clicks computer keyboard actions or MIDI notes Trigger down starts the clip...

Page 159: ...r clip triggering To disable clip quantization choose None To use the Control Bar s Global Quantization setting choose Global Global quantization can be quickly changed using the Ctrl 6 PC 6 Mac 7 8 9...

Page 160: ...ip in Legato Mode is launched it takes over the play position from whatever clip was played in that track before Hence you can toggle clips at any moment and rate without ever losing the sync Legato M...

Page 161: ...w Actions occurring If a clip has Chance A set to 1 and Chance B set to 0 Follow Action A will occur every time the clip is launched As we can see from this example a Chance setting of 0 means that an...

Page 162: ...c based on loops or short melodic fragments has a tendency to sound static Follow Actions allow you to create structures that will repeat but can also be surprising Remember that you can always record...

Page 163: ...ty the second clip will simply play in a loop until it is stopped 12 6 2 Creating Cycles One of the most obvious possibilities that Follow Actions open up is using a group of samples to form a musical...

Page 164: ...speci ed time or until random chance leads to the next clip in the group 12 6 4 Adding Variations in Sync Paired with clip envelopes and warping Follow Actions can be used to create all sorts of inte...

Page 165: ...each clip is equal to the length of the clip that you want to play you can set up two Follow Actions with different Chance values in each clip launch a clip and surprise yourself 12 6 6 Creating Nonr...

Page 166: ...k In Out section which offers for every track choosers to select a signal source and destination The mixer s In Out section is Live s patchbay The In Out section can be independently shown or hidden f...

Page 167: ...channels they are available from the lower chooser or the Input Output Channel chooser In our Ext example these would be the individual audio MIDI inputs and outputs 13 1 Monitoring Monitoring in the...

Page 168: ...avoid latency Generally it is preferable to work with an audio interface that allows for negligible latencies a few milliseconds If you are recording into Live with monitoring set to Off you may want...

Page 169: ...ono is turned into stereo simply by using the identical signal for left and right channels When a track is routed into a mono output the left and right signals are added together and attenuated by 6 d...

Page 170: ...with the note C3 The black keys on a piano correspond to the upper row of computer keys The ve leftmost letters on the lower row of the keyboard Z X C V and B on a U S English keyboard are used to tra...

Page 171: ...he synthesizer s Local Off function Every synthesizer has this function which effectively separates the keyboard from the sound generator allowing you to treat both components as if they were separate...

Page 172: ...s 13 4 ReWire Slave Routing Live can operate as a ReWire master or slave in cooperation with another ReWire application As a ReWire master Live can send MIDI to and receive audio from any ReWire slave...

Page 173: ...If you want to continue work on the project without reopening Reason simply record Reason s audio by arming the audio track and engaging Record Mode A similar procedure is possible with the External I...

Page 174: ...the meter Then you can arm the track and record into any of its empty clip slots Note that the recording track s own output will be suppressed while resampling is taking place and will not be included...

Page 175: ...eed into Track B Technically what you hear is the output of Track B with everything except Track A s signal removed Approach 2 on the other hand leaves Track A unaffected except for Track B tapping it...

Page 176: ...w you to hear the tapped track Post FX taps the signal at the output of a track s device chains FX but before it has been passed back to the track mixer Changes to the tapped track s devices will ther...

Page 177: ...also be listed in the Input Channel chooser Rack Name Chain Name Pre FX The signal will be tapped from the point that it enters the Rack before it reaches the chain s devices Rack Name Chain Name Pos...

Page 178: ...al An Example Setup for Post Effects Recording This is easily accomplished by devoting a special audio track for processing and monitoring the incoming guitar signal We call this track Guitar and drag...

Page 179: ...ng that sounds more like a piece of music than a single tone This output lends itself more to representation as an audio waveform than a single note in a MIDI clip particularly when comparing the edit...

Page 180: ...me control for the entire drum kit Alternatively you could combine the separate drum tracks into a Group Track for even more exibility This automatically creates the necessary output routings and also...

Page 181: ...In option in the Output Channel represents the pad track s input signal the signal to be recorded which is not what we want We instead select Simpler Ch 1 to send the new track s MIDI directly to the...

Page 182: ...mixes the output of its eight sample slots internally and delivers the mix at the instrument s audio out Any audio effects following Impulse in the same track process the composite signal Sometimes it...

Page 183: ...Tapping Audio From the Parts of a Multi Timbral Instrument Sending MIDI from the mixer to a multi timbral instrument is a variation of a case described above One MIDI track hosts the multi timbral in...

Page 184: ...le track by placing each one in a Rack s device chain Note that the main outputs of the multi timbral instrument will still output to the track that contains the instrument only auxiliary outputs are...

Page 185: ...devices have their own sidechain controls with integrated routing choosers that match those found in tracks Thus when using these devices it is not necessary to follow the above procedure you can simp...

Page 186: ...ayer Instruments Perhaps you wonder why this works given that the string track s output is audio and not MIDI When routing MIDI in from another track we are tapping the MIDI at the latest possible sta...

Page 187: ...is accessible from two views The Arrangement View Mixer In the Arrangement View the mixer appears as a horizontal strip to the right of the track area To display all mixer controls for a track unfold...

Page 188: ...y toggles between the Arrangement and Session Views The View menu options listed below show or hide mixer components You can use different mixer view setups in the Session View and in the Arrangement...

Page 189: ...selected toggling one of their Track Activators will toggle the others as well 5 The Solo switch solos the track by muting all other tracks but can also be used for cueing With multiple tracks selecte...

Page 190: ...ill add a decibel scale alongside the meter s tick marks These enhancements are tailored for use in traditional mixing settings but are available anytime the Mixer section is displayed Because of the...

Page 191: ...hortcut Ctrl R PC R Mac and then using the Tab key to move from title bar to title bar When a symbol precedes a name the track will get a number that updates automatically when the track is moved Addi...

Page 192: ...f normal audio or MIDI tracks into a special kind of summing container called a Group Track To create a Group Track select the tracks to include and execute the Edit menu s Group Tracks command Group...

Page 193: ...ng a Group Slot serves as a shortcut for selecting all of the contained clips 14 4 Return Tracks and the Master Track In addition to Group Tracks and tracks that play clips a Live Set has a Master tra...

Page 194: ...ck active controls The Pre setting allows you to create an auxiliary mix that is processed in the return track independently of the main mix As the return track can be routed to a separate output this...

Page 195: ...rs It features seven different crossfade curves so that you can choose the one that ts your style the best To change the curve PC Ctrl Mac on the crossfader then select an entry from the context menu...

Page 196: ...absolute left and right positions are separately available for MIDI or keyboard mapping There are two special scenarios for remote control with respect to the crossfader A key mapped to any one of the...

Page 197: ...n depth editing To edit each track s crossfade assignment please choose Mixer from the Envelope Device chooser and X Fade Assign from the Control chooser The crossfader s automation curve is accessibl...

Page 198: ...set to an output other than that selected for the Master If the desired outputs don t show up in these choosers please check the Audio Preferences 3 Activate cueing by setting the Solo Cue Mode switch...

Page 199: ...w clips can be achieved using the nudge buttons in the Clip View however track delays can be used in the Arrangement View for such offsets Note that delay compensation for plug ins and Live devices is...

Page 200: ...ing up Audio Preferences Also keep in mind that devices such as microphones guitars and turntables do not operate at line level meaning that they will need to have their levels boosted before they can...

Page 201: ...eo external input a speci c MIDI channel from a speci c MIDI in device audio from ReWire slave programs or a signal coming from another track The Routing chapter describes these options in detail 15 2...

Page 202: ...as well Arming a track selects the track so you can readily access its devices in the Track View 15 3 Recording Recording can be done in both the Session and the Arrangement Views If you want to reco...

Page 203: ...the Arrangement Loop s start position 5 Likewise to prevent recording after the punch out point activate the Punch Out switch The punch out point is identical to the Arrangement Loop s end position 6...

Page 204: ...the slot with a red Clip Launch button that shows it is currently recording To go from recording immediately into loop playback press the clip s Launch button 4 Alternatively you can click a Clip Sto...

Page 205: ...p and changing its loop properties 4 Arm the track 5 Launch the clip 6 The notes you play are added into the looping clip and you can observe your recording in the Clip View 7 By default the Control B...

Page 206: ...MIDI Editor 1 Arm the MIDI track that contains the clip into which you want to record 2 Enable the Preview switch in the clip s MIDI Editor 3 Click in the MIDI Editor to place the insert mark at the...

Page 207: ...lay along with or to use the built in metronome which is activated via its Control Bar switch and will begin ticking when the Play button is pressed or a clip is launched The Preview Volume Knob To ad...

Page 208: ...overdub recording with the Clip View Loop activated changes to the Record Quan tization take effect immediately and they cannot be separately undone with the Edit menu command Recorded MIDI notes can...

Page 209: ...song tempo the program will automatically maintain good sound quality usually without further adjustment 15 8 Where are the Recorded Samples Recorded samples are stored with the current Set s Project...

Page 210: ...e A Track Launch Button and another key to start and end recording in the respective track You can also map the step recording navigators The Step Recording Arrows This allows you to for example use M...

Page 211: ...gnals and can be placed in audio tracks They can also be placed in MIDI tracks as long as they are downstream from an instrument Instruments are devices that reside in MIDI tracks receive MIDI and out...

Page 212: ...context menu Devices Can Be Folded To learn about a particular device and how to operate it consult the Live Audio Effect Reference Live MIDI Effect Reference or the Live Instrument Reference To lear...

Page 213: ...tion track by clicking within it then select a device or preset in the Browser and press Return to add it to the selected track You can also drag devices into tracks or drop areas in the Session and A...

Page 214: ...me to append it to the device chain Signals in a device chain always travel from left to right You can drop audio effects in at any point in an audio track s device chain keeping in mind that the orde...

Page 215: ...be used on devices Pasted devices are inserted in front of the selected device You can paste at the end of a device chain by clicking in the space after the last device or by using the key to move the...

Page 216: ...erly strong signal is sent to a physical output or written to a sample le Further information about track types in Live can be found in the Routing and I O chapter in cluding information on using retu...

Page 217: ...and audition different presets You can even replace the current device with a new one by simply selecting another device s preset To load a device s default factory settings select the parent folder o...

Page 218: ...ar of the device and dropping into the Browser location of your choice For detailed information on what can be done with the Browser please see the Manag ing Files and Sets chapter For more on how to...

Page 219: ...Drum Rack to create a single chain Add any additional MIDI or Audio Effects to this chain Adjust parameters in any of the devices Assign Macro Controls to any of the controls in the chain s devices D...

Page 220: ...Hot Swap button activated Note The rst time you start Live no plug ins will appear in the Plug In Device Browser as you must rst activate your plug in sources Activating your plug in sources tells Li...

Page 221: ...g Ins in the Track View A VST Plug In in the Track View Once a plug in is dragged from the Browser into a track it will show up in the Track View For plug ins with fewer than 32 modi able parameters a...

Page 222: ...If activated the Auto Open Plug In Windows Preference assures that plug in edit windows open automatically when plug ins are loaded into tracks from the Browser If the Multiple Plug In Windows option...

Page 223: ...g them to new locations Parameters can be deleted by pressing the Delete key If you try to delete a parameter that has existing automation data clip envelopes or MIDI key or Macro mappings Live will w...

Page 224: ...y con gured its parameters in Live s panel you can use it just like a Live device You can map MIDI controller messages to all of the parameters in Live s panel You can drag or copy the device to diffe...

Page 225: ...mples it calculates per millisecond can be set using the Buffer Size setting in the Audio Preferences 16 3 VST Plug Ins 16 3 1 The VST Plug In Folder When you start Live for the rst time you will need...

Page 226: ...the Use VST Plug ins in System Folders option 2 You may have an alternative folder in which you store your VST Plug ins perhaps those that you use only with Live You can use VST Plug ins in this folde...

Page 227: ...t they will not appear in the Plug In Device Browser and will not be rescanned again until they are reinstalled 16 3 2 VST Programs and Banks Every VST Plug in instance owns a bank of programs A progr...

Page 228: ...ialog select VST Device Program from the Format menu Macintosh from the File Type menu Windows select a folder and name For saving the entire bank as a le proceed likewise but choose VST Device Bank a...

Page 229: ...g an Audio Units Plug In Window Audio Units have presets that function just like those for the Live effects However some AU presets cannot be dragged to different locations in the Browser as they are...

Page 230: ...n the Options menu Unusually high individual track delays or reported latencies from plug ins may cause no ticeable sluggishness in the software If you are having latency related dif culties while rec...

Page 231: ...amline your device chain by bringing together your most essential controls While Racks excel at handling multiple devices they can extend the abilities of even a single device by de ning new control r...

Page 232: ...hen processes its signal serially through its own devices The output of each of the parallel chains is mixed together producing the Rack s output Drum Racks also allow multiple parallel chains to be u...

Page 233: ...only audio effects and can be placed in audio tracks They can also be placed in MIDI tracks as long as they are downstream from an instrument Instrument Racks contain instruments but can additionally...

Page 234: ...ained between end brackets Just as with punctuation or in mathematics a Rack within a Rack will have a pair of brackets within a pair of brackets To ungroup devices dismantling their Racks select the...

Page 235: ...o be renamed by using the Edit menu s Rename command You can also enter your own info text for a Rack via the Edit Info Text command in the Edit menu or in the Racks s PC Ctrl Mac context menu When al...

Page 236: ...r our own introduction The Chain List represents the branching point for incoming signals Each parallel device chain starts here as an entry in the list Below the list is a drop area where new chains...

Page 237: ...nd regrouping In this case the Devices view will indicate how many chains are currently selected Each chain has its own Chain Activator as well as Solo and Hot Swap buttons Chains in Instrument Drum a...

Page 238: ...device chain By default zones behave transparently never requiring your attention They can be recon gured however to form sophisticated control setups The three types of zones whose editors are toggle...

Page 239: ...be able to pass through every zone in that chain Every chain in a MIDI Effect Rack has three zones a key zone a velocity zone and a chain select zone 4 An incoming MIDI note gets compared to a chain s...

Page 240: ...f individual chains may occupy any number of keys allowing for exible keyboard split setups Key zone fade ranges attenuate the velocities of notes entering a chain 17 5 3 Velocity Zones The Velocity Z...

Page 241: ...nly those with chain select zones that overlap the current value of the Chain selector can be addressed and thereby produce output By default the chain select zones of Instrument and MIDI Effect Racks...

Page 242: ...effects that we would like to be able to switch between To make this a hands on experience we have MIDI mapped the Chain selector to an encoder on an external control surface Let s move the chain sele...

Page 243: ...of our zones a bit Setting the zones as shown maintains four exclusive values for our presets so that each still has one point where neither of the others are heard We crossfade between the presets ov...

Page 244: ...es is selected in the Receive chooser the Play and Choke choosers are disabled in this case the chain simply passes the note that it receives to its devices The small Preview button to the left of the...

Page 245: ...ets can be dragged onto a pad mapping automatically to the pad s note and creating or recon guring internal chains and devices as necessary Dropping a sample onto an empty pad for example creates a ne...

Page 246: ...y chains it represents An empty pad shows only the note it will trigger When you mouse over it the Status Bar will display this note as well as the suggested GM instrument A pad that triggers only one...

Page 247: ...r according to the clip s transients or Warp Markers Since a Rack can contain a maximum of 128 chains Live won t let you proceed if your choice would result in more than 128 slices You can x this by e...

Page 248: ...ll take a few moments to process all of this information Playing the MIDI clip will trigger each chain in the Drum Rack in order according to the timing information that you speci ed or that was embed...

Page 249: ...um loops but there s no reason to stop there Experiment with slicing audio from different sources such as voices and ambient textures The same sorts of resequencing and reprocessing operations can be...

Page 250: ...you d like to create more mappings or click on the Map Mode button once more to exit Macro Map Mode Note that once assigned to a Macro Control a device parameter will appear disabled since it hands o...

Page 251: ...nd in the Rack s chain list so any changes made to these controls in either area will be re ected in the other immediately Likewise many chain operations such as reordering renaming and regrouping can...

Page 252: ...n dragged from the mixer to a new track they take their MIDI notes with them For example if you are working on a MIDI drum loop within a single track and decide that you would like to move just the sn...

Page 253: ...po 18 1 Recording Automation Creating automation is straightforward All changes of a control that occur while the Control Bar s Record switch is on become automation Try recording automation for a con...

Page 254: ...t overwriting existing automation data Well nothing is forever in the world of in nite Undo but it s easy to disable a control s automation temporarily to avoid overwriting existing data If you change...

Page 255: ...pes unfold the track by clicking the button next to the track name Note that for Group Tracks you may need to expand the track s height in order to see its envelopes 2 Clicking on one of the track s m...

Page 256: ...view it simultaneously If the Fades Device chooser is set to None this button will be hidden 7 The button hides its respective automation lane Note that hiding a lane from view does not deactivate it...

Page 257: ...egments and the breakpoints connecting them become draggable objects Clicking and dragging in the envelope s background de nes a selection Here is what you can do Double click at a position on a line...

Page 258: ...ove only affects the selected part of the envelope Dragging an Envelope Line Segment Moves the Segment Vertically 18 4 3 Locking Envelopes When moving clips Live normally moves all automation with the...

Page 259: ...t also from one parameter to another Since the parameters may be completely unrelated this can have unexpected but possibly interesting results 18 4 5 Editing the Tempo Automation The ability to dynam...

Page 260: ...upon clip type and setup clip envelopes can do anything from representing MIDI controller data to modulating device parameters In this chapter we will rst look at how all clip envelopes are drawn and...

Page 261: ...e bottom menu the Control chooser selects among the controls of the item chosen in the top menu In both choosers parameters with altered clip envelopes appear with LEDs next to their names You can sim...

Page 262: ...e uses of clip envelopes 19 2 Audio Clip Envelopes Clip envelopes extend Live s elastic approach to audio and in conjunction with Live s audio effects turn Live into a mighty sound design tool Using c...

Page 263: ...kpoints and line segments This is useful for smoothing the coarse steps by horizontally displacing breakpoints The Transposition Envelope with Steps Top and Ramps Bottom Note that the warp settings de...

Page 264: ...volume shape onto the sample Imposing a Volume Envelope on a Sample The volume envelope s output is interpreted as a relative percentage of the clip volume slider s current value The result of the cli...

Page 265: ...beat loops We discourage using this technique for analytical cut and splice tasks they are much easier to perform using Live s Arrangement View and the results can easily be consolidated into new clip...

Page 266: ...tomation for an audio clip so that it gradually fades out over four bars What happens to your fade out when you create a clip envelope that gradually increases the mixer volume over four bars At rst y...

Page 267: ...hard right the modulation amount is automatically reduced as you move the pan knob towards the left or right When the pan knob is turned all the way to the left for instance the pan clip envelope has...

Page 268: ...to 119 accessible via the scroll bar on the right side of the menu Note that devices to which you send your MIDI controller messages may not follow the conventions of MIDI control channel assignments...

Page 269: ...velope now has its own local loop region settings The loop region controls in the Envelopes box come to life 2 Make sure the clip envelope s Loop switch is off Notice the Sample box s Loop switch is n...

Page 270: ...edit any envelope to superimpose onto the sample loop This of course not only works for volume but for any other control as well how about a lter sweep every four bars Note that you can create as muc...

Page 271: ...bar volume envelope loop The volume envelope loop now works as a pattern that is repeatedly punching holes into the music so as to perhaps remove every third beat You can certainly think of other par...

Page 272: ...in the Tempo Control and Warping chapter If you are interested in syncing Live with external video equipment you ll also want to read the chapter on synchronization 20 1 Importing Video Live can impor...

Page 273: ...edited in any way by Live they do provide visual cues that can be helpful when scoring Note that these markers are always read from the original movie le and are not stored in the Live Set or video c...

Page 274: ...e and location of this window are not speci c to the Set and will be restored when you open a video again The video can be shown in full screen and optionally on a second monitor by double clicking in...

Page 275: ...Tempo Master Remember from the Tempo Control and Warping chapter that although any number of warped Arrangement clips can have the Tempo Master option activated only the bottom most currently playing...

Page 276: ...ntents by clicking the buttons to the left of their names 4 Double click on the video clip s title bar to view it in the Clip View In the Sample box make sure that the Warp button is enabled Warped cl...

Page 277: ...ction to start at song time 1 1 1 and SMPTE time 00 00 00 00 This can be accommodated by trimming video clips as follows First we drop a movie le at the start of the Arrangement 1 1 1 A Video Clip at...

Page 278: ...video clip s title bar to deselect everything else then drag the video clip s left edge to the left as far as possible to reveal the pre roll again The Video Clip with Pre Roll Restored The Export Aud...

Page 279: ...nd Effects chapter explains the basics of using effects in Live 21 1 Auto Filter The Auto Filter Effect The Auto Filter effect provides classic analog lter emulation It can be modulated by an envelope...

Page 280: ...input levels high values integrate any changes gradually creating a looser slower response Think of it as adding inertia to the response Lower Release values cause the envelope to respond more quickly...

Page 281: ...ntrols de ne the relationship between these two LFOs Phase keeps both LFOs at the same frequency but can set the two LFO waveforms out of phase with each other creating stereo movement Set to 180 the...

Page 282: ...LFO speed is controlled with the Rate control which can be set in terms of hertz Rate can also be synced to the song tempo Though both LFOs run at the same frequency the Phase control lends the sound...

Page 283: ...size the size of each repeated slice If set to 1 16 a slice the size of one sixteenth note will be captured and repeated for the given Gate length or until Repeat is deactivated Large grid values crea...

Page 284: ...he repetitions never passing the original signal Gate mode is especially useful when the effect is housed in a return track You can set the output level of the device using the Volume control and appl...

Page 285: ...the modulation frequency rate is in Hertz Clicking the 20 switch multiplies the modulation frequency by 20 to achieve more extreme sounds The Feedback control determines how much of the output signal...

Page 286: ...a signal above the threshold increases by 6 dB then the output will increase by only 2 dB A ratio of 1 means no compression regardless of the threshold The Knee control adjusts how gradually or abrup...

Page 287: ...compressor tries to gure out whether to compress or not while generally considered an undesirable effect some engineers use it on full drum kits to give unusual sucking effects Careful adjustment of a...

Page 288: ...y FB is a feedback model which analyzes the output of the device and then self adjusts its compression be havior Because feedback compressors analyze signals that have already been compressed their At...

Page 289: ...ffectively bypassed Note that increasing the gain does not increase the volume of the source signal in the mix The sidechain audio is only a trigger for the compressor and is never actually heard Note...

Page 290: ...drum By inserting a compressor on the bass or master track and using the kick drum s track as the sidechain input you can help to control problematic low frequencies that might interfere with the kic...

Page 291: ...from which to receive MIDI note information With Frequency enabled the tuning of the resonance is determined by the incoming MIDI note If multiple notes are held simultaneously the Last Low switch det...

Page 292: ...hase and Spin controls de ne the relationship between these two LFOs Phase available only when the LFOs are synced to song tempo keeps both LFOs at the same frequency but can set the two LFO waveforms...

Page 293: ...ticated resonances This parameter is not used with the Pipe or Tube resonators The Material knob adjusts the variation of the damping at different frequencies At lower values low frequency components...

Page 294: ...or Tube resonators The processed signal is fed through a lowpass and highpass lter that can be controlled with an X Y controller To de ne the lter bandwidth click and drag on the vertical axis To set...

Page 295: ...ctral distribution of the distortions directing them into the higher registers or through the midrange and deeper The Drive control determines how much signal reaches the tube greater Drive yields a d...

Page 296: ...for changing a sound s timbre It extends the functionality of the former EQ Four device and is fully backward compatible with EQ Four presets The input signal can be processed using one of three mode...

Page 297: ...Mac modi er while dragging the mouse Note that the gain cannot be adjusted for the low cut notch and high cut lters In these modes vertical dragging adjusts the lter Q You can also use the numbered lt...

Page 298: ...LEDs Even if a band is turned off you can tell if there is something going on in it The internal threshold for the LEDs is set to 24 dB The frequency range of each band is de ned via two crossover co...

Page 299: ...the X axis in the X Y eld The Y axis controls the modulation amount If you hold down the Alt PC Alt Mac modi er key while clicking in the X Y eld the Y axis controls the bandwidth Note that bandwidth...

Page 300: ...Peak level indicator that shows the highest audio level attained Click on the indicators to reset them The Gain knobs next to the choosers adjust the levels going out of and back into Live These level...

Page 301: ...sure to switch back to milliseconds before changing your sample rate Note If the Delay Compensation option is unchecked in the Options menu the Latency slider is disabled For instructions on how to a...

Page 302: ...ys the signal by four 16th notes which equals one beat a quarter note of delay With Sync Mode active changing the Delay Time eld percentage value shortens and extends delay times by fractional amounts...

Page 303: ...nger contains two LFOs to modulate delay time for the left and right stereo channels The LFOs have six possible waveform shapes sine square triangle sawtooth up sawtooth down and random The extent of...

Page 304: ...r down by a user speci ed amount in Hertz Small amounts of shift can result in subtle tremolo or phasing effects while large shifts can create dissonant metallic sounds The Coarse and Fine knobs set t...

Page 305: ...t the same frequency but offsetting their waveforms relative to each other Set this to 180 and the LFOs will be perfectly out of phase 180 degrees apart so that when one reaches its peak the other is...

Page 306: ...ning of the drum while retaining the quality of the original sample Phasing To create lush phasing effects try using extremely small amounts of shift no more than about 2 Hz Note that the phasing is c...

Page 307: ...ed gate will mute the input signal A setting of 0 00 dB means that even if the gate is closed there is no effect on the signal Settings in between these two extremes attenuate the input to a greater o...

Page 308: ...ou to use a combination of sidechain and original signal as the gate s trigger With Dry Wet at 100 the gate is triggered entirely by the sidechain source At 0 the sidechain is effectively bypassed Not...

Page 309: ...ign a parameter to the X axis choose it from the parameter row below the controller To assign a parameter to the Y axis use the parameter row on the left side The Feedback parameter sets how much of t...

Page 310: ...incoming signal level has no peaks that are higher than the ceiling Limiter will have no effect The Stereo L R switch determines how Limiter treats peaks that occur on only one side of the stereo sign...

Page 311: ...incoming audio and set Live s tempo to match it You can also prede ne a loop length before recording and Live s tempo will adjust so that your loop ts into the speci ed number of bars Furthermore aud...

Page 312: ...ases everything that you ve overdubbed since the last time Overdub was enabled Your original recording and anything that was overdubbed in a previous pass is preserved After pressing Undo the button c...

Page 313: ...e recorded material plays back at Live s global tempo Set Follow song tempo Live s global tempo will be adjusted to match the tempo of material recorded into Looper Any subsequent changes to Live s gl...

Page 314: ...ngth of Looper s recording buffer Any material that you ve already recorded will simply be duplicated This allows you to for example record a series of one bar ideas and then overlay a series of two b...

Page 315: ...ct in a single track Never means that the input signal will never be heard You ll typically want to choose Never when using Looper as an effect in a return track where it may be fed by send levels fro...

Page 316: ...w be routed through the other track s device chain and then back into itself creating increasingly processed overdub layers with each pass 21 19 Multiband Dynamics The Multiband Dynamics Effect The Mu...

Page 317: ...an see from this diagram employing either type of compression results in a signal with a smaller dynamic range than the original original dynamic range smaller dynamic range downward compression commo...

Page 318: ...g In fact because the device allows for incoming audio to be divided into three frequency bands and each band has both an upper and lower threshold a single instance of Multiband Dynamics can provide...

Page 319: ...edges of the blocks on the left or right side These blocks represent the signal levels under the Below and over the Above thresholds respectively Dragging left or right on the edges of these blocks ad...

Page 320: ...uickly Multiband Dynamics responds to level changes With Peak selected the device reacts to short peaks within a signal RMS mode causes it to be less sensitive to very short peaks and to begin process...

Page 321: ...engineers are often asked to perform miracles like adding punch and energy to a mix that has already been heavily compressed and thus has almost no remaining transients Most of the time these mixes h...

Page 322: ...and drag on the horizontal axis These parameters can also be set via the slider boxes below the X Y display The Drive control sets the amount of distortion Note that 0 does not mean zero distortion To...

Page 323: ...ntrol Periodic control of the lter frequency is possible using the envelope section You can increase or decrease the envelope amount or invert its shape with negative values and then use the Attack an...

Page 324: ...he right output The delay is preceded by a lowpass and highpass lter that can be controlled with an X Y controller To de ne the lter bandwidth click and drag on the vertical axis To set the position o...

Page 325: ...t if using Ping Pong Delay in a return track Changing the delay time while Ping Pong Delay is processing audio can cause abrupt changes in the sound of the delayed signal You can choose between three...

Page 326: ...e more deconstructed the sound Downsampling is like applying a mosaic effect to an image There s a loss of information and sharp edges occur between the blocks The Downsample Mode switch de nes if the...

Page 327: ...bandpass highpass and notch The input lter frequency can be adjusted with the Frequency parameter The rst resonator is fed with both the left and right input channels while the second and fourth reso...

Page 328: ...ct the other ones Resonators II through V follow the Note parameter de ned in Resonator I but they can each be individually transposed 24 semitones using the Pitch controls and detuned in cents using...

Page 329: ...igher value can sometimes improve the source s intelligibility while a lower value may give a smoother decay Spin applies modulation to the early re ections The X Y control accesses the depth and freq...

Page 330: ...er ation will sustain almost endlessly Cut modi es Freeze by preventing the input signal from adding to the frozen reverberation when off the input signal will contribute to the diffused amplitude Fla...

Page 331: ...oming signals are rst clipped to the dB level set by the Drive control The meter on the right side of the display shows how much Saturator is in uencing the signal Signal shaping has six xed modes Ana...

Page 332: ...s from audio material that contains them Activating the Color button enables two lters The rst of these controlled with the Base control dictates how much the effect will be reduced or increased for v...

Page 333: ...elay Time eld or click in the eld and type in a value The Feedback parameter de nes how much of each channel s output signal feeds back into the delay lines inputs Internally they are two independent...

Page 334: ...f incoming audio signals The results are represented in a graph with dB along the vertical axis and frequency pitch along the horizontal The peak levels are retained on the graph until the song is res...

Page 335: ...of the display between Hertz and note names Linear scaling is particularly useful for detailed analysis of high frequencies As you move your mouse over Spectrum s display a box appears that shows the...

Page 336: ...channels of a sample If for example Left is selected the right channel is ignored and the left channel appears on both outputs This is especially useful if you have a stereo le that contains different...

Page 337: ...in a value Holding the Alt PC Alt Mac modi er while dragging vertically in the X Y display changes the frequency band s Q bandwidth The Pinch Effect section adds odd harmonics to the input signal Thes...

Page 338: ...ders work by running both the carrier and modulator signals through banks of bandpass lters The output level of each of the modulator s lters is then analyzed and used to control the volume of the cor...

Page 339: ...h tracking is generally unpredictable but can be very interesting Particularly when using external carrier sources a vocoder s output can sometimes lose a lot of high end Enabling the Enhance button r...

Page 340: ...ng The Attack and Release controls set how quickly Vocoder responds to amplitude changes in the modulator signal Very fast times preserve the transients of the modulator but can cause distortion artif...

Page 341: ...ks 6 Play the synthesizer as you speak into the microphone You ll hear the rhythm of your speech but with the timbral character and frequencies of the synthesizer To hear the vocoded signal alone solo...

Page 342: ...The Working with Instruments and Effects chapter explains the basics of using effects in Live 22 1 Arpeggiator The Arpeggiator Effect Live s Arpeggiator effect takes the individual MIDI notes from a...

Page 343: ...ginates with the musical concept of the arpeggio in which the notes comprising a chord are played as a series rather than in unison Arpeggio is derived from the Italian word arpeggiare which refers to...

Page 344: ...will play the pattern of notes at the speed set by the Rate control which can be calibrated in either milliseconds or beat time using the neighboring Sync Free button With Sync chosen Arpeggiator wil...

Page 345: ...by combining this feature with the Retrigger parameter which we will explain in a moment This can be used to create rhythmically generated arpeggios separated by pauses The Retrigger parameter resets...

Page 346: ...s allow selecting the pitch of the notes that contribute to the chord from a range of 36 semitones relative to the original Setting Shift 1 to 4 semitones and Shift 2 to 7 semitones for example yields...

Page 347: ...trols are available The length of held notes can be adjusted in milliseconds or synced in relation to the song tempo Gate de nes the percentage of the Length value that notes should be held for At 200...

Page 348: ...tive values notes below C3 will be made progressively longer and notes above C3 will be made shorter Negative values will invert this relationship 22 4 Pitch The Pitch Effect Pitch is a transposition...

Page 349: ...play at C3 and half will play at C4 But with Chance set to 50 percent Choices set to 12 and Scale set to 1 half of the resulting notes will play at C3 and half will play at one of any semitone that is...

Page 350: ...6 Scale The Scale Effect Scale alters incoming note pitch based on a scale mapping Each incoming note is given an outgoing equivalent on the X Y scale map of the effect All incoming Cs for example mi...

Page 351: ...that are shown in the display are within the range chosen by the Range and Lowest controls and are represented on the X axis The resulting curve shows how velocity is being altered by the effect If Lo...

Page 352: ...velocities and is repre sented by a gray area on the display curve The Drive and Compand controls can be combined to create more complex curves Com pand is a simultaneous expanding and compressing too...

Page 353: ...s and Effects chapter explains the basics of using instruments in Live The boxed version of Live 8 ships with the Essential Instrument Collection a multi gigabyte library of meticulously sampled and s...

Page 354: ...how analog circuits function are solved in real time Analog uses no sampling or wavetables the sound is simply calculated in real time by the CPU according to the values of each parameter This sound s...

Page 355: ...addition to the synthesis modules there is a Global section that contains general performance parameters such as instrument volume vibrato and polyphony 23 1 2 Oscillators Display and Shell Parameter...

Page 356: ...ll conform to a conventional equal tempered scale Higher or lower values change the amount of space between the notes on the keyboard At 0 the oscillator is not modulated by note pitch at all To get a...

Page 357: ...noise and includes its own 6db octave low pass lter The generator can be turned on or off via the Noise switch in the shell Its output level is adjusted by the slider to the right of this activator Th...

Page 358: ...ser is an additional control which differs between the two lters In Filter 1 the To F2 slider allows you to adjust the amount of Filter 1 s output that will be sent to Filter 2 The Slave switch below...

Page 359: ...sound with an amplitude envelope and panning All parameters can be set independently for each ampli er The Amp 1 and Amp 2 switches in the shell toggle the respective ampli er on and off while the ou...

Page 360: ...e envelope to reach the sustain level after the attack phase is set by the Decay slider The Sustain slider sets the level at which the envelope will remain from the end of the decay phase to the relea...

Page 361: ...of the envelope while a key is depressed When Off is selected the envelope plays once through all of its segments without looping With AD R selected the envelope begins with the attack and decay phase...

Page 362: ...Width values shift the waveform towards an upwards sawtooth while higher values result in a downward saw At 50 the waveform is a perfect triangle The behavior is similar with the Rect setting At 50 th...

Page 363: ...etune slider next to this switch adjusts the amount of tuning variation applied to each stacked voice Turning on the unison effect enables the two additional Unison parameters in the display The Voice...

Page 364: ...a more brilliant sound Negative values simulate negative stretch tuning upper notes become atter while lower notes become sharper The Error slider increases the amount of random tuning error applied...

Page 365: ...pendent or linked stereo resonators While the oscillators produce the initial component of the sound it is the resonator parameters that have the greatest impact on the sound s character Collision s i...

Page 366: ...tion Collision s Mallet Section The Mallet section simulates the impact of a mallet against a surface The parameters adjust the physical properties of the mallet itself Volume controls the overall out...

Page 367: ...adjusting the K Key and V Velocity sliders below the knob respectively To the right are the lter controls The type chooser allows you to choose between low pass high pass and two types of band pass lt...

Page 368: ...ided into three subsections On the left are controls related to tuning In the center are the controls that determine the physical properties of the resonant object To the right are mixer controls Each...

Page 369: ...pitch The default value of 100 means that the resonator will conform to a conventional equal tempered scale At 200 each half step on the keyboard will result in a whole step change in tuning At negat...

Page 370: ...resonators and performance by reducing the number of overtones that are calculated Basic uses minimal CPU resources while Full creates more sophisticated resonances This parameter is not used with the...

Page 371: ...partials This parameter is not used with the Pipe or Tube resonators Inharmonics can also be modulated by velocity via the slider below the knob Opening which is only available for the Pipe resonator...

Page 372: ...applied This is useful for restoring high frequencies which can often be damped when the tuning or quality are set to low values 23 2 4 LFO Tab Collision s LFOs Collision s two independent LFOs can b...

Page 373: ...d triggering a note restarts the LFO with the waveform phase set by the Offset parameter The Offset slider adjusts the phase Each LFO can modulate two targets which are set via the Destination chooser...

Page 374: ...Collision s global Volume control The Structure buttons determine whether Collision s resonators are arranged in series 1 2 or in parallel 1 2 When in series Mallet and Noise output to Resonator 1 Th...

Page 375: ...ld it is important to remember that these models allow for much more exibility than their physical counterparts While Collision can produce extremely realistic simulations of conventional mallet instr...

Page 376: ...tic changes in volume Make sure to keep output levels low when experimenting with new sounds 23 3 Drum Machines Drum Machines is a multisampled collection of classic drum computers recorded and pro gr...

Page 377: ...rack loads a combination of MIDI notes an instrument and custom effects that you can use as a starting point for your own creative work 23 4 Electric The Electric Instrument Electric is a software ele...

Page 378: ...own for a long time But releasing the key applies a damper to the fork which mutes it more quickly The Electric interface is divided into ve main sections some of which are further divided into relate...

Page 379: ...harmonics The amplitude of the tine is adjusted with the Level knob This level can be further modulated by note pitch via the Key scaling control The Tone subsection controls the secondary resonance...

Page 380: ...in turn affects the amount of distortion applied to the overall signal The Output knob controls the amount of signal output by the pickup section Different combinations of these two knobs can yield v...

Page 381: ...c and acoustic pianos and is an intrinsic part of their characteristic sound At 0 Electric will play in equal temperament which means that two notes are an octave apart when the upper note s fundament...

Page 382: ...The Audio From chooser provides options for returning the audio from the hardware synth plug in or ReWire device If you re routing to a hardware synth use this chooser to select the ports on your audi...

Page 383: ...latency in samples in order to achieve the lowest possible latency In this case be sure to switch back to milliseconds before changing your sample rate Any latency introduced by devices within Live w...

Page 384: ...d of MIDI notes Mapping can be transposed from the default by applying a Pitch device or it can be rearranged by applying a Scale device Each of the eight samples has a proprietary set of parameters l...

Page 385: ...ple by removing certain frequencies The Frequency control de nes where in the harmonic spectrum the lter is applied the Resonance control boosts frequencies near that point Filter Frequency can be mod...

Page 386: ...ffects feeding the audio chain of the track It can oftentimes make more sense to isolate the instrument or one of its individual drum samples and send this signal to a separate track Please see the Ro...

Page 387: ...t in instruments You will nd them in the Latin Percussion folder within the Drum Rack folder Latin Percussion presets are therefore loaded just like any other device by dragging a preset from the Brow...

Page 388: ...an advanced and exible synthesizer that combines the concept of frequency modulation FM with classic subtractive and additive synthesis It utilizes four multi wave form oscillators that can modulate e...

Page 389: ...tors at once via the shell and then adjust each individual oscillator s envelope waveform and other parameters in its display Operator can be folded with the triangular button at its upper left This i...

Page 390: ...tial editor The instrument is made complete with an LFO a pitch envelope and a lter section Note that lots of classic FM synthesizers create fantastic sounds without using lters at all so we suggest e...

Page 391: ...rms by drawing the amplitudes of the oscillator s harmonics You can also select one of the built in waveforms and then edit it in the same way The small display next to the Wave chooser gives a realti...

Page 392: ...hich only the timbre will vary when different notes are played but the tuning will stay the same Fixed Mode would be useful for example in creating live drum sounds Fixed Mode also allows producing ve...

Page 393: ...ally likely to produce this kind of effect since one can easily create sounds with lots of high harmonics This also means that more complex oscillator waveforms such as Saw 32 tend to be more sensitiv...

Page 394: ...d uses random numbers chosen at the rate of the LFO creating the random steps useful for typical retro futuristic sci sounds The noise waveform is simply bandpass ltered noise Tip FM synthesis can be...

Page 395: ...lope shapes can be copied and pasted from one oscillator to another in Operator using the PC Ctrl Mac context menu As mentioned above the lter and pitch envelopes also have adjustable slopes Clicking...

Page 396: ...Time parameter Envelope rates can be further modi ed by note pitch as dictated by the Time Key parameter in the global section s display The rate of an individual envelope can also be modi ed by velo...

Page 397: ...es have 24 dB slopes and are based on the lters found in some classic analog synthesizers The Envelope and Filter buttons in the lter section s display area toggle between showing the lter envelope an...

Page 398: ...example In these cases you can set Voices to 1 If Voices is set to 1 another effect occurs Overlapping voices will be played legato which means that the envelopes will not be retriggered from voice t...

Page 399: ...e pitch section of the shell Tip Whether or not spread is applied to a particular note depends upon the setting of the Spread parameter during the note on event To achieve special effects you could fo...

Page 400: ...based on a syn thesis concept that you can now explore yourself simply by playing with Operator in Live We wish you loads of fun with it 23 8 10 The Complete Parameter List The function of each Operat...

Page 401: ...to minimize high frequency distortion Disabling this modes reduces the CPU load Time Key The rates of all envelopes can be controlled by note pitch If the global Time Key parameter is set to higher va...

Page 402: ...nt Modulates the lter s envelope intensity Shaper Drive Modulates the amount of gain applied to the lter s waveshaper LFO Rate Modulates the rate of the LFO LFO Amount Modulates the intensity of the L...

Page 403: ...ts nal pitch when Glide is activated This setting has no effect if Glide is not activated Pitch Envelope to Osc Destination A D The pitch envelope affects the frequency of the respective oscillator if...

Page 404: ...g to this setting Filter Frequency Key Freq Key Filter frequency is modulated by note pitch according to this setting A value of 100 means that the frequency doubles per octave The center point for th...

Page 405: ...rols LFO Amount Mod This sets the overall intensity of the LFO Note that the actual effect also depends on the LFO envelope LFO to Osc Destination A D The LFO modulates the frequency of the respective...

Page 406: ...lating another its level has signi cant in uence on the resulting timbre Higher levels usually create bright and or noisy sounds Envelope Oscillator Switches These switches toggle the display between...

Page 407: ...w much the oscillator s level depends upon note pitch The center point for this function is C3 Envelope Display Envelope Attack Time Attack This sets the time it takes for a note to reach the peak lev...

Page 408: ...from the current level to the peak level Envelope Loop Time Time If a note is still on after the end of the decay sustain segment the envelope will start again from its initial value The time it take...

Page 409: ...lso a command to export the waveform as an ams le Play By Key This command in the PC Ctrl Mac context menu for the lter s Freq control optimizes the lter for key tracking by setting the cutoff to 466...

Page 410: ...by reducing the number of zones and sample layers used Both the Full and Lite presets use 24 bit multisamples Additionally you can Hot Swap between different quality levels of the same preset and any...

Page 411: ...e their presets with all Live users can convert their work to Simpler presets To do this PC Ctrl Mac on Sampler s title bar and choose the Sampler Simpler command Getting started with Sampler is as ea...

Page 412: ...Live automatically brings up the Device Browser to show the new presets ready to drag in sort rename or delete Note that some multisample les will be converted to Instrument Rack presets that contain...

Page 413: ...le bar and selecting Workspace 3 Click on the Browser item found at the bottom named Find Sample CDs 4 Double click the item that appears to import the CD s contents 23 10 2 Sampler s Tabs Once you be...

Page 414: ...Ctrl Mac within the sample layer list opens a context menu that offers a variety of options for sorting and displaying the layers distributing them across the keyboard and various other sample managem...

Page 415: ...ts own key zone which can span anywhere from a single key up to the full 127 A typical multisampled instrument contains many individual samples distributed into many key zones Samples are captured at...

Page 416: ...hose notes at different velocities The Velocity Zone Editor when toggled appears alongside the sample layer list Velocity is measured on a scale of 1 127 and this number range appears across the top o...

Page 417: ...ual samples are set within the Sample tab Most of this tab is dedicated to displaying the waveform of the currently selected sample Mousing over the waveform will display relevant information about th...

Page 418: ...the basic voicing of the Sampler instrument If you are unfamiliar with how envelopes work you will nd that they are well documented in Operator s Envelopes section All time based values in this tab ar...

Page 419: ...OFF The volume envelope s release stage is active but will occur within the Sustain Loop with playback never proceeding beyond Loop End Release Enabled When the volume envelope reaches its release st...

Page 420: ...rt and end points but loading large multisamples into RAM will quickly leave your computer short of RAM for other tasks In any case it is always recommended to have as much RAM in your computer as pos...

Page 421: ...values cause the envelope to move quickly at the beginning then slower Negative slope values cause the envelope to remain at for longer then move faster at the end A slope of zero is linear the envelo...

Page 422: ...p the signal passes from the shaper to the lter With the triangle pointing down it passes from the lter to the shaper The Filter Shaper Order Button The Volume Envelope The volume envelope is global a...

Page 423: ...initial phase of an LFO so that it begins at a different point in its cycle This can create hybrid LFO shapes if the LFO is retriggered before completing a cycle LFO Rate Key Key Also known as keyboar...

Page 424: ...lose or internal mic depending on the drum and its bleed into a variety of additional open microphones Each of these levels can be mixed independently For maximum realism each drum chain contains care...

Page 425: ...Session mixer Additionally the multimic presets include three return chains which also appear in the mixer and can be mixed independently Snare Bottom this chain controls the level of the ambient vibr...

Page 426: ...eplace all of the currently loaded snare components leaving all other pads alone Because Ableton s drum collections share common note mappings this works when swapping between any instruments in the S...

Page 427: ...command In this way presets created in Simpler can be further edited with Sampler s extended functionality 23 12 1 Sample View The Sample View displays the sample waveform Samples can be dragged into...

Page 428: ...When the sample s start or end points are moved Simpler will try to preserve the loop length for as long as possible by automatically adjusting the Start Loop and Length settings It is possible for g...

Page 429: ...cutoff can be decided using the envelope amount Env controls in each of these sections 23 12 5 Filter The Filter section offers classic 12 dB or 24 dB lowpass bandpass and highpass lters as well as a...

Page 430: ...h the Glide Time control Simpler also offers a special Spread parameter that creates a rich stereo chorus by using two voices per note and panning one to the left and one to the right The two voices a...

Page 431: ...by the LFO Finally the output volume of Simpler is controlled by the Volume control which can also be dependent upon note velocity as adjusted by the Velocity control Tremolo effects can be achieved b...

Page 432: ...ard version of Live but is a special feature available for purchase separately Tension features four types of excitators two types of hammer a pick and a bow an accurate model of a string a model of t...

Page 433: ...the string vibration to an ampli er In addition to these main sections a lter section has been included between the string and body sections in order to expand the sonic possibilities of the instrumen...

Page 434: ...mulate the behavior of soft hammers or mallets Hammer models a hammer that is located below the string and strikes it once before falling away This type of mechanism is found in a piano for example Ha...

Page 435: ...e location rather than changing as the length of the string changes This behavior is similar to that of a guitar where the picking position is always basically the same regardless of the notes being p...

Page 436: ...t of tune as its value increases The Damping slider adjusts the amount of high frequency content in the string s vibration Higher values result in more upper partials less damping This parameter can b...

Page 437: ...liders Rate adjusts the frequency of the pitch variation while Amount adjusts the intensity amplitude of the effect The Delay slider sets how long it will take for the vibrato to start after the note...

Page 438: ...kly The stiffness of the damper s material is adjusted with the Stiffness control Lower values simulate soft materials such as felt while higher values model a metal damper Note that very high Mass an...

Page 439: ...he Position knob serves an analogous function to the control in the Excitator section but here speci es the point on the string where the damper makes contact At 0 the damper contacts the string at it...

Page 440: ...on s Pickup Section The Pickup section models an electromagnetic pickup similar to the type found in an electric guitar or electric piano The only control here is the Position slider which functions s...

Page 441: ...increase the body size the frequency of the resonance will become lower You can further modify the body s frequency response with the Hi Cut and Low Cut knobs The decay time of the body s resonance ca...

Page 442: ...resonance frequency of the lter is adjusted with the Freq slider while the amount of resonance is adjusted with the Res control When a formant lter is chosen in the chooser the Res control cycles bet...

Page 443: ...he time it takes for the envelope to reach zero after the key is released The LFO subsection provides an additional modulation source for the lter This section can be toggled on or off via the switch...

Page 444: ...mi and Tuning controls function as coarse and ne tuners Octave transposes the entire instrument by octaves while Semi transposes up or down in semitone increments The Tuning slider adjusts in incremen...

Page 445: ...rtional to the interval between the notes Large intervals will slide slower than small intervals Disabling this switch causes the slide time to be constant regardless of interval The Time slider sets...

Page 446: ...ion The Essential Instrument Collection is installed separately from the main Live installation The various instruments on the EIC DVD are grouped into separate Live Packs that can be installed as nee...

Page 447: ...struments are included Acoustic Keyboards Grand Piano Harpsichord Celesta Electric Keyboards E Piano MK 1 B3 Jazz Organ B3 Rock Organ Orchestral Strings Solo Strings legato Double Bass Cello Viola Vio...

Page 448: ...r and Bass Banks The EIC s guitar instruments have additional banks for single key chords with strumming and the PBass instrument has a similar bank for down and up strokes played with a pick In all c...

Page 449: ...dd on product co developed with Cycling 741 allows users to extend and customize Live by creating instruments controllers audio effects and MIDI processors After installing Max for Live you will need...

Page 450: ...Max Device This launches the Max for Live application with the current device loaded and ready for editing After editing you can save your Max patch and it will automatically update any devices that...

Page 451: ...ed automatically unless they are already on Ableton s server Likewise any media les which are needed by Sets that you download are only downloaded if you do not already have them This le management ha...

Page 452: ...the size of your Set and media the upload can take some time The process happens in the background allowing you to continue working normally with Live If you quit the program while an upload is in pr...

Page 453: ...racks Dialog Note that Freezing is not always possible Group Tracks return tracks and the Master track for example cannot be frozen 25 2 Downloading Sets You can download Live Sets that other users ha...

Page 454: ...ng Sets that are in the process of transferring will display a progress bar as well as icons to pause or resume the transfer Please note that the Upload Download Browser shows the contents of your cac...

Page 455: ...ches and buttons among them the Track and Device Activator switches the Control Bar s tap tempo metronome and transport controls 3 Radio buttons A radio button selects from among a number of options O...

Page 456: ...gs solely to the Clip Launch button MIDI keys that become part of remote control assignments can no longer be used as input for MIDI tracks This is a common cause of confusion that can be easily resol...

Page 457: ...arameters to physical controls This varies of course depending upon the con guration of knobs sliders and buttons on the control surface These feature dependent con gurations are known as instant mapp...

Page 458: ...able locking PC Ctrl Mac on a device s title bar and then select your preferred controller from the Lock to context menu You ll recognize the same list of control surfaces that you de ned in the MIDI...

Page 459: ...f MIDI ports for remote mapping Live will merge their incoming MIDI signals When working with a control surface that provides physical or visual feedback you will also need to enable the Remote switch...

Page 460: ...d its new value is sent immediately to its destination parameter usually resulting in abrupt value changes Pick Up Moving the physical control has no effect until it reaches the value of its destinati...

Page 461: ...to the mapped parameter the parameter s name and the mapping s Min and Max value ranges The assigned Min and Max ranges can be edited at any time and can be quickly inverted with a PC Ctrl Mac context...

Page 462: ...ays review your mappings by entering MIDI Map Mode again 26 2 2 Mapping to MIDI Notes MIDI notes send simple Note On and Note Off messages to Live s interface elements These messages can produce the f...

Page 463: ...outside of the range turn the switch on while values inside the range turn it off For all other switches such as transport controls controller values 64 and above turn the switch on while controller v...

Page 464: ...eration is being used or not You can improve the detection process by moving the relative controller slowly to the left when you make an assignment Live will offer its suggestion in the Status Bar s m...

Page 465: ...s For details see the previous section on Relative Map Modes 3 Assign this button to launch the highlighted scene If the Record Warp Launch Preferences Select Next Scene on Launch option is checked yo...

Page 466: ...command 2 Click on the Live parameter that you wish to assign to a key Remember that only the controls that are shown with a red overlay are available for mapping 3 Press the computer key to which you...

Page 467: ...CHAPTER 26 MIDI AND KEY REMOTE CONTROL 465 computer keystrokes for use with instruments...

Page 468: ...powered on and connected to your computer s USB port you will need to select the APC40 in Live s Preferences The APC40 is one of Live s natively supported control surfaces so setup is quite easy 1 Op...

Page 469: ...ons gives you physical access to the clips in your Session View The matrix has 40 three color buttons arranged in a ve scene deep by eight track wide grid The color coding system lets you know exactly...

Page 470: ...hat s going on Amber this slot contains a clip Green this clip is playing Red this clip is recording Many aspects of the Live interface are replicated in the APC40 You can stop all music in a track wi...

Page 471: ...view of your Session View In the Session Overview each clip launch button represents a ve scene by eight track block of clips giving you a matrix of 125 scenes by 64 tracks Hit a button to focus on th...

Page 472: ...Cue Level knob controls cue volume so you can pre listen to a clip or the metronome without your audience hearing it Mixer Controls You can shift these eight tracks around the Session View using the...

Page 473: ...els on the selected parameter Four buttons below the dials give you additional control options Clip Track lets you switch between viewing the devices on a track or the properties of the clip currently...

Page 474: ...le and four global buttons access Live s functions cleaning up your screen view onstage and freeing you from the mouse in the studio Transport and Global Controls Detail View opens and closes the Clip...

Page 475: ...pan settings or send levels for whichever eight tracks are currently selected It consists of eight endless dials with LED rings and four buttons Pan Send A Send B and Send C Track Controls The button...

Page 476: ...once every beat the tempo of the Live Set will follow your tapping You can also use tapping to count in If you are working in a 4 4 signature it takes four taps to start song playback at the tapped te...

Page 477: ...g effect volume and modulation curves Crossfader In Live you can set any track as an A or B destination and then crossfade between the A and B selections Normal wear and tear can render a crossfader o...

Page 478: ...ive s MIDI Map Mode you can override the pre assigned functions of all of the APC40 s knobs faders and buttons The eight Track Control knobs can be assigned in four banks which can be switched with th...

Page 479: ...The MIDI Clock protocol also provides messages that indicate the song position With respect to MIDI Clock Live can act as both a MIDI sync master and slave MIDI Timecode MIDI Timecode is the MIDI ver...

Page 480: ...next to the Control Bar s EXT button will ash when Live is sending sync messages to external sequencers 28 1 2 Synchronizing Live to External MIDI Devices Live can be synchronized via MIDI to an exte...

Page 481: ...ize All of the usual SMPTE frame rates are available When the Rate is set to SMPTE All Live will auto detect the Timecode format of incoming sync messages and interpret the messages accordingly Note t...

Page 482: ...f audio streams The programs in a ReWire connection play distinct roles The ReWire master accesses the audio hardware and provides mixing facilities the ReWire slave s have no direct link to the audio...

Page 483: ...ire master application upon startup Therefore always start the ReWire master application rst and then start Live Likewise you will rst have to quit Live then the ReWire master application Live s opera...

Page 484: ...ill be ignored 28 2 3 More on ReWire You can nd tutorials on connecting Live to speci c ReWire master programs at the Ableton tutorial website1 The Ableton FAQ website2 is the rst place to go if you e...

Page 485: ...the CPU Load To output a continuous stream of sound through the audio hardware Live has to perform a huge number of calculations every second If the processor can t keep up with what needs to be calcu...

Page 486: ...s Note that the CPU meter takes into account only the load from processing audio not other tasks the computer performs e g managing Live s user interface Audio calculations have the highest priority i...

Page 487: ...help in managing the CPU load incurred by devices and clip settings When you select a track and execute the Freeze Track command Live will create a sample le for each Session clip in the track plus o...

Page 488: ...rb you should note that the audible result may be different once the track is again unfrozen depending on the situation This is because if a track is frozen the applied effects are not being calculate...

Page 489: ...mmand simpli es sharing projects between comput ers Computers that are a bit low on processing power can be used to run large Live Sets as long as any CPU intensive tracks are frozen This also means t...

Page 490: ...mono inputs instead of stereo inputs in the Audio Preferences Channel Con guration dialog Use RAM Mode for selected clips Reduce the number of audio channels playing by using mono samples instead of...

Page 491: ...highest quality results As mentioned above the focus of our research has been on objective that is quanti able and measurable behavior We make no claims about what you can hear because we can t possib...

Page 492: ...tions are in fact neutral it is important to remember that each of them may and almost certainly will occur within a context that also contains non neutral operations For example running an audio sign...

Page 493: ...itch Warping If the tempo of a Clip is the same as the tempo of the Set that clip will play back unstretched In this case if the Warp mode of the Clip is set to Beats Tones Texture or Re Pitch but not...

Page 494: ...eal balance between audio quality and CPU memory consumption 30 2 5 Recording external signals bit depth A D converter Recording audio signals into Live is a neutral operation provided that the bit de...

Page 495: ...hem for the duration of the frozen clip This is analogous to the behavior with unfrozen clips when playing normal clips in Session View any Arrangement automations are punched out until the Back to Ar...

Page 496: ...tion testing of the two les con rms that they are identical 30 2 9 Routing The routing of signals within Live is a neutral operation The signal at the routing destination will be identical to the sign...

Page 497: ...Complex and Complex Pro Warp modes use an entirely different technology from the algorithms behind Beats Tones and Texture modes Although the Complex modes may sound better particularly when used with...

Page 498: ...written for Live 7 and now results in considerably lower distortion than in previous versions 30 3 3 Volume Automation Automation of volume level results in a change in gain which is necessarily a non...

Page 499: ...ng an unprocessed 16 bit audio le at 32 bits will not increase the sound quality 30 3 7 Consolidate Consolidating clips in the Arrangement View creates new audio les which are non neutral in compariso...

Page 500: ...list of recommended practices and program settings Decide which sample rate to use for a project prior to beginning work rather than changing the sample rate while working on the project Record audio...

Page 501: ...actly how audio is affected when performing various procedures in Live Our focus has been on functions that have proven over the years to cause confusion or uncertainty and the list of both neutral an...

Page 502: ...generally not applicable to users with high quality audio and MIDI hardware If you have already invested time and money into optimizing these factors in your studio and are not experiencing problems...

Page 503: ...piano 31 2 MIDI Timing Problems The realities of computer based MIDI are complex and involve so many variables that the ideal systems described above are impossible to achieve There are two fundament...

Page 504: ...t positions in the timeline of a Live Set Live needs to know exactly when those events were received from the MIDI keyboard But Live cannot receive them directly they must rst be processed by the MIDI...

Page 505: ...are is processed by the hardware as soon as it arrives rather than according to a schedule Additionally MIDI cables are serial meaning they can only send one piece of information at a time In practice...

Page 506: ...new audio clip in Live In an ideal system each event in the MIDI clip would occur simultaneously with the corresponding event in the audio clip Thus the difference in timing between the MIDI and audio...

Page 507: ...d between 4 and 11 ms For all other tests the maximum jitter was 5 ms In all tests the majority of the jitter occured at 1 ms Interface B For most of the tests the maximum jitter was 4 or 5 ms At 44 1...

Page 508: ...if you are recording MIDI while listening directly to a hardware device such as an external synthesizer as opposed to listening to the device s audio through Live via the External Instrument device L...

Page 509: ...s to use the highest quality hardware components available For users of such components all software MIDI systems should perform with no noticeable issues For users with less than optimal hardware how...

Page 510: ...on Arrangement View Toggle Track Clip View or F12 or Ctrl F12 Hide Show Detail View Ctrl Alt L or F12 Alt L or Ctrl F12 Hide Show Info View Hide Show Browser Ctrl Alt B Alt B Hide Show Overview Ctrl A...

Page 511: ...e menu Alt F for File for instance While a menu is open you can use to navigate the menu items to open the neighboring menu Return to choose a menu item 32 3 Adjusting Values Windows Macintosh Increme...

Page 512: ...rn Return Load Selected Item from Browser Return or Double Click Return or Double Click Preview Selected File Return Return Activate Browser Search Mode Ctrl F F Jump to Search Results 32 5 Transport...

Page 513: ...Undo Ctrl Z Z Redo Ctrl Y Z Rename Ctrl R R Select All Ctrl A A By holding down an additional modi er key some of the above commands can also be applied to Windows Macintosh Clips and Slots Across al...

Page 514: ...oop Ctrl Select Material in Loop Click Loop Brace or Ctrl L Click Loop Brace or L 32 8 Session View Commands See also the editing commands Windows Macintosh Launch Selected Clip Slot Return Return Sel...

Page 515: ...ngement View See also the editing commands Windows Macintosh Split Clip at Selection Ctrl E E Consolidate Selection into Clip Ctrl J J Create Fade Crossfade Ctrl Alt F Alt F Loop Selection Ctrl L L In...

Page 516: ...group Tracks Ctrl G G Show Grouped Tracks Hide Grouped Tracks Move Nonadjacent Tracks Without Collapsing Ctrl arrow keys arrow keys Arm Solo Multiple Tracks Ctrl Click Click Add Device from Browser Do...

Page 517: ...Mode Ctrl K K Computer MIDI Keyboard Ctrl K K 32 13 Zooming Display and Selections Windows Macintosh Zoom In Zoom Out Drag Click to Append to a Selection Click to Add Adjacent Clips Tracks Scenes to...

Page 518: ...t Marker 32 15 Clip View MIDI Editor The shortcuts for zooming snapping drawing and loop region settings also work in the MIDI Editor Windows Macintosh Quantize Ctrl U U Quantize Settings Ctrl U U Scr...

Page 519: ...Widen Grid Ctrl 2 2 Triplet Grid Ctrl 3 3 Snap to Grid Ctrl 4 4 Fixed Zoom Adaptive Grid Ctrl 5 5 Bypass Snapping While Dragging Alt 32 17 Global Quantization Windows Macintosh Sixteenth Note Quantiza...

Page 520: ...t MIDI le Ctrl E E 32 19 Working with Plug Ins and Devices Windows Macintosh Show Hide Plug In Windows Ctrl Alt P Alt P Open Second Multiple Windows with Plug In Edit Button Ctrl Open Mac Keystroke Pl...

Page 521: ...ontain applicable settings from the Preferences You should change these options with care as they will affect not only the currently selected item but the general settings of the program Some commands...

Page 522: ...s in 112 analysis of les batch processing 44 Analyze Audio command 44 APC40 466 Arm Recording button 187 199 Arpeggiator effect 340 and grooves 342 Arrangement see Arrangement View Arrangement Overvie...

Page 523: ...me ruler and Arrangement editing 74 and editing envelopes 267 and editing MIDI 137 in the MIDI Editor 138 Beats Mode 131 Bit Depth preference 207 bookmarks 34 breakpoint envelopes see automation see c...

Page 524: ...on View 90 Live Clips 51 MIDI clips 19 renaming 102 reversing 114 saving samples on export 68 saving settings for 112 setting properties of 98 Close All Folders command 33 Collect Samples on Export 68...

Page 525: ...te Locator button 77 Delete Locator command 77 Delete Time command in the Arrangement 86 in the MIDI Editor 144 Delete Time Signature Change command 78 Demo Sets 13 Detune eld 111 Device Activator swi...

Page 526: ...ort Audio Video 44 Export MIDI Clip command 50 exporting audio see Export Audio Video exporting video see Export Audio Video External Audio Effect 298 and real time freezing 485 and real time renderin...

Page 527: ...rooves 149 and Impulse 382 and Simpler 425 I I O see routing importing les 39 importing projects 64 Impulse instrument 381 and individual outputs 384 and MIDI 382 lter 383 global controls 384 Link but...

Page 528: ...in the Arrangement 80 with clips 109 Loop Selection command 80 Loop Start Punch In Position elds 80 Loop switch Clip View 108 267 268 Control Bar 80 with MIDI clips 140 Loop To Next Locator command 78...

Page 529: ...479 MIDI Timecode Start Offset preference 479 MIDI Track In Indicator 170 MIDI Track Out Indicator 170 MIDI tracks see tracks Minimum Free Space preference 42 mixer 22 185 Mixer Section selector 186...

Page 530: ...chooser buttons Pitch effect 346 Play button 75 plug ins using see devices Plug In Buffer Size preference 223 Plug In Con gure Mode 221 Plug In Device Browser 218 Plug In Device Browserselector 218 Pl...

Page 531: ...4 registration see Ableton remote control see mapping to MIDI keys Rename command in the Browser 40 with clips 102 with locators 77 with plug ins 225 with tracks 189 Repeat Mode 156 resampling 172 see...

Page 532: ...As command 52 Save command 52 Save Current Set as Default button 54 Save Default Clip button 43 112 Save Live Set to Web command 52 449 Scale effect 348 Scene Launch button 91 Scene Select eld 463 Sc...

Page 533: ...ce 332 Split button 136 Split command 87 Start Recording on Scene Launch 202 start end markers 107 step recording 204 Stop All Clips button 97 Stop button 75 swing see groove feature Sync Delay prefer...

Page 534: ...ing 82 84 253 Transient Envelopes 131 Transient Loop Mode 131 transport 75 Transpose quick chooser button see quick chooser buttons Transposition knob 111 Trigger Mode 156 Triplet Grid command 85 tuto...

Page 535: ...ume quick chooser button see quick chooser buttons VST Plug ins using see devices VST Plug In Custom Folder button 223 W Warp BPM From Here command 129 Warp As Bar Loop command 128 Warp From Here Star...

Reviews: