


Chapter 9 WAN
NBG7815 User’s Guide
85
IPv4 / IPv6
Select
IPv4 O nly
if you want the NBG7815 to run IPv4 only.
Select
Dua l Sta c k
to allow the NBG7815 to run IPv4 and IPv6 at the same time.
PPPoE Username
Type the user name given to you by your ISP.
Password
Type the password associated with the user name above.
MTU Size
Enter the Maximum Transmission Unit (MTU) or the largest packet size per frame that your
NBG7815 can receive and process.
Service Name
Enter the PPPoE service name specified in the ISP account.
DNS Server
First DNS Server
Second DNS Server
Third DNS Server
Select
Use r- De fine d
if you have the IP address of a DNS server. Enter the DNS server's IP
address in the field to the right.
Select
No ne
if you do not want to configure DNS servers. If you do not configure a DNS server,
you must know the IP address of a computer in order to access it.
WAN IP Address Assignment
Obtained from ISP
Select this option If your ISP did not assign you a fixed IP address. This is the default selection.
Fixed IP
Select this option and enter your WAN IP address if the ISP assigned a fixed IP address.
WAN MAC Address
The MAC address section allows users to configure the WAN port's MAC address by using the NBG7815’s MAC
address, copying the MAC address from a computer on your LAN or manually entering a MAC address.
Factory Default
Select
Fa c to ry de fa ult
to use the factory assigned default MAC Address.
Clone My
Computer’s MAC
Address
Select
C lo ne the c o m pute r's MAC a ddre ss - IP Addre ss
and enter the IP address of the
computer on the LAN whose MAC you are cloning.
Set WAN MAC
Address
Select this option and enter the MAC address you want to use.
IPv6 Address
This section is NOT available when you select
IPv4 O nly
in the
IPv4/ IPv6
field.
Automatic IP
(DHCP)
Select this option if you want to obtain an IPv6 address from a DHCPv6 server.
•
Select
DUID- LL (De fa ult)
to have the NBG7815 use DUID-LL (DUID Based on Link-layer
Address) for identification when exchanging DHCPv6 messages.
•
Select
DUID- LLT
to have the NBG7815 use DUID-LLT (DUID Based on Link-layer Address Plus
Time) for identification when exchanging DHCPv6 messages.
Static IP Address
Select this option if you have a fixed IPv6 address assigned by your ISP.
IPv6 Address
Enter the IPv6 address assigned by your ISP.
Prefix length
Enter the address prefix length to specify how many most significant bits in an IPv6 address
compose the network address.
Gateway
Enter the IPv6 address of the next-hop gateway. The gateway helps forward packets to their
destinations.
Link Local Only
Select this option to use the link-local address which uniquely identifies a device on the local
network (the LAN).
IPv6 DNS Server
This section is NOT available when you select
IPv4 O nly
in the
IPv4/ IPv6
field.
First DNS Server
Second DNS Server
Third DNS Server
Select
Use r- De fine d
and enter the IPv6 DNS server address assigned by the ISP to have the
NBG7815 use the IPv6 DNS server addresses you configure manually.
Select
No ne
if you do not want to configure DNS servers. If you do not configure a DNS server,
you must know the IPv6 address of a computer in order to access it.
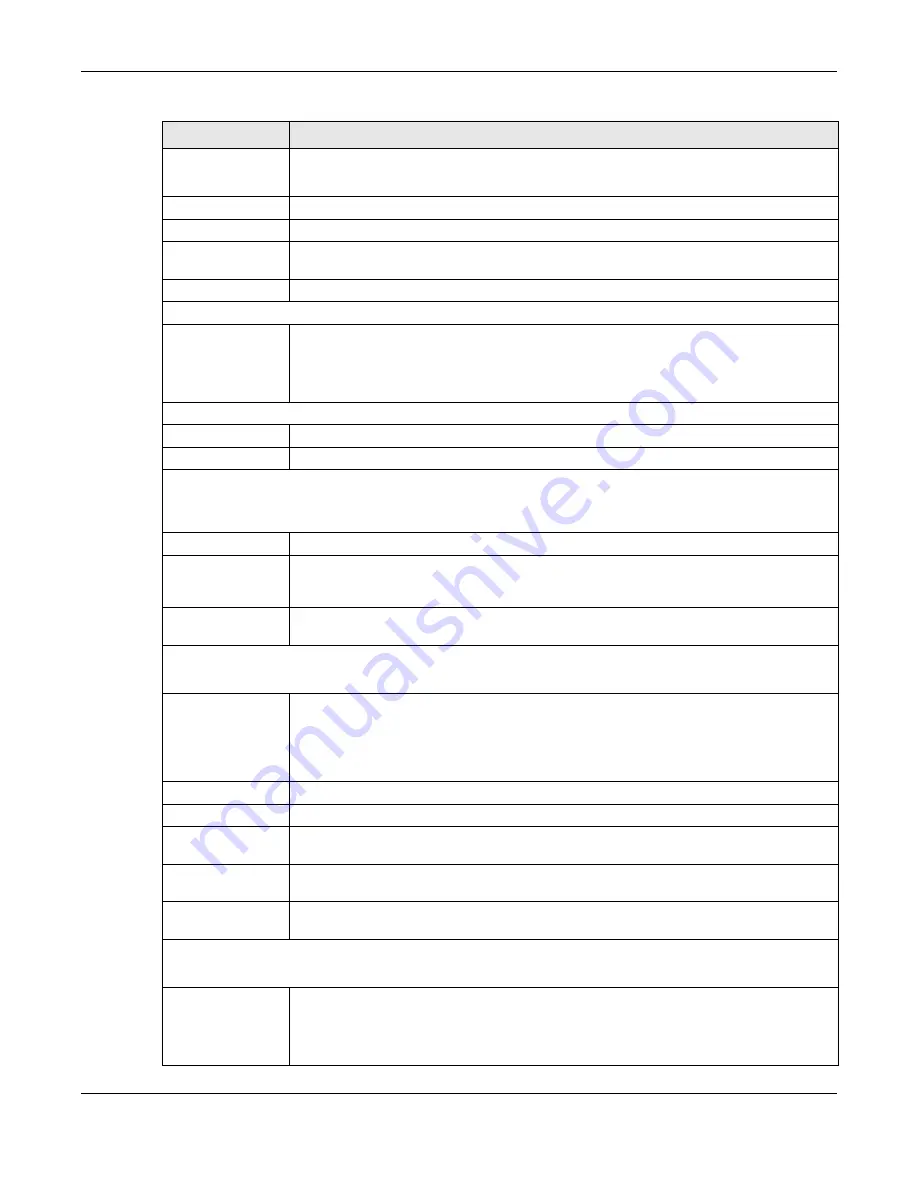
Table 23 Network > WAN > Internet Connection: PPPoE Encapsulation (continued)
LABEL
DESC RIPTIO N
Содержание ARMOR G5
Страница 10: ...10 PART I Use r s Guide...
Страница 29: ...Chapter 3 The Web Configurator NBG7815 User s Guide 29 Figure 8 Overview Standard Mode...
Страница 46: ...Chapter 7 Tutorials NBG7815 User s Guide 46...
Страница 55: ...Chapter 7 Tutorials NBG7815 User s Guide 55...
Страница 56: ...56 PART II T e c hnic al Re fe re nc e...
Страница 77: ...Chapter 8 Applications NBG7815 User s Guide 77 5 Once you log in the USB device displays in the usb1 folder...
Страница 99: ...Chapter 9 WAN NBG7815 User s Guide 99 2 Click Change Advanc e d Sharing Se ttings...
Страница 102: ...Chapter 9 WAN NBG7815 User s Guide 102 2 Click Ne twork and Sharing Ce nte r 3 Click Change advanc e d sharing se ttings...
Страница 109: ...Chapter 10 Wireless LAN NBG7815 User s Guide 109 Figure 57 Settings WiFi Main WiFi...
Страница 118: ...Chapter 11 LAN NBG7815 User s Guide 118 Figure 65 Settings LAN LAN IP Standard Mode...
Страница 134: ...Chapter 13 System NBG7815 User s Guide 134 Figure 76 Settings System Status Standard Mode...