


Chapter 8 Applications
NBG7815 User’s Guide
64
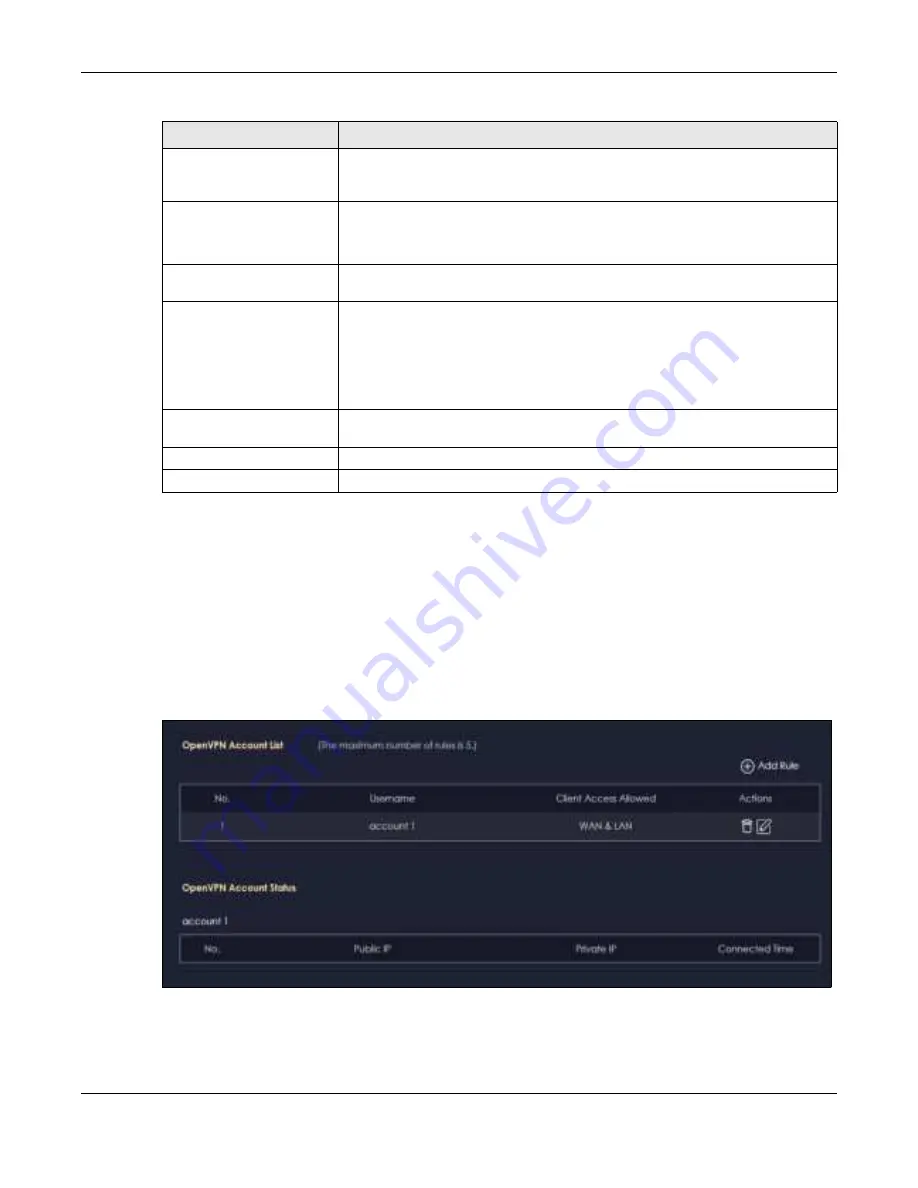
8.3.2 O pe nVPN Ac c o unt Sc re e n
Use the
O pe nVPN Ac c o unt List
screen to view the basic information of the NBG7815 OpenVPN server.
Use the
O pe nVPN Ac c o unt Sta tus
screen to view the basic information of clients that are connected to
the NBG7815 OpenVPN server
Note: At the time of writing, up to 16 OpenVPN clients can connect to the NBG7815
OpenVPN server at the same time.
Fig ure 26
OpenVPN Account
Server Port
The default server port number is 1194. You can change it if needed. However,
clients connected to this OpenVPN Server account will have to use the same port
number in order to access the server account.
VPN Subnet/ Netmask
The fields define the network form which OpenVPN clients can connect to the
NBG7815 OpenVPN server.
Enter an IPv4 address and subnet mask.
Advertise DNS to Clients
Select
Ena b le
if you want the NBG7815 to broadcast its OpenVPN server to
OpenVPN clients in its VPN network defined previously.
Key Setting
Click the
C ha ng e Ke y
button if you want to change the key your clients use to
access to your OpenVPN Server account.
You do not need to click Change Key the first time to configure this screen.
Periodically changing the key is recommended, but you must export the new .opvn
configuration file and send it to all OpenVPN clients so that they can they use the
new key.
Export Config
Click
Exp o rt C o nfig
to export your configuration to an .ovpn file that OpenVPN
clients need to connect to the NBG7815 OpenVPN server.
Apply
Click
Apply
to save your changes back to the NBG7815.
Cancel
Click
C a nc e l
to begin configuring this screen afresh.
Table 12 OpenVPN Server
LABEL
DESC RIPTIO N
Содержание ARMOR G5
Страница 10: ...10 PART I Use r s Guide...
Страница 29: ...Chapter 3 The Web Configurator NBG7815 User s Guide 29 Figure 8 Overview Standard Mode...
Страница 46: ...Chapter 7 Tutorials NBG7815 User s Guide 46...
Страница 55: ...Chapter 7 Tutorials NBG7815 User s Guide 55...
Страница 56: ...56 PART II T e c hnic al Re fe re nc e...
Страница 77: ...Chapter 8 Applications NBG7815 User s Guide 77 5 Once you log in the USB device displays in the usb1 folder...
Страница 99: ...Chapter 9 WAN NBG7815 User s Guide 99 2 Click Change Advanc e d Sharing Se ttings...
Страница 102: ...Chapter 9 WAN NBG7815 User s Guide 102 2 Click Ne twork and Sharing Ce nte r 3 Click Change advanc e d sharing se ttings...
Страница 109: ...Chapter 10 Wireless LAN NBG7815 User s Guide 109 Figure 57 Settings WiFi Main WiFi...
Страница 118: ...Chapter 11 LAN NBG7815 User s Guide 118 Figure 65 Settings LAN LAN IP Standard Mode...
Страница 134: ...Chapter 13 System NBG7815 User s Guide 134 Figure 76 Settings System Status Standard Mode...