wc_tx004029gb_FM10.fm
69
Rammer
Disassembly and Reassembly
Continued from the previous page.
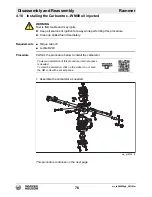
2. Use a piece of air hose
(g)
or similar, wrap it around inside the folds of the
bellows.
Note: This will keep the bellows from collapsing and aid in installation.
3. Set the lower clamp
(e)
in place.
4. Set the bellows
(d)
on the protective pipe
(f)
as square as possible.
5. Set the upper clamp
(c)
in place.
6. Set the cylinder guide
(a)
onto the bellows as square as possible.
7. With a strong push, slam the cylinder guide into the bellows and the bottom of
the bellows onto the protective pipe.
8. Remove air hose from the folds of the bellows.
9. Partially tighten the upper and lower clamp onto the bellows.
10.Install a new O-ring
(b)
.
This procedure continues on the next page.
wc_gr012849
a
f
b
g
d
e
c
Содержание BS 50-4s, BS 50-4As
Страница 1: ...Repair Manual Vibratory Rammer 5100018465 01 1015 5 1 0 0 0 1 8 4 6 5 EN...
Страница 6: ...wc_tx004061gb_FM10 fm 6 Rammer Foreword...
Страница 10: ...Table of Contents Rammer wc_br5100018465_FM10TOC fm 10...
Страница 180: ...wc_td000553gb_FM10 fm 180 Rammer Technical Data Notes...
Страница 192: ......
Страница 193: ......


