background image

Also note that your Macro Controls will be modulatable if, and only if, their target parameters
are  themselves  modulatable.  For  more  information  on  Macro  Controls  please  refer  to  section

7.3, Creating Custom Sets of Parameters with the Macro Controls

.

6.4.2

Recording Modulation


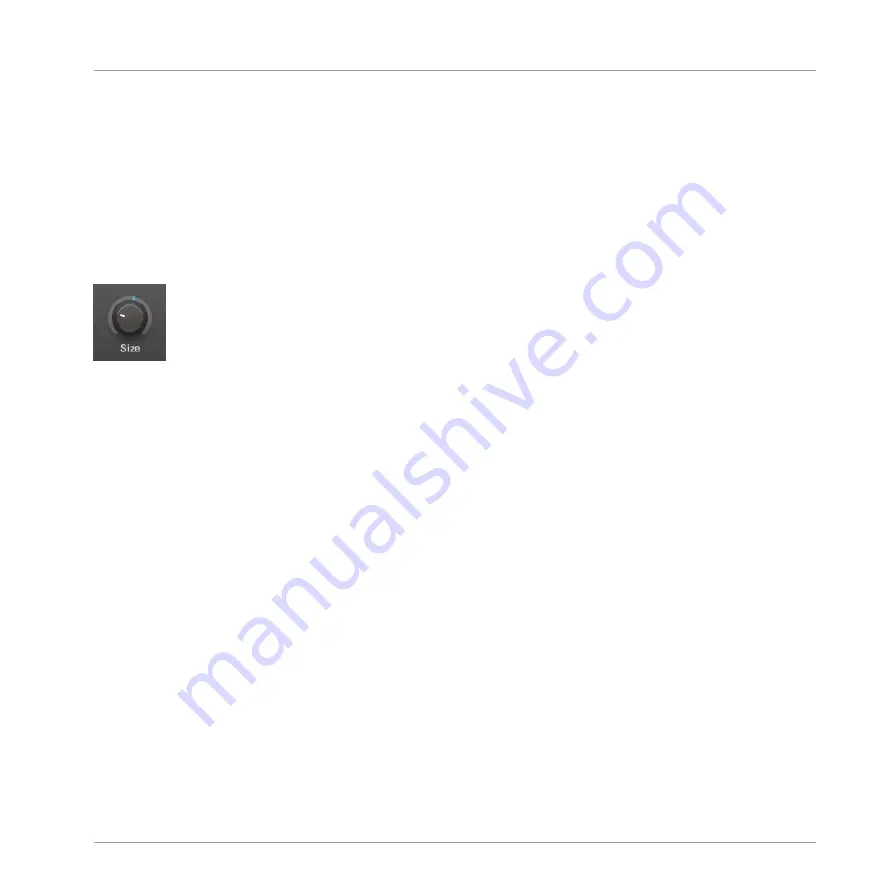
In the software in Arrange view, if you take a closer look at the knobs in the Parameter pages

of the Control area you will notice they have an outer ring that changes its color to light grey as

soon as you hover over it with the cursor.

Drag the outer ring of the knobs to record modulation.

To record modulation for a knob in real time, click its outer ring and then drag it up and
down during playback.

Your movement are recorded into the Pattern and will be recalled as the playback is loop-
ed.

As soon as you create modulation for a parameter, the following happens:

On the outer ring of the knob, the colored section (usually indicating the current parameter
value) is replaced by a little segment indicating the modulated value. During playback this
little segment follows the movement you have just recorded. The non-modulated value of
the parameter is still indicated by the little white segment on the knob itself. Since modu-
lation is defined relative to this non-modulated value, you can turn the knob to define the
reference value from which the recorded modulation will deviate.

A modulation track is created for this parameter in the Modulation pane of the Control area
(at the bottom of the Pattern Editor) containing the modulation points you have just record-
ed. You can further edit the modulation track from there — see section 

6.4.3, Creating

and Editing Modulation in the Control Lane

.

Removing Modulation

You can also use the outer ring to remove the entire modulation for the knob:

Working with Patterns

Recording and Editing Modulation


MASCHINE 2 - Manual - 253

Содержание Maschine

Страница 1: ...MANUAL...

Страница 2: ...ociated logos are registered trademarks of Native Instru ments GmbH Mac Mac OS GarageBand Logic iTunes and iPod are registered trademarks of Apple Inc registered in the U S and other countries Windows...

Страница 3: ...et Boulevard 5th Floor Los Angeles CA 90028 USA www native instruments com NATIVE INSTRUMENTS K K YO Building 3F Jingumae 6 7 15 Shibuya ku Tokyo 150 0001 Japan www native instruments co jp NATIVE INS...

Страница 4: ...etting the Focus on a Group or a Sound 31 2 3 2 Switching Between the Master Group and Sound Level 35 2 3 3 Navigating Channel Properties Plug ins and Parameter Pages in the Control Area 35 2 3 4 Undo...

Страница 5: ...2 7 2 Joining and Leaving a Link Session 81 3 Browser 83 3 1 Browser Basics 83 3 1 1 The MASCHINE Library 83 3 1 2 Browsing the Library vs Browsing Your Hard Disks 84 3 2 Searching and Loading Files...

Страница 6: ...orting Files from Your File System 122 3 6 1 Overview of the FILES Pane 122 3 6 2 Using Favorites 124 3 6 3 Using the Location Bar 125 3 6 4 Navigating to Recent Locations 126 3 6 5 Using the Result L...

Страница 7: ...oups 157 4 3 4 Changing the Group s Color 157 4 3 5 Saving Groups 159 4 3 6 Copying and Pasting Groups 161 4 3 7 Moving Groups 163 4 3 8 Deleting Groups 164 4 4 Exporting MASCHINE Objects and Audio 16...

Страница 8: ...ing Plug in Presets 197 5 1 9 3 Removing a Default Plug in Preset 197 5 2 The Sampler Plug in 198 5 2 1 Page 1 Voice Settings Engine 200 5 2 2 Page 2 Pitch Envelope 201 5 2 3 Page 3 FX Filter 204 5 2...

Страница 9: ...2 1 Step Mode Basics 236 6 3 Editing Events 237 6 3 1 Editing Events with the Mouse an Overview 237 6 3 2 Creating Events Notes 241 6 3 3 Selecting Events Notes 242 6 3 4 Editing Selected Events Notes...

Страница 10: ...rns 279 7 Audio Routing Remote Control and Macro Controls 288 7 1 Audio Routing in MASCHINE 289 7 1 1 Sending External Audio to Sounds 290 7 1 2 Configuring the Main Output of Sounds and Groups 295 7...

Страница 11: ...rips 348 8 2 4 Managing Your Channels in the Mixer 349 8 2 5 Adjusting Settings in the Channel Strips 351 8 2 6 Using the Cue Bus 355 8 3 The Plug in Chain 357 8 4 The Plug in Strip 358 8 4 1 The Plug...

Страница 12: ...ck Rasper 390 9 2 6 Kick Snappy 391 9 2 7 Kick Bold 393 9 2 8 Kick Maple 395 9 2 9 Kick Push 396 9 3 The Snares 398 9 3 1 Snare Volt 400 9 3 2 Snare Bit 402 9 3 3 Snare Pow 404 9 3 4 Snare Sharp 405 9...

Страница 13: ...447 9 7 The Cymbals 451 9 7 1 Cymbal Crash 453 9 7 2 Cymbal Ride 455 10 Using Effects 458 10 1 Applying Effects to a Sound a Group or the Master 458 10 1 1 Adding an Effect 458 10 1 2 Other Operations...

Страница 14: ...80 11 1 2 Gate 483 11 1 3 Transient Master 486 11 1 4 Limiter 488 11 1 5 Maximizer 491 11 2 Filtering Effects 494 11 2 1 EQ 494 11 2 2 Filter 496 11 2 3 Cabinet 500 11 3 Modulation Effects 501 11 3 1...

Страница 15: ...ortion Effects 528 11 6 1 Distortion 528 11 6 2 Lofi 529 11 6 3 Saturator 531 11 6 4 Analog Distortion 534 11 7 Perform FX 535 11 7 1 Filter 536 11 7 2 Flanger 538 11 7 3 Burst Echo 540 11 7 4 Reso Ec...

Страница 16: ...2 6 Naming Scenes 579 12 2 7 Changing the Scene s Color 581 12 2 8 Moving Scenes 582 12 2 9 Clearing Scenes 584 12 2 10 Duplicating Scenes 584 12 2 10 1 Scene Linking Basics 585 12 2 10 2 Duplicating...

Страница 17: ...Your Recorded Samples 611 13 3 Editing a Sample 612 13 3 1 Using the Edit Page 612 13 3 2 Audio Editing Functions 616 13 4 Slicing a Sample 619 13 4 1 Opening the Slice Page 620 13 4 2 Adjusting the S...

Страница 18: ...rd 688 14 8 Adjusting the Settings for Your Keyboard in the MASCHINE Preferences 692 14 9 Arp Hold Mode 694 14 10 Support for KOMPLETE KONTROL S88 695 15 Troubleshooting Getting Help 696 15 1 Troubles...

Страница 19: ...ne Mode and Tweak the Loop Range 702 16 2 3 Create Variations of Your Drum Patterns in the Step Sequencer 702 16 2 4 Use Note Repeat 702 16 2 5 Set Up Your Own Multi effect Groups and Automate Them 70...

Страница 20: ...without ever having to stop the music Since you can integrate it into any sequencer that supports VST AU or AAX plug ins you can reap the benefits in almost any software setup or use it as a stand al...

Страница 21: ...o date and localized versions of these documents You can start the Service Center by se lecting Launch Service Center from the Help menu in the Application Menu Bar or from the Help submenu in the MAS...

Страница 22: ...E Project the quick access options performed using the MASCHINE hardware controller and lots of key board shortcuts Controller Editor Manual Besides using your MASCHINE hardware controller together wi...

Страница 23: ...f information can be expected The speech bubble icon indicates a useful tip that may often help you to solve a task more efficiently The exclamation mark icon highlights important information that is...

Страница 24: ...omputer s keyboard you ll find put in square brackets e g Press Shift Enter Single instructions are introduced by this play button type arrow Results of actions are introduced by this smaller arrow Na...

Страница 25: ...fect presets and Samples Each of these can be stored and tagged in a way that allows you easy access to all of them MASCHINE s factory library is already completely tagged as well as factory libraries...

Страница 26: ...mixed The Master channel can also host any number of insert effects of its own these effects are applied to all Groups and the Sounds within them More information on the Master can be found in chapter...

Страница 27: ...ins process the audio in series ac cording to the order in which they are stacked up Refer to chapter 5 Working with Plug ins Effect MASCHINE comes with many different effects in the form of Internal...

Страница 28: ...you can select one of four different sizes to display MASCHINE s software GUI The View menu in the Application Menu Bar Windows depicted The View submenu in the MASCHINE menu Full screen view is also...

Страница 29: ...ader You can also show hide the Browser from your computer keyboard via the F4 function key 2 2 3 Switching between Arrange View and Mix View Click the Mix View button at the top left of the Arranger...

Страница 30: ...the arrow button at the bottom left of the Mixer to show and hide the channel de tails in the Mixer Minimizing maximizing the Mixer 2 2 5 Showing Hiding the Control Lane When MASCHINE is in Arrange vi...

Страница 31: ...or Group you first need to put it in focus Setting the focus on a Sound or Group is slightly different than selecting it The focus defines what will be displayed whereas the selection defines what wi...

Страница 32: ...and Groups in focus in Mix view please refer to chapter 8 2 3 Selecting Channel Strips Setting the Focus on a Group To put a Group in focus click this Group in the Group List of the Arranger The focu...

Страница 33: ...ile hovering the Arranger to display any hidden Groups You can also extend the Arranger by dragging its lower right corner verti cally with the mouse You can also select multiple Groups at once to app...

Страница 34: ...nger see above The focused Group is highlighted The Pattern Editor displays the Sounds and Patterns of that Group 2 Click the desired Sound slot in the Sound List of the Pattern Editor The focused Sou...

Страница 35: ...o display the Plug in parameters or Channel properties of the Master the focused Group or the focused Sound respectively The selected tab lights up The name of your Project the focused Group or the fo...

Страница 36: ...el Properties 1 At the far left of the Control area click the Channel icon showing a little knob to display the Channel properties The button lights up The Channel Property selector appears in the lef...

Страница 37: ...e section 5 1 3 Loading Removing and Replacing a Plug in for more on this Navigating Parameter Pages In some situations the selected Plug in or Channel properties provide more parameters than the disp...

Страница 38: ...the Parameter area two small ar rows are displayed on the left to click through the pages Click the left or right arrow to access additional pages Adjusting the Parameters In the Parameter area each p...

Страница 39: ...operations you have performed or to compare two versions before and after a change You can undo nearly everything you did after loading or creating your Project Note If you save your Project you will...

Страница 40: ...he undo function 64 times in a row This is what Take Undo has been made for Take Undo Redo is an extended undo redo available while recording that allows you to cancel or re execute a whole group of a...

Страница 41: ...and tweak other controls more easily For this purpose MASCHINE lets you pin or lock temporary modes so that they behave like perma nent modes 2 3 6 Using Two or More Hardware Controllers If two or mor...

Страница 42: ...ance and press the jog wheel or Button 8 to load it MASCHINE MK2 controller Press SHIFT STEP turn Knob 5 or press Button 5 6 to select the desired instance and press Button 8 to load it MASCHINE MIKRO...

Страница 43: ...Library when you start MASCHINE for the first time after installing the instrument except KONTAKT instruments with NKS support see below The folders containing the preset files for NKS support can be...

Страница 44: ...d in the folder Do not delete or move the folder afterwards otherwise MASCHINE and KONTAKT will not be able to access the instrument files 2 4 2 Loading NKS and Third party Plug ins from the Plug in M...

Страница 45: ...y plug ins For more information on using Plug ins and accessing the plug in menu please refer to chapter 6 Working with Plug ins in the MASCHINE manual 2 5 Stand Alone and Plug in Mode You can run the...

Страница 46: ...ignature fields are grayed out and inactive in the MASCHINE Header Obviously you cannot control MASCHINE s playback and tempo settings from your MASCHINE controller either However from your controller...

Страница 47: ...le CPU wise In contrast to the stand alone applica tion they are always synced to the host In plug in mode you can also send MIDI Program Change messages from your host to switch between MASCHINE s Sc...

Страница 48: ...the File menu of the Application Menu Bar Windows depicted and in the File submenu of the MA SCHINE menu The following pages are available in the Preferences panel General see 2 6 1 Preferences Genera...

Страница 49: ...neral Page The General page holds a few global settings To display the General page click the General tab on the left of the Preferences panel The Preferences General page Basic Concepts Preferences M...

Страница 50: ...udio interface your MIDI interface and the Latency value you selected in the Audio and MIDI Settings panel see MISSING LINK you may experience a lack of synchronization between MASCHINE and the extern...

Страница 51: ...nome by clicking the Metronome button in the MASCHINE Header see section Using the Metronome Auto Enable when Recording Auto Enable option automatically turns on the metronome when you start recording...

Страница 52: ...ion applied while recording When recording all events are quantized to the closest step possibly ahead of the event When playing on the other hand events occurring in the first half of the steps are l...

Страница 53: ...OS X or File menu Windows of the Application Menu Bar or in the File sub menu of the MASCHINE menu 2 Click the Allow usage data tracking checkbox to enable or disable user data tracking Usage Data Tr...

Страница 54: ...the Audio page click the Audio tab on the left of the Preferences panel Preferences Audio page Setting Description Interface Driver Select your audio driver here Basic Concepts Preferences MASCHINE 2...

Страница 55: ...the latency of your audio interface in samples Lower values result in a more immediate playing response but are heavier on both the CPU and the audio driver and may result in audible clicks and pops...

Страница 56: ...d when sampling external sources for example Outputs By clicking Outputs you will be presented with a list of the 16 stereo outputs from MASCHINE In the right column you can assign them to the outputs...

Страница 57: ...The Preferences MIDI page Basic Concepts Preferences MASCHINE 2 Manual 57...

Страница 58: ...as a drum machine another groovebox or sequencer or even another software sequencer Please note that the Slave Receive Clock option is not available when LINK is active For more information on Link s...

Страница 59: ...licking the fields in the Status column which displays the current status of the corresponding port If you want MASCHINE to send other MIDI messages than MIDI Clock in particular if you want to contro...

Страница 60: ...The Preferences Default page Basic Concepts Preferences MASCHINE 2 Manual 60...

Страница 61: ...Audio Workstation The field displays the location of the Template Project selected for use Click the folder icon to select another Template Project Any Project file can be used as a template this can...

Страница 62: ...lick the check box to enable Link when Duplicating Pattern Length Bars Here you can define the default length of new Patterns The length is measured in bars beats 16ths To adjust the value click the d...

Страница 63: ...you to switch between the Factory pane and the User pane Factory Pane To display the Factory pane click the Factory button at the top of the Library page The Preferences panel the Library page s Fact...

Страница 64: ...ach library If you have moved any library to another location on your computer click the folder icon on the left of that library and select its new path Product column Shows the name of each product T...

Страница 65: ...ws all user libraries currently used These include MASCHINE s standard user directory as well as any other user directory you might have defined These libraries will appear in the User view of the Bro...

Страница 66: ...e the selected user library Files will only be removed from the MASCHINE Browser not from your hard disk Rescan button If you have made any change to a library e g added removed files select it in the...

Страница 67: ...e Library page of the Preferences panel the Rescan button allows you to rescan the se lected library or all your libraries if none is selected so that the MASCHINE Browser mirrors any changes you have...

Страница 68: ...t of files into the MASCHINE Library via the FILES pane of the Browser or via the Library page of the Preferences panel nor the process of applying changes to the file tags and proper ties via the Att...

Страница 69: ...the folder you have selected If Samples reside in a subfolder of this folder the subfolder name will be used as bank If Samples reside in a subfolder of this subfolder the name of the lower subfolder...

Страница 70: ...ge the Manager and Locations buttons allow you to switch between the Manager pane and the Locations pane Manager Pane To display the Manager pane click the Manager button at the top of the Plug ins pa...

Страница 71: ...The Preferences panel the Plug ins page s Manager pane Basic Concepts Preferences MASCHINE 2 Manual 71...

Страница 72: ...ers of this plug in will be auto mapped when loading it into a plug in slot To remove a default plug in preset click the little cross on the right Rescan button If you have changed the content of any...

Страница 73: ...and are available for loading in MASCHINE In order to distinguish them from the VST versions Plug in entries in the Native Instruments submenu of the Plug in menus and in the Plug in Browser will disp...

Страница 74: ...he following controls Element Description Plug in column Lists all plug in directories used in MASCHINE Click the folder icon on the left of an entry to change the path of that plug in directory Add b...

Страница 75: ...ng Rescan will check the integrity of your plug ins and allow you to automatically detect plug ins that are added or removed or disable any plug ins that are not working correctly for any reason 2 6 7...

Страница 76: ...previous MASCHINE versions you could have only one device focused on a particular MA SCHINE instance and the Hardware page of the Preferences panel showed the settings for that particular controller...

Страница 77: ...ice focused on that instance The Controller menu is empty and all settings in the Hardware page are grayed out and inactive To modify the settings of a device from that MASCHINE instance the device mu...

Страница 78: ...device of which you want to edit the settings Upon your selection all settings underneath are updated accordingly 2 6 9 Preferences Colors Page The Colors page enables you to choose default colors for...

Страница 79: ...The Preferences panel Colors page Basic Concepts Preferences MASCHINE 2 Manual 79...

Страница 80: ...d with your MASCHINE files Projects Groups Sounds etc If you uncheck Load with Colors checked by default the saved colors won t be used next time you load the files the loaded files will use the defau...

Страница 81: ...nsure maximum security and reliability while using Link there are several things you may want to consider For reliability connect to the local network using a router via an Ethernet cable If you do us...

Страница 82: ...ing Link session or begin a new session 2 Start MASCHINE s playback by clicking the play button MASCHINE s playback is now synchronized with the Link timeline 3 To stop using Link and leave the sessio...

Страница 83: ...SCHINE EXPANSIONS or other Native Instruments products as well as your own user content To help you find the right file quickly and efficiently the Library implements various techni ques that go far b...

Страница 84: ...ibed in the next section The Browser provides two operation modes each of them providing its own tools The LIBRARY pane allows you to browse the MASCHINE Library This is the preferred way to search fo...

Страница 85: ...Importing Files from Your File System 3 2 Searching and Loading Files from the Library The Browser s LIBRARY pane allows you to search for any file in the MASCHINE Library To display the LIBRARY pane...

Страница 86: ...epresenting the different files types of MA SCHINE From the left to right the file types are Project Group Sound Instrument preset Ef fect preset and Sample By clicking one of them it causes only the...

Страница 87: ...orming a Text Search 8 Result list The Result list displays all files that match your query as specified via the vari ous tools above See section 3 2 8 Loading a File from the Result List 9 Control ba...

Страница 88: ...uct selector 4 If you have selected a product you can further choose a particular bank and sub bank of this product if any 2 Select tags in the TYPES filter 5 and the MODES filter 6 for Instrument and...

Страница 89: ...ecting a Product Category Click on the Product selector header to open it The Product selector opens up showing you all products available in your MASCHINE Li brary Browser Searching and Loading Files...

Страница 90: ...ws all products that are available in your MASCHINE Library If Category is selected in the Category Vendor selector the Product list is sorted by the follow ing categories Drums Percussion Sampled Ins...

Страница 91: ...Center Resetting the Product Selection To reset the selection made in the Product selector click the little cross at the right of the product name The product selection is cancelled The Product select...

Страница 92: ...ibrary or any other con tent categorization specific to a particular product for example different sets of drum sounds for POLYPLEX as shown above To select a particular bank for the selected product...

Страница 93: ...or this product are loaded and the result list only displays preset files only associated with this product 3 2 3 Selecting a Product Category a Product a Bank and a Sub Bank The Product selector allo...

Страница 94: ...he header shows the product or the selected product category if there is no selection it shows a generic label All Instruments in the picture above corre sponding to the type of file selected in the F...

Страница 95: ...Result list be low will be filtered accordingly The closed Product selector with an Instrument selected Product categories and products are shown in the Product selector only if the MA SCHINE Library...

Страница 96: ...This Bank menu allows you to select a particular bank of files for the selected product MA SCHINE in the picture above To select a particular bank for the selected product click the Bank menu under t...

Страница 97: ...When you save Projects Groups or Sounds they are automatically set to the Maschine product When you save Instrument or Effect presets Presets for Internal Plug ins The product is set to Maschine whil...

Страница 98: ...xfx 6 Samples wav aiff Click the desired icon in the File Type selector to display only the files of that type in the Result list The selected icon is highlighted and the files are filtered accordingl...

Страница 99: ...r to select them and limit the search to the files marked with them Click the selected tags again to deselect them and broaden the search Tags for Projects Groups Sounds and Samples 3 Type Levels For...

Страница 100: ...his product for more information on this see section Selecting a Product Category a Product a Bank and a Sub Bank For now the TYPES filter shows on ly top level tags In order to find a shaker you firs...

Страница 101: ...Acoustic tag below them since you had selected the Acoustic tag below the Shaker tag the Acous tic tag below the Tom tag will be automatically selected as well This allows you to quickly find various...

Страница 102: ...ple tags from the same level Hold Shift on your computer keyboard and click two tags at a particular level to select these tags and all tags in between Hold Ctrl Cmd on Mac OS X on your computer keybo...

Страница 103: ...gle next to the Attributes TYPES and MODES 3 2 7 Performing a Text Search In the Search field you can enter your search query The Search field Browser Searching and Loading Files from the Library MASC...

Страница 104: ...st of matches will start narrowing in the Result list below On the right of the Search field click the Reset button showing a little cross to reset both text search and tag search The Product selectio...

Страница 105: ...files in between To select distant files in the list do the following Hold Ctrl Cmd on Mac OS X and click all the files you want to select Loading Files via Double Click Double clicking one of the mat...

Страница 106: ...mple into its own Zone in the Zone page of the Sample Editor A new Zone will be created for that Sample See section 13 5 7 Adding Samples to the Sample Map for more information Drag and drop of Groups...

Страница 107: ...or onto a Sound in the Sound List they will be appended to the existing Plug ins in the Plug in List of that Group or Sound If you drop the Effect presets between two existing Plug ins in the Plug in...

Страница 108: ...the deletion or Cancel to keep the file The file is deleted from the MASCHINE Library and from your hard disk When browsing factory content the Delete entry is not available in the context menu Navig...

Страница 109: ...Autoload button When Autoload is enabled any item that you select in the Result list of the LIBRARY pane or FILES pane is automatically loaded into the focused Group or Sound slot or into the selected...

Страница 110: ...main output For more information on the Cue bus see section 8 2 6 Using the Cue Bus Prehear is particularly useful on your controller See below for more details Prehear and Autoload are mutually exclu...

Страница 111: ...nt Patterns Notably this can be very useful to try another drum kit with your current Patterns The Load Patterns checkbox is available only when browsing Groups 3 3 4 Displaying File Information The I...

Страница 112: ...ctivated the results list will only show items that have been assigned as a Favorite and also match all other selected filters including the search query en tered into the search field Favorites are a...

Страница 113: ...The MASCHINE Browser showing all Favorite Instruments tagged with the Type Bass To activate the Favorites filter Browser Using Favorites in the Browser MASCHINE 2 Manual 113...

Страница 114: ...ow lit and the results list shows all Favorites that match the selected search criteria Adding an Item to the Favorites List To add an item to the Favorites follow the instructions below 1 Place the m...

Страница 115: ...its name You can add any item in the results list to the Favorites no matter if it is selected or not The Set Favorites icon will appear as soon as you place the mouse cursor over the entry Removing...

Страница 116: ...sults list 3 5 Editing the Files Tags and Properties The Attribute Editor allows you to assign or edit tags and properties to your MASCHINE files to make it easier to find them later when browsing the...

Страница 117: ...After you have finished tagging click OK to import the files to the Library and apply the selected tags or click CANCEL to cancel the import See section 3 6 Loading and Importing Files from Your File...

Страница 118: ...will be indicated by a yellow read only item label next to the EDIT button at the bottom of the Browser Factory files are loaded in the Attribute Editor The Attribute Editor will display the various a...

Страница 119: ...s Groups Sounds and Samples or two columns for Instrument and Effect presets according to the hierarchical levels of the Type tags see section 3 2 6 Selecting Type and Mode Tags The MODES page is avai...

Страница 120: ...PES page If another column is available on the right the tag you check is automatically selected and its Sub Types appear in the next column if any allowing you to directly refine your de scription by...

Страница 121: ...our computer keyboard and press Enter to confirm Adding a new Sub Type for the Loops Type Deleting Tags Tags in the TYPES and MODES pages cannot be deleted manually However if a tag is not as signed t...

Страница 122: ...on about the selected files As with the other pages of the Attribute Editor the fields in the PROPERTIES page can be modified only if you have selected user files in the Result list The attributes of...

Страница 123: ...avorite to directly jump to that particular path and display its content in the Result list 5 See section 3 6 2 Using Favorites 3 Location bar Displays the selected path The Location bar provides vari...

Страница 124: ...t to it in order to pre listen to the selected Samples directly from the Browser in order to make a quick se lection See section 3 3 2 Pre Listening to Your Samples For Groups enable the Load Patterns...

Страница 125: ...to the Favorite bar This is done in the Result list 1 Navigate to the parent folder containing the folder you want to use as Favorite so that this folder appears in the Result list 2 In the Result li...

Страница 126: ...list to jump to that folder If all the levels cannot be displayed in the path click the double left pointing arrow left of the path to display the remaining upper levels up to the Workspace represent...

Страница 127: ...e Result List The Result list of the FILES pane shows the files and folders found in the path loaded in the Location bar above see section 3 6 3 Using the Location Bar Only MASCHINE compatible files a...

Страница 128: ...sing the Location Bar Recent Locations button 3 6 4 Navigating to Recent Locations Selecting Files and Folders in the Result List To select a single file or folder in the Result list click its entry Y...

Страница 129: ...e Result list of the FILES pane Windows depicted Following commands are available Command Description Add to Favorites folders only Adds the selected folder to your Favorites See section 3 6 2 Using F...

Страница 130: ...s why whenever you move files make sure to update the paths to their re spective directories in the Library page of the Preferences panel as described in section 2 6 4 Preferences Default Page This s...

Страница 131: ...on this If the folder s you are importing contain different types of files e g Samples Sounds and Groups the various imported files will be available by selecting the corresponding types in the File...

Страница 132: ...at the bottom of the dialog let you choose between following actions IGNORE Click this button to continue loading your Project without locating the missing Sample You will be able to locate it at a la...

Страница 133: ...g Sample s from that Sound Select Find Missing Samples from the Sound slot s context menu to open the Missing Sample dialog again and locate missing Samples for that Sound The same commands also appea...

Страница 134: ...of kick Samples this may take a considerable amount of time With Quick Browse you can restore the query with just one click Quick Browse is available for Samples Plug ins presets Instruments and Effe...

Страница 135: ...for the corresponding file will be restored in the LIBRARY or FILES pane of the Browser depending on which of both panes was used to find the file The file will be shown in the Result list if necessa...

Страница 136: ...Instrument or Effect loaded in this first Plug in slot will define the Sound s role audio source or bussing point respectively For more information on Plug ins and how they define the Sound s role pl...

Страница 137: ...s in your Project are mixed together and sent to the Master channel where their sum will be processed by the Master s Plug ins if any The resulting sig nal is sent to MASCHINE s outputs Each channel p...

Страница 138: ...ion 8 2 The Mixer for more information The Mixer displaying the channel strips for all Sounds in a Group 4 1 2 Similarities and Differences in Handling Sounds and Groups Sounds and Groups are handled...

Страница 139: ...ASCHINE you can select multiple Sounds or multiple Groups at once This notably allows you to change a parameter value for all selected Sounds Groups at a time To achieve this MASCHINE distinguishes th...

Страница 140: ...ut their leading letter and or number stays gray Other Sounds were added to the selection but they are not focused More precisely if a Group or a Sound is currently focused you can additionally select...

Страница 141: ...lug ins for more information on Plug ins Pad view Base key Choke group and Link group settings apply to all selected Sounds See section Adjusting Your Pads for more information on these settings You c...

Страница 142: ...ect except for the focused object which cannot be deselected Shift click object Selects all objects between the focused one and the Shift clicked one Ctrl A Cmd A on Mac OS X if some objects are not s...

Страница 143: ...e Pad View button to show or hide the Pad view The Pad view replaces the Sound List on the left of the Pattern Editor In the Pad view each cell represents a pad on your controller and corresponds to a...

Страница 144: ...e Sound List Context menu Right click Ctrl click on Mac OS X the desired Sound slot in the Sound List or the corresponding cell of the pad grid in Pad view and select Open in the context menu In the L...

Страница 145: ...Sample e g from the Browser into the Sound slot the Sound slot takes the Sound s preset s or Sample s name You can also rename Sound slots manually Naming is only available from within the software b...

Страница 146: ...ect Color from the context menu A Color Palette appears In the Palette the current color of the Sound is highlighted 2 Select the desired color in the Palette You can also choose to set the Sound back...

Страница 147: ...ther default color for Sounds in Preferences Colors Sound Default See section 2 6 9 Preferen ces Colors Page for more information Once you have set a custom color for a Sound as described above the So...

Страница 148: ...ve com mand on a factory file it automatically turns into the Save As command a Save Sound dia log opens and lets you save your modified Sound to your user library See next paragraph for more details...

Страница 149: ...Press Enter to confirm and close the Save Sound dialog Your Sound is now saved The Sound will be added to the user library and is ready to be tagged in the Browser see section 3 5 Editing the Files Ta...

Страница 150: ...nd slot this can also be in another Group in this case first click the desired Group in the Group List of the Ar ranger and select Paste from the context menu All parameters of the Sound will be copie...

Страница 151: ...ots the source Sound stays in the clipboard ready for the next use When you copy paste Sounds in the software the entire content of the copied Sound s is past ed including their events Notably pasting...

Страница 152: ...Pad view As the mouse cursor moves an insertion line appears at the potential places where you can drop the Sound slot s 3 When the insertion line appears at the desired location in the Sound List or...

Страница 153: ...s You can select multiple Sound slots to reset them all at once See 4 1 3 Selecting Multiple Sounds or Groups for more information To reset a Sound slot select it in the Sound List or in the Pad view...

Страница 154: ...Many of the functions described in the following sections are available in the following two context menus The context menu of the Groups in the Group List opened via a right click Ctrl click on Mac...

Страница 155: ...e either menu as you see fit 4 3 1 Creating Groups Creating a Group will add a new empty Group at the end of the Group List You can then fill this Group with the Sounds of your choice To create a Grou...

Страница 156: ...drop Select the desired Group in the Browser or Group file in your operating sys tem and drag it onto the Group List Drag it onto an existing Group to replace this Group in the Group List Drag it betw...

Страница 157: ...click the name of the desired Group in the Group List or right click Ctrl click on Mac OS X the Group and select Rename from the context menu The Group name is now highlighted and editable 2 Modify th...

Страница 158: ...K2 controller when you hold the GROUP button mirror the Group colors you have selected By default each Group has a different color But you can choose a common default color for Groups in Preferences C...

Страница 159: ...click on Mac OS X Ctrl click the Group in the Group List or the Group name in the top left corner of the Pattern Editor and select Save from the context menu Your modifications are saved to the Sound...

Страница 160: ...ied version or if there is no original version of your Group i e you built it from scratch you can save it as a new Group file 1 Right click on Mac OS X Ctrl click the Group in the Group List or the G...

Страница 161: ...for more information 4 3 6 Copying and Pasting Groups You can copy and paste Groups in your Project In the software Groups are copied without their Clips in the Arranger To include the Clips in the co...

Страница 162: ...well The Group previously in that position in the Group List will be re placed Cutting Copying and Pasting Logic for Multiple Groups The cutting procedure for multiple Sounds and Groups is as follows...

Страница 163: ...an existing Patterns In the sentence above existing Patterns means the Patterns with the same IDs i e the same position in the Pattern List as in the source Group Example If the source Sound contains...

Страница 164: ...to delete the last re maining Group in a project will simply reset the Group to the default values You can select multiple Groups to delete them all at once See 4 1 3 Selecting Multi ple Sounds or Gro...

Страница 165: ...in section 6 7 1 Exporting Audio from Patterns and 6 7 2 Exporting MIDI from Patterns respectively 4 4 1 Saving a Group with its Samples Sometimes it is useful to have the ability to save a Group with...

Страница 166: ...th Samples from the context menu You will be presented with the Save Group with Samples panel 2 In this panel adjust the settings see table below and click Save to confirm or Close to cancel the opera...

Страница 167: ...d files thereby minimizing the amount of audio data to be exported This command is also available from the Group menu opened by right clicking Ctrl clicking on Mac OS X the Group name above the Sound...

Страница 168: ...SCHINE menu You will be presented with the Save Project with Samples panel 2 In this panel adjust the settings see table below and click Save to confirm or Close to cancel the operation Managing Sound...

Страница 169: ...your Groups Sounds or your complete Project as audio files in order to edit them further in other applications or burn a CD Audio can be exported in WAV or AIFF format This function is only available...

Страница 170: ...op and adjust the export options in the Options page that appears see description below 5 At the bottom of the panel click Export to start the export process or Close to cancel the operation and close...

Страница 171: ...The Export page of the Export Audio panel Following parameters are available Managing Sounds Groups and Your Project Exporting MASCHINE Objects and Audio MASCHINE 2 Manual 171...

Страница 172: ...port the output signals of specific Sounds to individual audio files When this entry is selected the Output list underneath shows all Sounds available for exporting Empty Sound slots are not listed Th...

Страница 173: ...ions page of the Export Audio panel allows you to adjust various settings for the export process The Options page of the Export Audio panel Managing Sounds Groups and Your Project Exporting MASCHINE O...

Страница 174: ...ription Options Normalize If this option is checked the resulting audio file s will be normalized i e the exported audio will be brought to the highest possible level without clipping 0 dBFS Managing...

Страница 175: ...he audio format you require uncompressed WAV and AIFF formats are available The audio format type selected here also affects audio exported using the Audio Dragger icon available in the Pattern Editor...

Страница 176: ...ng of the exported files will reflect the structure of your Project If Sound Outputs is selected in the Output menu the audio files will be named as follows Project name Sound name BPM wav aiff In add...

Страница 177: ...Drum program files PGM and AKP from the Akai MPC ser ies to Groups Supported models include the MPC4000 MPC3000 MPC2000 MPC500 MPC1000 and the MPC2500 Supported Parameters from MPC Programs Since MASC...

Страница 178: ...x x Filter Cutoff Filter1 Resonance x x x Filter Resonance Filter1 Velocity to Frequency x Velocity Cutoff Mixer Level x x x x Track Level Mixer Pan x x x Track Pan Velocity to Level x Velocity to Vo...

Страница 179: ...the MPC Import panel 3 In the Input section of the panel select one of the import options see table below 4 Click OK to start the import procedure or Cancel to close the panel without importing anythi...

Страница 180: ...arate Group Import One Bank Select this if you only want to import a single Bank Use the drop down menu to the right to select which Bank you want to import The list below shows you a preview of the s...

Страница 181: ...ssential Internal Instrument Plug in in charge of playing back all sample content in MASCHINE the Sampler 5 2 The Sampler Plug in Specific information on Native Instruments and External Plug ins 5 3 U...

Страница 182: ...ound Kick Ordinance of the selected Sound slot 1 Sounds Groups and the Master can each hold any number of Plug ins These are stacked up in the Plug in List on the left of the Control area Working with...

Страница 183: ...ttom In addition to Plug ins each Sound each Group and the Master also provide a set of global settings called Channel properties These are described in section Groove and in chapter 7 Audio Routing R...

Страница 184: ...Using the Drumsynths for more details Native Instruments You can use all Native Instruments KOMPLETE instruments instal led on your computer as VST AU plug ins e g MASSIVE which is included with MA SC...

Страница 185: ...al the Sound will be available as bussing point for other signals from within MASCHINE and possibly from the outside world This notably allows you to build up send effects or to ap ply effects to exte...

Страница 186: ...far left of the Control area click the little plug icon to display the Plug ins This displays the Plug in List on the left of the Control area The Plug in List is still empty because we selected an e...

Страница 187: ...o the next slot Clicking it would allow you to load a Plug in into the next Plug in slot of that Sound and so on Instead of using the Plug in menu to load a Plug in with its default settings you can a...

Страница 188: ...c OS X the Plug in name in the slot This will notably allow you to remove the loaded Plug in from the slot To remove the Plug in currently loaded in a slot open its Plug in menu and select None at the...

Страница 189: ...ilable in their Plug in menu are listed in the following table All other Plug in slots at the Sound Group and Master level only accept Effect Plug ins Therefore their Plug in menus and submenus provid...

Страница 190: ...to play back all Samples in MASCHINE this essential Plug in will be described in details in section 5 2 The Sampler Plug in Drumsynth submenu first Plug in slot of Sounds only Lists the available Dru...

Страница 191: ...nts and External only show the Plug ins that are enabled in the Plug ins page of the Preferences panel For more on this see section 2 6 6 Preferences Plug ins Page The edit commands Cut Copy and Paste...

Страница 192: ...rom To bypass a Plug in do the following 1 If you want to bypass a Plug in of the Master click the MASTER tab in the top left corner of the Control area 2 If you want to bypass a Plug in of a Group cl...

Страница 193: ...ss Sounds and Groups Moving Plug ins Within the Plug in List To move a Plug in in the Plug in List click its name and drag your mouse vertically While you are holding the mouse button an insertion lin...

Страница 194: ...its target location Duplicating Plug ins Across Sounds and Groups Instead of selecting Cut in the Plug in menu of the original slot see above select Copy to du plicate the Plug in to another slot 5 1...

Страница 195: ...re up to date Please check Service Center or log in to your Native Instruments account to find the latest updates 5 1 9 1 Saving Plug in Presets Saving Plug in presets can only be done in the software...

Страница 196: ...with this Plug in the next time it is opened Remove Default Preset Removes the default preset for the current plug in This menu item only appears after a preset has been saved using the Save As Defaul...

Страница 197: ...ready for loading You can assign tags to the Plug in presets that you saved This is done in the Browser in the MASCHINE software For more information please refer to section 3 5 Editing the Files Tags...

Страница 198: ...nd also remove them if required Removing the default preset for a plug in is a software only feature 5 2 The Sampler Plug in The Sampler Plug in allows you to play back any Sample in MASCHINE includin...

Страница 199: ...appear in the Control area of the Arrange view The Sampler also provides a custom panel in the Plug in Strip of the Mix view This panel is described in section 8 4 3 Panel for the Sampler The Sampler...

Страница 200: ...are 1 2 4 8 default 16 32 and 64 You can also set this to Legato in that case the polyphony is set to 1 and the Sampler performs a continuous pitch transition between consecutive notes Glide If Legato...

Страница 201: ...h pass filtering and S1200 High for High i e high pass filtering 5 2 2 Page 2 Pitch Envelope Sampler parameters page 2 of 6 PITCH GATE and AMPLITUDE ENVELOPE in the software Parameter Description PITC...

Страница 202: ...pical vintage drum machine behavior the sample is played in its entire ty from beginning to end with no envelope If One shot is selected the AMPLITUDE ENVE LOPE section doesn t display any parameters...

Страница 203: ...red Hold AHD only Hold determines how long the envelope will stay at its maximum level Decay AHD and ADSR Decay determines how fast the envelope drops to the Sustain level in ADSR mode in AHD mode it...

Страница 204: ...SR stands for sample rate you can use it to lower the original sample rate in order to make the Sound more lo fi Bits Allows you to lower the original bit depth of the Sound resulting in a more rough...

Страница 205: ...ency Bandwidth and Gain parameters 5 2 4 Page 4 Modulation Sampler parameters page 4 of 6 MODULATION ENVELOPE and DESTINATION in the software MODULATION ENVELOPE The MODULATION ENVELOPE section offers...

Страница 206: ...s where you define modulation targets for the modulation envelope i e the parameters you want this envelope to control The knobs adjust the amount of modulation for the following targets Parameter Mod...

Страница 207: ...lues instead of hertz Phase Defines the initial phase of the LFO waveform from 0 50 to 0 50 Sync The Sync selector is used to synchronize the LFO with the tempo of your Project If Free is selected the...

Страница 208: ...LP2 HP2 BP2 only on the FX Filter page page 3 Drive Drive parameter of the FX section on the FX Filter page page 3 Pan Pan parameter on the Audio page of the Sound s Output properties see 7 1 2 Config...

Страница 209: ...ter types LP2 HP2 BP2 only on the FX Filter page page 3 Volume This allows you to modulate the volume which is what velocity normally is used for MODWHEEL DESTINATION Here you can determine how incomi...

Страница 210: ...ks e g loading ad justing Plug in parameters etc please refer to section 5 1 Plug in Overview 5 3 1 Opening Closing Plug in Windows When you load a Native Instruments or External Plug in into a Plug i...

Страница 211: ...es tabs at the top of the Control area The little diagonal arrow next to the Parameter pages tabs To open or close the floating window of a Native Instruments or External Plug in select this Plug in a...

Страница 212: ...is the same as in the Plug in s panel in the Plug in Strip software in Mix view with an additional Edit button described below For more information please re fer to section 8 4 4 Custom Panels for Nat...

Страница 213: ...pages that will appear both in the software s Control area and on your controller in Control mode exactly like Internal Plug ins Having the Plug in parameters on Parameter pages in MASCHINE has the f...

Страница 214: ...ameter pages may be assigned automatically using auto mapping see section 5 3 2 Using the VST AU Plug in Parameters above or created individually via Learn mode With Learn mode you can create custom p...

Страница 215: ...Instruments or External Plug ins and for the Macro properties For all other Plug ins and Channel properties parameters and Pa rameter pages are not editable and the Pages tab is grayed out and inactiv...

Страница 216: ...starts this can be seen only after you have closed the Assignment area Moreover the Parameter page will mirror the label s of its section s if there is more than one section the page label will mirro...

Страница 217: ...the Parameter area Once you have organized plug in parameters into Parameter pages you can also use MASCHINE Macro Controls to pick the most commonly used parameters e g for live performances For mor...

Страница 218: ...ed somewhere else Ctrl V Cmd V Pages Name Context Menu When the Assignment Area is opened and the Pages tab is selected a right click on a Page name at the top of the Parameter area opens a context me...

Страница 219: ...n the right then choosing the desired NI product in the drop down list underneath and of course you will find all these presets in the same locations in the Browser on your controller You can also add...

Страница 220: ...r in the Presets submenu of the Plug in menus in MASCHINE Some VST AU plug ins can run both as instrument and effect plug ins When loading a preset for such a plug in check that the preset can be effe...

Страница 221: ...ir is inserted in the usual Plug in signal chain This output pair is fed into the input of the next Plug in slot or sent to the channel output if the Plug in is in the last Plug in slot The Plug in s...

Страница 222: ...s from Scratch in MASCHINE How to organize your Patterns in your Project 6 6 Managing Patterns How to import export MIDI to from Patterns and how to export audio from Patterns 6 7 Importing Exporting...

Страница 223: ...iew See section 6 1 5 Group View and Keyboard View 2 Keyboard View button Click this button to switch to Keyboard view See section 6 1 5 Group View and Keyboard View 3 Sample Editor button Click this...

Страница 224: ...ongate shorten them create and delete them using various Edit modes 13 The Event area also displays the Step Grid divisions a set of regularly spaced vertical lines defining the resolution of your edi...

Страница 225: ...ight of the Pattern Editor See section 6 1 2 Navigating the Event Area for more information 13 Edit Mode selector The Edit Mode selector lets you choose from three different modes when editing the con...

Страница 226: ...at a fix positioned in the Pattern Similarly click the right handle 3 of the scroll bar hold the mouse button and drag your mouse horizontally to zoom in or out of the Event area while keeping the le...

Страница 227: ...yback position To prevent this you can force the Event area to follow the playhead Activate the Follow button to keep following the playhead in the Event area To follow the playhead position in the Ev...

Страница 228: ...n the Pattern Moving the playhead to another position in the timeline of the Pattern Editor automati cally moves it to the corresponding position in the Arranger However using the timeline of the Patt...

Страница 229: ...tern is four bars long and the Pattern Grid resolution is set to one bar if you click around the 1 4 mark 4th beat of the 1st bar in the timeline when the playhead reaches the 3 3 mark 3rd beat of the...

Страница 230: ...yboard View Alternatively you can switch the Pattern Editor to Keyboard view Click the Keyboard View button showing a little keyboard on the left of the Pattern Edi tor to switch it to Keyboard view T...

Страница 231: ...d Sound at that particular pitch This view is well suited for melodic instruments e g a piano since you can focus on a par ticular Sound and edit notes at every pitch 6 1 6 Adjusting the Pattern Grid...

Страница 232: ...4 bars This handy mode allows you to quickly select from the most common Pattern Lengths For other uses of the Pattern Grid adjusting the playback position and the Loop Range one bar divisions are us...

Страница 233: ...6 1 7 Adjusting the Step Grid and the Nudge Grid The Step Grid defines regularly spaced out timings the steps at which your events notes can be created moved etc The Step Grid resolution corresponds...

Страница 234: ...ay 6 or 8 bars and choose a Step Grid resolution of 1 64th Regardless of the current Step Grid resolution the gray lines on the beats quarter notes and the black lines on the bars notes are always vis...

Страница 235: ...e 6 3 4 Editing Selected Events Notes for more information The Nudge Grid is based on the Step Grid The Nudge Grid is active when the Step Grid is active If the Step Grid is disabled nudging events wi...

Страница 236: ...Event area of the Pattern Editor 6 2 Recording Patterns with the Step Sequencer If you are familiar with classic drum machines you may want to program your Pattern using the step sequencer 6 2 1 Step...

Страница 237: ...ghlighted Events vs Notes Basically events and notes are the same thing a trigger for a Sound with a particular velocity pitch length etc If the word note is used when dealing with melodic instruments...

Страница 238: ...y way to bulk delete events notes Listed here are all available mouse actions from the Mouse Edit modes For more details on specific actions please refer to the next sections Mouse in Select Mode The...

Страница 239: ...ckground Deselect all notes Editing Selected Notes see 6 3 4 Editing Selected Events Notes for details Drag note horizontally Moves selected notes in time according to the Step Grid Ctrl drag note hor...

Страница 240: ...ich you started The other way round Click a note and move the mouse cursor with the button pressed to erase all notes under the mouse cursor Only Notes for the selected Sound are erased Additionally y...

Страница 241: ...er to create events for that Sound Mouse in Select Mode To create a new event in Select mode double click at the desired location in the back ground of the Event area Mouse in Paint Mode To create a n...

Страница 242: ...n Drag in Event area s background Multiple selection selection frame Click in Event area s background Deselect all events Selecting All Events You can select all events displayed in the Event area via...

Страница 243: ...Grid see quantizing rules below Drag left right note border Moves the start end of selected notes according to the Step Grid thereby resizing the notes see quantizing rules below Ctrl drag left right...

Страница 244: ...snap to the Step Grid To override the quantization and freely adjust the note position or size hold Ctrl Cmd on Mac OS X while dragging Quantization when Editing Multiple Events Notes at Once When you...

Страница 245: ...e Grid division If no event is selected all events in the Pattern will be affected See the hardware section below for more information on the Nudge command 6 3 5 Deleting Events Notes In the software...

Страница 246: ...the Pattern Manager double click the Pattern in which you want to paste the events see section 6 6 1 The Pattern Manager and Pattern Mode for more information on the Pattern Manager 3 Click anywhere i...

Страница 247: ...go beyond the Pattern s end the Pattern is extended to the next Pattern Grid division after the last pasted event If you paste the events via the shortcut on your computer keyboard while playback is...

Страница 248: ...You can quantize your notes at any time no matter how you recorded them They will be quantized according to the step size i e Step Grid resolution selected If you turn the Step Grid off no quantizati...

Страница 249: ...reated after record ing your pattern right click the mouse and select Quantize 50 from the context menu 4 To undo redo Quantize use hotkeys Ctrl Z Ctrl Y Cmd Z Cmd Y on Mac 6 3 8 Quantization While Pl...

Страница 250: ...s panel Click the Quantize menu and select the desired Input Quantization mode from the three modes available see their description above 6 4 Recording and Editing Modulation One of the really cool fe...

Страница 251: ...n please refer to section 7 2 3 Controlling Parameters via MIDI and Host Automation Please note that modulation and automation are not mutually exclusive You can modulate a parameter in MASCHINE and a...

Страница 252: ...be modulated This second rule is also true for Plug ins if a Plug in is loaded at the Master level its parameters will not be modulatable but the same Plug in loaded at the Group or Sound level will...

Страница 253: ...the following happens On the outer ring of the knob the colored section usually indicating the current parameter value is replaced by a little segment indicating the modulated value During playback th...

Страница 254: ...dit modulation for parameters of a Sound click the desired Sound in the Sound List left of the Pattern Editor and click the SOUND tab in the Control area 2 To see and edit modulation for parameters of...

Страница 255: ...ins a variable number of modulation points each of them defining a new value for the parameter The zoom factor and scroll position of the modulation track is always synchronized to those of the Event...

Страница 256: ...other Patterns of the Group as well Editing Modulation Points You can create edit and delete modulation points in the displayed modulation track with your mouse As for the Event area above the mouse...

Страница 257: ...together by dragging them up or down they will keep their relative offsets until any of them reaches the minimum or maximum value 2 Paint mode Click and drag to set modulation points wherever you move...

Страница 258: ...it to a param eter of your choice 4 Right click Ctrl click on Mac OS X the Modulator X label to open a structured menu containing all modulatable parameters in that channel 5 Navigate the structure o...

Страница 259: ...change the parameter assignment of a modulation track right click Ctrl click on Mac OS X the desired entry in the Modulator List and select another parameter from the hierarchical menu as described a...

Страница 260: ...n as a MIDI file for use in another environment MIDI automa tion tracks will be included in the exported MIDI file See section 6 7 2 Exporting MIDI from Patterns for more information You cannot create...

Страница 261: ...ating and Editing Modulation in the Control Lane You have just created a new MIDI track You will notice that one MIDI track is always present in the MIDI pane the Velocity track This track holds the v...

Страница 262: ...and Pattern Mode In the software all Pattern management operations are done in the Pattern Manager To open the Pattern Manager click the Pattern Manager button a down pointing arrow at the left of th...

Страница 263: ...ur controller In each Pattern bank the col ored cells indicate Pattern slots containing a Pattern while unlit cells indicate empty Pat tern slots The selected Pattern bank is surrounded by a white bor...

Страница 264: ...tern is named Basics Selecting a Pattern 1 Open the Pattern Manager see 6 6 1 The Pattern Manager and Pattern Mode 2 If it is not already selected select the Pattern bank containing the desired Patter...

Страница 265: ...ern in the current Pattern bank press PATTERN the dim lit pad corre sponding to the cell of the desired Pattern on the right display Selecting a Pattern has the following consequences This Pattern is...

Страница 266: ...nd Removing Clips You can still manually create a new empty Pattern in the software 1 Open the Pattern Manager see 6 6 1 The Pattern Manager and Pattern Mode 2 If it is not already selected click the...

Страница 267: ...6 6 1 The Pattern Manager and Pattern Mode 2 If necessary select the Pattern bank containing the desired Pattern by clicking its pad grid on the right The selected Pattern bank is surrounded by a whi...

Страница 268: ...er see 6 6 1 The Pattern Manager and Pattern Mode 2 Click the symbol under the last pad grid on the right to create another Pattern bank A new empty Pattern bank is created and its pad grid appears in...

Страница 269: ...in the Arranger these Clips will be removed as well 6 6 6 Naming Patterns You can replace the Patterns default names with custom names of your own This can be done in the Pattern Editor in the Patter...

Страница 270: ...tern slot click the little pen icon You can also right click Ctrl click on Mac OS X the Pattern slot or the corresponding cell in the pad grid and select Rename from the context menu The Pattern name...

Страница 271: ...map ped to some function of the host software In this case click anywhere else in the MA SCHINE plug in window to confirm the name you have entered 6 6 7 Changing the Pattern s Color By default Patte...

Страница 272: ...olor by selecting Default at the bottom of the Color Palette The Pattern slot takes the new color you select In the Arranger all Clips referencing this Pattern will also mirror the selected color By d...

Страница 273: ...context menu A Pattern copy is inserted right after the original Pattern in the Pattern bank all follow ing Patterns are shifted to the next slot Copying and Pasting a Pattern To cut or copy the cont...

Страница 274: ...pful to organize your Patterns more conveniently e g to bring together variations of the same rhythm To move Patterns 1 Open the Pattern Manager see 6 6 1 The Pattern Manager and Pattern Mode 2 If nec...

Страница 275: ...from the selected Pattern onto your desktop or into your host software by simply dragging it onto the target location or appli cation This function is only available in the software The audio will be...

Страница 276: ...Mute and Solo otherwise the exported audio file will be silent Al ternatively you can let the Pattern Editor in Group view and solo this Sound 4 In the top right corner of the Pattern Editor click an...

Страница 277: ...perating system or directly into a MIDI channel of your host software 1 Select the Pattern you want to export MIDI from see section 6 6 2 Selecting Patterns and Pattern Banks 2 If you want to export M...

Страница 278: ...rn Editor to Group view and right click Ctrl click on Mac OS X the desired Group in the Group List left of the Arranger to open its context menu You can also right click Ctrl click on Mac OS X the Gro...

Страница 279: ...ne both in the soft ware or from your controller see section 2 3 4 Undo Redo You can import MIDI files into Groups or into individual Sounds You can do this via three methods via the context menu of t...

Страница 280: ...o the selected Pattern of the Group according to the im port rules described below Method 2 via drag and drop 1 In the Group List left of the Arranger click the Group in which you want to import the M...

Страница 281: ...cks in the selected Pattern If the MIDI file contains data on a single MIDI channel MIDI notes will be imported to the different Sounds of your Group according to their pitch The MIDI note data will b...

Страница 282: ...individual Sounds that have not received any data during the current import yet the channel with the lowest number will be imported to the Sound with the lowest slot number and so on Example if the MI...

Страница 283: ...below Method 2 via drag and drop 1 In the Group List left of the Arranger click the Group containing the Sound for which you want to import the MIDI file This sets the focus to that Group and displays...

Страница 284: ...ed Sound Method 3 using the FILES pane of the Browser 1 In the Group List left of the Arranger click the Group containing the Sound for which you want to import the MIDI file This sets the focus to th...

Страница 285: ...won t be affected Any channel information in the MIDI file will be disregarded All notes will appear in the same Pattern for that particular Sound If the same MIDI note number and MIDI CC num ber are...

Страница 286: ...from this each new Pattern receiving the data from one of the MIDI files Apart from this each MIDI file will be imported as a single MIDI file to that Group see above for a detailed description To imp...

Страница 287: ...notes in these new Patterns Apart from this each MIDI file will be imported as a single MIDI file to that Sound see above for a detailed description Alternatively if you have selected the MIDI files i...

Страница 288: ...e features described here can be accessed via the Channel properties Channel prop erties are global settings that apply to a particular Sound Group or to the Master independ ently of which Plug ins ar...

Страница 289: ...ication in plug in mode This default basic configuration can be customized in numerous ways Using the audio settings available in the Input and Output properties at the Sound Group and Master level yo...

Страница 290: ...rties Plug ins and Parameter Pages in the Control Area 7 1 1 Sending External Audio to Sounds Each Sound can be configured to receive external audio signals These audio signals can be coming from the...

Страница 291: ...e Input properties in the software and from your controller Controls Description AUDIO Section Source Selects an external audio input to be routed to the Sound Available entries are None no external i...

Страница 292: ...our controller To access it and change its parameters simply use the common workflow described in 2 3 3 Navigating Channel Properties Plug ins and Parameter Pages in the Control Area Furthermore you w...

Страница 293: ...Group channels in the top row of the Mixer double click the header of the Group containing the Sound you want to configure If the Mixer currently displays the Sound channels single click the header of...

Страница 294: ...e desired external input in the menu This is equivalent to setting the Source parameter described above 6 Turn the little knob on its left to adjust the input gain This is equivalent to setting the Ga...

Страница 295: ...ps to other pairs of outputs on your audio interface in order to process them separately at a later stage The output routing configuration is done on the Audio page of the Output properties for Sounds...

Страница 296: ...Cue is enabled the main output of the channel is sent to the Cue bus instead of its normal target defined in Dest see above For example this is very useful to pre listen a channel before you mix it in...

Страница 297: ...e input number e g Drums Kick 1 In the selector display they are labeled as follows For Groups Group letter number e g A2 For Sounds Group letter number S Sound number input number e g A2 S4 1 for the...

Страница 298: ...sible only when the Pattern Editor is in Group mode In Keyboard mode the knobs are not visible Configuring the Main Outputs of Sounds and Groups in Mix View You can also easily configure the outputs o...

Страница 299: ...ly displays the Group channel strips and for a Group simply ensure that its channel strip is visible double click the Group header if the Mixer currently displays the Sound channel strips 3 To adjust...

Страница 300: ...ts that you can route to addi tional targets For example you can send a definable amount of the channel s audio output to other channels for further processing This is notably used in send effects see...

Страница 301: ...the Aux 1 or Aux 2 output Order If Order is set to Pre the channel will be fed into Aux 1 or Aux 2 before the Level and Pan settings of the MAIN section on the Audio page are applied If Order is set...

Страница 302: ...ttings for the auxiliary outputs of each channel strip 4 Navigate to the channel of which you want to configure an auxiliary output for a Sound click the header of its parent Group or double click it...

Страница 303: ...tting the Level parameter described above 7 Set the pre post state of the auxiliary output by clicking the Post or Pre label right under the menu This is equivalent to setting the Order parameter desc...

Страница 304: ...section 2 3 3 Navigating Channel Properties Plug ins and Parameter Pages in the Control Area to know how to access the Audio page of the Output proper ties in the software and from your controller Co...

Страница 305: ...sts the level of the Cue output Pan Defines the panoramic position of the Cue output in the stereo field If MASCHINE is running as a plug in the external stereo outputs Ext 1 16 available in the Outpu...

Страница 306: ...p right corner of the Mixer The Master Cue channel strip appears underneath In this Master Cue channel strip do the following to configure the output of the Master chan nel 1 Click Master in the strip...

Страница 307: ...y see above 3 To select another destination for the Master output click the first area under the level meter and select the desired destination in the menu This is equivalent to setting the Output par...

Страница 308: ...ely This is equivalent to setting the Level or Pan parameters in the CUE section respectively see above 3 To select another destination for the Cue output click the first area under the level meter an...

Страница 309: ...fed into any number of Sounds For example this allows you to process any external audio signal using the plug ins loaded in a Sound and more generally integrate external audio signals into the MASCHI...

Страница 310: ...Sounds in MASCHINE s Mixer 1 Click the Mix View button on the left of the Arranger to switch from Arrange view to Mix view 2 Open the extended view of the Mixer by clicking the down pointing arrow on...

Страница 311: ...If the Mixer currently displays the Group channels in the top row of the Mixer double click the header of the Group containing the Sound you want to configure If the Mixer currently displays the Soun...

Страница 312: ...The Mixer displays the channel strips of all Sounds in the selected Group Audio Routing Remote Control and Macro Controls Audio Routing in MASCHINE MASCHINE 2 Manual 312...

Страница 313: ...nder the Sound name and select the desired external input in the menu This is equivalent to setting the Source parameter described above 6 Turn the little knob on its left to adjust the input gain Aud...

Страница 314: ...ividual Sounds and for entire Groups These are described in section 7 2 1 Triggering Sounds via MIDI Notes Controlling parameters via MIDI messages and host automation You can control parameters of Ch...

Страница 315: ...ct to incoming MIDI notes This is done in the MIDI page of the Sounds or Group s Input properties There is no MIDI page in the Input properties of the Master MASCHINE 1 x owners The MIDI page of the I...

Страница 316: ...lecting VST AU Plug in Presets via MIDI Program Change for more information The way MIDI files are imported to Sounds and Groups See section 6 7 3 Importing MIDI to Patterns for more information MIDI...

Страница 317: ...is selected for both a Sound and its parent Group if the Sound is focused it will receive MIDI notes from all MIDI ports and on all MIDI channels Channel Selects the MIDI channel on which the Sound or...

Страница 318: ...s the Scene trigger has priority over any Sound trigger set to the same MIDI channel To configure MIDI control for Scenes please refer to section 12 4 Triggering Scenes via MIDI MASCHINE Plug in Only...

Страница 319: ...ger field on the right labeled MIDI IN by default and select the desired MIDI port in the menu This is equivalent to setting the Source parameter described above If MASCHINE is running as a plug in yo...

Страница 320: ...INE runs as a Plug in this MIDI data is sent to the host application When MASCHINE runs as a stand alone application this MIDI data is send out to all activated MIDI output devices MIDI Scene Change p...

Страница 321: ...tion tracks in your host Configuring MIDI and host automation is possible in the software only In MASCHINE automation means the control of MASCHINE parameters from an external source MIDI or host appl...

Страница 322: ...sing modulation please refer to section 6 4 Recording and Editing Modulation Please note that modulation and automation are not mutually exclusive You can modulate a parameter in MASCHINE and automate...

Страница 323: ...ith the Macro Controls for more information The Automation pane holds two tabs MIDI tab Click the MIDI tab to assign MIDI messages to automatable parameters You can then remote control and automate MA...

Страница 324: ...software in Mix view this means that all automatable parameters are found in some Parameter page of the Control area In order to be automatable parameters of Plug ins and Channel properties have to me...

Страница 325: ...Groups not in the Master In other words at the Sound and Group level the same pa rameters are both automatable and modulatable For more information on modulation please refer to section 6 4 Recording...

Страница 326: ...r to the next free automation ID The Assignment field displays the automation ID for that parameter The parameter is ready to be controlled from your host Removing an automation ID is also straightfor...

Страница 327: ...ng a MIDI control to a parameter in MASCHINE is done via an intuitive Learn mode 1 Click the down pointing arrow in the bottom left corner of the Control area to open the Assignment area underneath 2...

Страница 328: ...r more details please refer to section 2 6 3 Preferences MIDI Page If MASCHINE is running as a plug in in a host appli cation the MIDI configuration is done in the host see section 2 5 Stand Alone and...

Страница 329: ...ts presets or a particular set of presets to the host Each VST AU instrument or effect might handle its presets or patches programs different ly Please refer to the plug in documentation to know how t...

Страница 330: ...this A Sound without any Plug in loaded can still send the MIDI data listed above Further more if the Sound has no Plug in it will forward any incoming MIDI notes to its MIDI output To know how to co...

Страница 331: ...or the enabled MIDI output ports are None MIDI output disabled default setting and Host If Host is selected MASCHINE will forward the MIDI data from the Sound to the host application This notably allo...

Страница 332: ...Mixer by clicking the down pointing arrow on the left of the Mixer 3 Check that the IO button is active on the left of the Mixer if not click it to enable it and display the input output settings of...

Страница 333: ...the header of the desired Group The Mixer displays the channel strips of all Sounds in the selected Group 5 At the bottom of the channel strip of the Sound you want to configure click the bigger field...

Страница 334: ...automation This is not the case in MA SCHINE 2 0 anymore automation and Macro Controls now are totally independent Now MASCHINE parameters can be directly assigned to MIDI controls or host automation...

Страница 335: ...channel in your Project Obviously the Macro properties even of a different channel are not available as targets for any Macro Control Linking the same parameter to more than one Macro Control can be u...

Страница 336: ...ne appears on its right You are now ready to assign Macro Controls to parameters Once the Assignment area is open when you switch to other Parameter pages the As signment area follows your selection i...

Страница 337: ...lick the field above the first parameter you want to include in the sec tion type the desired name for the section and press Enter to confirm The new section will include all following parameters unti...

Страница 338: ...cro Control do the following 1 Click the Select menu for now the only menu of the Target selector The menu is organized into subcategories Settings listing the properties of the current channel Slots...

Страница 339: ...ntouched while items on its right i e at a lower level are reset Macro Assignment Context Menu When the Assignment area is opened and the Pages tab is selected right click on an assigned or unassigned...

Страница 340: ...selected right click on a Page opens a context menu The Control Area Assignment Pages context menu The context menu contains the following items Menu Item Description Keyboard Shortcuts Delete Deletes...

Страница 341: ...arious stages of your work e g when building custom drum kits setting up send effects creating advanced routings and last but not least during live performances 8 1 Mix View Basics This section descri...

Страница 342: ...between the Arrange view and the Mix view 8 1 2 Mix View Elements When you switch the MASCHINE software to Mix view the Arranger the Control area and the Pattern Editor disappear and are replaced with...

Страница 343: ...displays Sound channels or the Mas ter Cue channel if the Mixer displays Group channels See section 8 2 The Mixer for a de tailed description 2 Plug in Chain In the middle the Plug in Chain lists all...

Страница 344: ...settings of different channels in one go The Mixer in the MASCHINE software The Mixer provides a classic mixing desk layout containing a certain number of channel strips The particular channel strips...

Страница 345: ...our Project Sound level The Mixer shows channel strips for all Sound slots in the focused Group Both display modes are described in the following paragraphs If the MASCHINE window is too small to disp...

Страница 346: ...hat focused Group At the top of the Mixer you see two rows The first row 3 contains the headers of all your Groups and of the Master Cue channel The header of the focused Group or of the Master Cue at...

Страница 347: ...een both views this would mute unmute the Group channel in question 8 2 2 Adjusting the Mixer Layout No matter which of the Group or Sound level is currently displayed in the Mixer you can adjust its...

Страница 348: ...he IO button is disa bled For a detailed description of the settings available in the channel strips see section 8 2 5 Adjusting Settings in the Channel Strips below 8 2 3 Selecting Channel Strips Sin...

Страница 349: ...ups Whichever channel strip is focused the Plug in Strip at the bottom of the Mix view shows the Plug ins loaded in that particular channel see section 8 4 The Plug in Strip 8 2 4 Managing Your Channe...

Страница 350: ...hanging the Group s Color Copying pasting channels Open the channel s context menu and select Copy or Paste See section 4 2 6 Copying and Pasting Sounds and 4 3 6 Copying and Pasting Groups Resetting...

Страница 351: ...ly displayed without having to put the channel under focus beforehand Simply click the desired setting in any of the displayed channel strips to modify it the current selection focus will stay untouch...

Страница 352: ...8 2 2 Adjusting the Mixer Layout for more information 1 2 3 4 5 6 7 8 A complete channel strip in the Mixer Sound on the left Group and Master on the right 1 Header Displays the name and index letter...

Страница 353: ...ust the MIDI input routing Visible only if the IO button is enabled on the left of the Mixer Click the MIDI IN label to select a MIDI input port then select a channel via the little menu on its right...

Страница 354: ...little headphones button to send the channel to remove it from the Cue bus This is equivalent to the Cue parameter in the Audio page of the channel s Output properties See section 8 2 6 Using the Cue...

Страница 355: ...ng Modulation for more on modulating parameters Available Settings in the Master and Cue Channel Strips The Master and the Cue channel strips are similar to the Sound Group channel strips described ab...

Страница 356: ...ack to its normal destination defined in its output settings simply click again on the headphones button You can send any number of Sound and Group channels to the Cue bus simultaneously In Arrange vi...

Страница 357: ...adphones These settings are described in section 7 1 4 Con figuring the Master and Cue Outputs of MASCHINE 8 3 The Plug in Chain In the middle of the Mix view right under the Mixer you see an horizont...

Страница 358: ...Open Save As and Save As Default Native Instruments and External Plug ins only commands to manage your Plug in presets See section 5 1 9 Saving and Recalling Plug in Presets and 5 3 4 Using VST AU Pl...

Страница 359: ...ruments Plug ins provide dedicated panels inspired from the user interface of each particular Native Instruments product 8 4 4 Custom Panels for Native Instruments Plug ins Native Instruments and Exte...

Страница 360: ...tal scroll bar appears at the bottom of the Plug in Strip to display the hidden part Use the horizontal scroll bar to display the other Plug in panels If the MASCHINE window is not high enough for any...

Страница 361: ...lay the rest of the Plug in 8 4 1 The Plug in Header For all types of Plug ins Internal Native Instruments and External the Plug in panel displays a Plug in Header at the top Controlling Your Mix The...

Страница 362: ...onal View button specific Native Instruments Plug ins only Some Native Instruments Plug ins provide two different views in their panel Click the little to switch between De fault view and Additional v...

Страница 363: ...urrent preset and the Quick Browse icon see section 8 4 1 The Plug in Header above for more details Although parameters are organized differently than in the Parameter pages of the Arrange view the pa...

Страница 364: ...ontrol area along with parameters available in the Zone page of the Sample Editor As with all other Plug ins the panel for the Sampler shows the Plug in Header at the top This Header contains the name...

Страница 365: ...ne page in the Sample Editor Start and End markers zooming etc For more details see section 13 Sampling and Sample Mapping 3 VOICE ENGINE section Allows you to adjust the Polyphony Glide and Mode para...

Страница 366: ...Page 3 FX Filter 6 TUNE section Allows you to adjust the Tune parameter from the Pitch Envelope page in the Control area For more details see section 5 2 2 Page 2 Pitch Envelope 7 PLAY and LOOP secti...

Страница 367: ...more details see section 13 Sampling and Sample Mapping As with all Internal Plug ins parameter modulation is not indicated in the panel for the Sampler As a consequence the value of modulated parame...

Страница 368: ...ABSYNTH 5 s Default view shows the main elements of the Perform window of AB SYNTH 5 Controlling Your Mix The Plug in Strip MASCHINE 2 Manual 368...

Страница 369: ...MASSIVE s Default view shows specific parts of the Synth view the eight Macro Controls at the top and the Modulation pages underneath Controlling Your Mix The Plug in Strip MASCHINE 2 Manual 369...

Страница 370: ...ton for opening the Plug in in a floating window as well as the name of the current preset and the Quick Browse icon see section 8 4 1 The Plug in Header above for more details For Native Instruments...

Страница 371: ...more information You can also undock any Native Instruments Plug in and open it in a separate floating window In the floating window you can notably switch between the Default view and the full user i...

Страница 372: ...Master In this channel you can have as many open floating windows as you see fit When you set the focus to another channel all open floating windows disappear possibly replaced by those for Native Ins...

Страница 373: ...the Edit view which shows the full interface of the original Native Instruments product Closing the Plug in s Floating Window To dock a Native Instruments or External Plug in back into the Plug in St...

Страница 374: ...don t hesitate to tweak them during your live performance or automate them like any other Plug in See section 6 4 Recording and Editing Modulation for more information on automa tion In this chapter...

Страница 375: ...e for gen erating the drum sound In the same Drumsynth each engine will have its own algorithm pa rameters and sonic characteristics it is in fact an entirely distinct drum For example the Kick provid...

Страница 376: ...rovides access to more complex and finer adjustments to the drum sounds The Modulation page allows to adjust the playability of the drum by setting its velocity response The Main page always starts wi...

Страница 377: ...just the Decay parameter or the Filter parameter for the Shaker engine of the Percussion In the bottom part of the panel you find the other parameters adjusting the sound of the selected engine For mo...

Страница 378: ...hat parameter positions will not be kept 9 1 4 Various Velocity Responses Each engine of each Drumsynth has a different response to the velocity of the notes you are playing Globally engines can be g...

Страница 379: ...itches from MIDI note 46 to 70 If the pitch of an incoming MIDI note falls outside the pitch range of the engine the pitch will be bounded to that engine s allowable pitch range Some engines have an u...

Страница 380: ...n page Each engine has a different character and set of parameters as detailed in the following sec tions The Kick provides following engines Sub default 9 2 1 Kick Sub Tronic 9 2 2 Kick Tronic Dusty...

Страница 381: ...below are presented as they appear in the Control area Ar range view The same parameters are available in the Plug in panel within the Plug in Strip Mix view See 8 4 The Plug in Strip for more inform...

Страница 382: ...compared to the Decay value you won t hear the entire pitch drop but only its beginning i e you will hear a higher pitch than the one set by Tune ATTACK Section Mode Selects the style of the attack T...

Страница 383: ...l be 9 2 2 Kick Tronic Fat punchy and warm the Tronic kick is based on another classic analog kick drum which has provided the backbone to countless dance and electronic records for the past 30 years...

Страница 384: ...values give a more gentle sound As Bend is increased the kick becomes more punchy at higher values the pitch envelope is more clearly audible as an actual pitch bend Impact Adjusts the amount of atta...

Страница 385: ...hanges to the distortion parameters are only audible when the Mix parameter is set above 0 Modulation Page As with all other engines and Drumsynths the Modulation page contains one parameter Veloc ity...

Страница 386: ...he middle C measured as a percentage Available values range from 0 0 to 100 0 default 50 0 For more details see 9 1 5 Pitch Range Tuning and MIDI Notes Decay Adjusts the duration of the sound s tail m...

Страница 387: ...mid position turning the knob to the left as the inverse effect the harder you hit the key pad the softer the resulting drum sound will be 9 2 4 Kick Grit The Grit kick is a modern electronic kick dru...

Страница 388: ...ck measured as a percentage Available values range from 0 0 to 100 0 default 6 8 Impact Adjusts the amount of click or initial attack measured as a percentage Available values range from 0 0 to 100 0...

Страница 389: ...es not contain any parameters Modulation Page Like with all other engines and Drumsynths the Modulation page contains one parameter Ve locity Element Description SCALE Section Velocity Adjusts the vel...

Страница 390: ...ne Adjusts the pitch of the drum played by the middle C measured in MIDI note numbers and cents Available values range from 38 00 to 62 00 The default value is 50 00 For more details see 9 1 5 Pitch R...

Страница 391: ...100 0 to 100 0 default value At zero mid course the drum is played at full velocity no matter how hard you hit the keys or pads From that mid position by turning the knob to the right you increase the...

Страница 392: ...age Available values range from 0 0 to 100 0 default 50 0 Snap Emulates the air movement caused by the beater before the drum is hit Therefore it produces a snap in the waveform the length of which ca...

Страница 393: ...e left as the inverse effect the harder you hit the key pad the softer the resulting drum sound will be 9 2 7 Kick Bold The Bold kick is an acoustic bass drum emulation that provides an aggressive cha...

Страница 394: ...0 Advanced Page For this engine the Advanced page does not contain any parameters Modulation Page As with all other engines and Drumsynths the Modulation page contains one parameter Veloc ity Element...

Страница 395: ...se refer to 9 2 The Kicks Tune Adjusts the pitch of the drum played by the middle C measured in MIDI note numbers and cents Available values range from 42 00 to 54 00 The default value is 48 00 For mo...

Страница 396: ...range from 100 0 to 100 0 default value At zero mid course the drum is played at full velocity no matter how hard you hit the keys or pads From that mid position by turning the knob to the right you i...

Страница 397: ...efault 50 0 For more details see 9 1 5 Pitch Range Tuning and MIDI Notes Decay Adjusts the duration of the sound s tail measured as a percentage Available values range from 0 0 to 100 0 default 50 0 P...

Страница 398: ...knob to the right you increase the positive velocity response and make the drum more and more sensitive to the velocities at which you hit the keys pads From the mid position turning the knob to the l...

Страница 399: ...e Main page Each engine has a different character and set of parameters as detailed in the following sec tions The Snare provides following engines Volt default 9 3 1 Snare Volt Bit 9 3 2 Snare Bit Po...

Страница 400: ...ge view The same parameters are available in the Plug in panel within the Plug in Strip Mix view See 8 4 The Plug in Strip for more information on this Main Page Element Description MAIN Section Engin...

Страница 401: ...asured as a percentage Available values range from 0 0 to 100 0 default 50 0 Punch Only available if Punchy is selected in the Mode selector see above Adjusts the amplitude of the pitch envelope punch...

Страница 402: ...3 2 Snare Bit The Bit snare is a thin harsh digital snare The parameters described below are presented as they appear in the Control area Ar range view The same parameters are available in the Plug i...

Страница 403: ...Page For this engine the Advanced page does not contain any parameters Modulation Page As with all other engines and Drumsynths the Modulation page contains one parameter Veloc ity Element Description...

Страница 404: ...Adjusts the pitch of the drum played by the middle C measured as a percentage Available values range from 0 0 to 100 0 default 50 0 For more details see Pitch Range Tuning and MIDI Notes Decay Adjust...

Страница 405: ...hit the keys pads From the mid position turning the knob to the left as the inverse effect the harder you hit the key pad the softer the resulting drum sound will be 9 3 4 Snare Sharp The Sharp snare...

Страница 406: ...rd the drum is hit measured as a percentage Available values range from 0 0 softest to 100 0 hardest The default value is 75 0 Body Adjusts the level of the snare body independently from the wires lev...

Страница 407: ...metallic snare sound The two modes available on its Advanced page relate to different tension levels of the snare wires which allows for a wide range of snares that will cut through very well into a m...

Страница 408: ...lects from two different noise types that simulate the wires of the drum Available modes are A default and B Tune Provides an independent tuning of the snare noise It relates to the tension of the sna...

Страница 409: ...on that provides the sound of old woody snares The character of the sound comes from its broad spectrum that allows for a wide range of snares via a subtle use of the Tune parameters The parameters de...

Страница 410: ...ion Mode Selects from two different noise types that simulate the wires of the drum Available modes are A default and B Tune Provides an independent tuning of the snare noise It relates to the wires t...

Страница 411: ...vailable on its Advanced page relate to different snare wire characteristics noisy and crispy The parameters described below are presented as they appear in the Control area Ar range view The same par...

Страница 412: ...the drum Available modes are A default and B Tune Provides an independent tuning of the snare noise It relates to the snare wire tension of a real snare drum Available values range from 0 0 to 100 0 d...

Страница 413: ...snare drum model that is capable of a metallic bright sound The two modes available on its Advanced page select from two different snare wire characteris tics The parameters described below are presen...

Страница 414: ...le values range from 0 0 to 100 0 default 75 0 Advanced Page The Advanced page contains parameters controlling the wires sound of the drum Element Description SPECTRA Section Mode Selects from two dif...

Страница 415: ...e Clap A stalwart of electronic music the classic analog clap never really sounded like a group of peo ple clapping but that makes it all the more iconic The parameters described below are presented a...

Страница 416: ...Page For this engine the Advanced page does not contain any parameters Modulation Page As with all other engines and Drumsynths the Modulation page contains one parameter Veloc ity Element Description...

Страница 417: ...nformation on the available engines please refer to section 9 3 The Snares Tune Adjusts the pitch of the drum played by the middle C measured in MIDI note numbers and cents Available values range from...

Страница 418: ...Available values range from 0 0 to 100 0 default 75 0 Modulation Page Like with all other engines and Drumsynths the Modulation page contains one parameter Ve locity Element Description SCALE Section...

Страница 419: ...hats The Hi hat Drumsynth can generate a variety of hi hat sounds The Hi hat in the Control area Main page depicted The Hi hat panel in the Plug in Strip Using the Drumsynths The Hi hats MASCHINE 2 M...

Страница 420: ...Many Different Drums per Drum synth For general information on the Snare and the other Drumsynths see 9 1 Drum synths General Handling 9 4 1 Hi hat Silver The Silver engine is the default engine of th...

Страница 421: ...ter applied to the sound measured in hertz Available values range from 932 3 Hz to 16 7 kHz default 7 4 kHz The default position gives a standard metallic analog hi hat Colored down the sound is much...

Страница 422: ...e the positive velocity response and make the drum more and more sensitive to the velocities at which you hit the keys pads From the mid position turning the knob to the left as the inverse effect the...

Страница 423: ...l no matter when the note is released although the sound duration will still depend on the Decay parameter see above TONE Section Color Adjusts the center frequency of the filter applied to the sound...

Страница 424: ...rameter Veloc ity Element Description SCALE Section Velocity Adjusts the velocity response of the drum Available values range from 100 0 to 100 0 default value At zero mid course the drum is played at...

Страница 425: ...a percentage Available values range from 0 0 to 100 0 default 65 0 A short decay produces a closed hat a long decay gives an open hi hat or cymbal Gate When enabled the decay of the cymbal is choked b...

Страница 426: ...velocity no matter how hard you hit the keys or pads From that mid position by turning the knob to the right you increase the positive velocity response and make the drum more and more sensitive to th...

Страница 427: ...ult 50 0 Decay Adjusts the duration of the sound s tail measured as a percentage Available values range from 0 0 to 100 0 default 65 0 TONE Section Color Adjusts the cutoff frequency of several low pa...

Страница 428: ...tter how hard you hit the keys or pads From that mid position by turning the knob to the right you increase the positive velocity response and make the drum more sensitive to the velocity at which you...

Страница 429: ...isabling Gate and modulating the Decay in your Pattern This rather advanced task might give you even finer control over the duration of your various hi hat sounds and thereby help you to give your hi...

Страница 430: ...ine selector on the Main page Each engine has a different character and set of parameters as detailed in the following sec tions The Tom provides following engines Tronic default 9 5 1 Tom Tronic Frac...

Страница 431: ...the Plug in panel within the Plug in Strip Mix view See 8 4 The Plug in Strip for more information on this Main Page Element Description MAIN Section Engine Selects the engine used in the Tom Plug in...

Страница 432: ...from 0 50 to 13 50 default 6 50 At low values the oscillators are tuned close together giving a detuned sound which can be used for basslines FM Freq Adjusts the frequency of the FM oscillator measure...

Страница 433: ...m sound will be 9 5 2 Tom Fractal The Fractal tom is a modern electronic tom with a broad sonic range from pure and analog sounding through organic and percussive through bell like to totally alien It...

Страница 434: ...gs on the Advanced page see below Decay Adjusts the duration of the sound s tail measured as a percentage Available values range from 0 0 to 100 0 default 50 0 Bend Adjusts the pitch sweep of the soun...

Страница 435: ...ge contains parameters controlling the individual oscillators Element Description HARMONICS Section KTr Mode Key Tracking Mode Selects from two key tracking modes Harmonic default and Dissonant In Har...

Страница 436: ...range from 0 0 to 100 0 default 75 0 Note that this control has no effect when FM and AM are set to zero see below FM Adjusts the amount of frequency modulation within the feedback oscillator bank me...

Страница 437: ...l though it is more suitable for floor and low toms it is also capable of producing interesting mid and high toms Furthermore the control over the pitch bend and the mute parameters al low for a wide...

Страница 438: ...asticity of the skin measured as a percentage allowing for a greater pitch bend when the drum is hit Available values range from 0 0 to 100 0 default 30 0 MUTE Section Skin Adjusts the amount of dampi...

Страница 439: ...r Tom With very few parameters it provides a wide range of tom rolls and fills The parameters described below are presented as they appear in the Control area Ar range view The same parameters are ava...

Страница 440: ...nt Description SCALE Section Velocity Adjusts the velocity response of the drum Available values range from 100 0 to 100 0 default value At zero mid course the drum is played at full velocity no matte...

Страница 441: ...ip As in every Drumsynth the engine can be selected via the Engine selector on the Main page Each engine has a different character and set of parameters as detailed in the following sec tions The Perc...

Страница 442: ...yed across the key board The parameters described below are presented as they appear in the Control area Ar range view The same parameters are available in the Plug in panel within the Plug in Strip M...

Страница 443: ...e other modules the tuning responds immediately when you adjust the Tune parameter Glide Adjusts the glide between the pitch of new notes measured in milliseconds When the Glide parameter is set highe...

Страница 444: ...0 0 Freq B Adjusts the pitch of oscillator B within the feedback oscillator bank measured as a percentage Available values range from 0 0 to 100 0 default 50 0 Note that this parameter has no effect w...

Страница 445: ...pads From the mid position turning the knob to the left as the inverse effect the harder you hit the key pad the softer the resulting drum sound will be 9 6 2 Percussion Kettle The Kettle percussion...

Страница 446: ...f feedback noise applied to the drum measured as a percentage Available values range from 0 0 to 100 0 default 25 0 Damp Adjusts the damping amount measured as a percentage Available values range from...

Страница 447: ...ker The Shaker is a versatile electronic shaker maraca engine The parameters described below are presented as they appear in the Control area Ar range view The same parameters are available in the Plu...

Страница 448: ...t and Machine In Realistic mode the envelope uses curved attack and release stages for a more natural sound In Machine mode the envelope uses linear attack hold and release stages for a static machine...

Страница 449: ...one by default and played manually during performance or automated in the sequencer By default the shaker plays a pattern according to the Rate parameter on the Advanced page see below When the Fill p...

Страница 450: ...peat every 4 shakes the note length of which can be set with the Rate parameter above Syncopated patterns can be created by selecting a value other than 4 or 8 or 3 or 6 if the Rate parameter is set t...

Страница 451: ...nge from 0 0 to 100 0 default 0 0 Modulation Page As with all other engines and Drumsynths the Modulation page contains one parameter Veloc ity Element Description SCALE Section Velocity Adjusts the v...

Страница 452: ...trip As in every Drumsynth the engine can be selected via the Engine selector on the Main page Each engine has a different character and set of parameters as detailed in the following sec tions The Cy...

Страница 453: ...ameters are available in the Plug in panel within the Plug in Strip Mix view for more information please refer to section 8 4 The Plug in Strip Main Page Element Description MAIN Section Engine Select...

Страница 454: ...d measured as a percentage Available values range from 0 0 to 100 0 default 100 0 Tone Adjusts the balance of the spectral content measured as a percentage Available values range from 0 0 to 100 0 def...

Страница 455: ...different ways through the use of the Edge and Bell parameters The sonic palette ranges from soft Jazz like rides to more noisy cymbals The parameters described below are presented as they appear in t...

Страница 456: ...creates a more chaotic sound hitting it near the center 0 0 creates a more high pitched sound Available values range from 0 0 to 100 0 default 50 0 Bell Adjusts the high frequencies on a narrow band m...

Страница 457: ...ard you hit the keys or pads From that mid position by turning the knob to the right you increase the positive velocity response and make the drum more sensitive to the velocity at which you hit the k...

Страница 458: ...Sound in the various Dest selectors in the Output properties of other Sounds and Groups See section 10 1 Applying Effects to a Sound a Group or the Master below for more infor mation Most of the feat...

Страница 459: ...e whole Group click the desired Group on the left of the Arranger and click the GROUP tab in the top left cor ner of the Control area 3 If you want to apply the effect to a Sound click its parent Grou...

Страница 460: ...ist appears nearby showing a stack of all Plug ins al ready loaded in the channel In the Plug in List each Plug in has its own slot 2 Click the icon under the last Plug in in the list or at the top if...

Страница 461: ...for Native Instruments products or External for third party products submenu at the top of the list Upon your selection the effect is loaded in a new Plug in slot at the end of the list and directly...

Страница 462: ...parameters for each MASCHINE effect please refer to chapter 11 Effect Reference For additional specific information on VST AU plug ins please read 5 2 6 Page 6 Veloc ity Modwheel If you created a nice...

Страница 463: ...corner of the Mixer click in the blank space above the Master label and headphones icon to set the focus to the Master Cue channel strip If necessary click Master in that header to switch from the Cue...

Страница 464: ...lect the desired effect in the Plug in menu that opens The effect is loaded and directly starts to process the audio of the channel The effect also appears in the Plug in Strip under the Mixer allowin...

Страница 465: ...rowser or from your operating system drag and drop the desired effect preset between two existing Plug in slots Replace an effect Open the Plug in menu and select another effect from the menu Remove a...

Страница 466: ...efault preset for this effect Open the Plug in menu and select Save As Default at the bottom of the menu For detailed information on these topics please refer to 5 1 Plug in Overview You will find mor...

Страница 467: ...and External Any AU plug in with side chain input VST plug ins Native Instruments and External Any VST plug in with multiple inputs When you load any of these Plug ins in a Sound or a Group a Side Cha...

Страница 468: ...l of the side chain signal fed into the Plug in FILTER Section Filter Activates a filter on the side chain input This filter can be useful to select only a specific frequency range of the side chain s...

Страница 469: ...virtual inputs To know how to route audio in your host to the virtual inputs of the MASCHINE plug in please refer to your host documentation When this is done go directly to section 10 2 2 Step 2 Set...

Страница 470: ...your audio interface will be available on the In 1 L input of MASCHINE and so on See 2 6 2 Preferences Audio Page for more information on the Audio page of the Preferences panel Using Effects Applying...

Страница 471: ...view see section 7 1 1 Sending External Audio to Sounds Now the external audio is routed to your Sound You can adjust the level of the incoming signal via the Gain knob You will find a detailed refer...

Страница 472: ...by selecting the Native Instruments Native Instruments products or External third party products submenu at the top of the list Upon your selection the effect is loaded in a new Plug in slot and dire...

Страница 473: ...channels of your Project The procedure in Arrange view is described here You can also do this in Mix view see section 10 1 1 Adding an Effect In this example we will use an empty Sound 1 Choose the em...

Страница 474: ...m other Sounds and Groups in your Project and sends them through its own Plug in slots in other words you now have a send effect You could also load an effect preset from the Browser instead of using...

Страница 475: ...ou can repeat the process to route more Sounds Groups to the same send effect or route the same Sound Group to an additional send effect send using AUX 2 10 3 3 A Few Notes on Send Effects When workin...

Страница 476: ...es e g the vocoder mentioned above 10 4 Creating Multi Effects Creating a multi effect unit is basically the same thing as creating a series of Sounds as send effects within a Group and arrange them a...

Страница 477: ...e Sound rather than any of its auxiliary outputs because it provides a few useful additional features not available on the auxiliary outputs Cue switch You can send the Main output of any Sound to the...

Страница 478: ...you to recognize it as an effect remember that you will be choosing this effect from a potentially large list in your user library In the MASCHINE Library there are already a number of multi effect Gr...

Страница 479: ...delays reverbs and distortions as well as engineering tools such as EQs dynamics and filters But we have also provided you with a series of unique and unusual effects such as Reflex Ice and Resochord...

Страница 480: ...t have a very wide dy namic range In addition to the legacy Classic mode the Compressor provides an alternate Feedback mode If this effect is used in a Sound or a Group it also provides a Side Chain I...

Страница 481: ...ft whereas with a high setting the Compressor abruptly starts to work once the threshold is reached Amount The amount of compression effect often called ratio in typical applications TIME Section Atta...

Страница 482: ...Sounds Group name Sound name e g Drums Kick In the selector display these outputs are labeled as follows For Groups Group name e g Drums For Sounds Group letter number S Sound number e g A1 S4 for th...

Страница 483: ...evel meters for visual monitoring of the input and output levels In particular by comparing the input level with the position of the Threshold fader you can easily see you which parts of the signal wi...

Страница 484: ...of the signal through the Gate TIME Section Attack Use Attack to adjust how fast the Gate reacts to the incoming signal the more you dial it to the right the slower it will react resulting in a softe...

Страница 485: ...audio signal you want to use as side chain signal to control the Plug in Available options are None side chain disabled default setting the outputs of all other Sounds and the outputs of all other Gro...

Страница 486: ...anel offers an extra feature not available in the Control area The Threshold fader corresponding to the Threshold parameter of the Main page in the Control area provides a level meter for visual monit...

Страница 487: ...ea Parameter Description DEPTH Section Input Gain Adjusts the level of the input signal This allows you to offset the overall level once you have set the desired effect in order to counterbalance the...

Страница 488: ...ed attack phases which become too loud 11 1 4 Limiter The Limiter does two things firstly it ensures that the signal level stays below 0 dB thus pre venting digital clipping But it can also increase t...

Страница 489: ...louder dial the Knob to the left Available values range in decibels from 40 0 dB to 0 0 dB default 0 0 dB Release The time the limiter will take to stop limiting after the input signal falls below the...

Страница 490: ...ounds and the outputs of all other Groups In the menu these outputs are labeled as follows For Groups Group name e g Drums For Sounds Group name Sound name e g Drums Kick In the selector display these...

Страница 491: ...Limiter Panel Plug in Strip In the Plug in Strip the Limiter panel offers an extra feature not available in the Control area The Threshold fader corresponding to the Threshold parameter of the Main pa...

Страница 492: ...amount of the Maximizer effect Turn the knob clockwise to increase the loudness of the signal Curve Controls the compression knee higher values tend to result in faster and more aggressive gain contr...

Страница 493: ...Sounds Group name Sound name e g Drums Kick In the selector display these outputs are labeled as follows For Groups Group name e g Drums For Sounds Group letter number S Sound number e g A1 S4 for the...

Страница 494: ...ring Effects 11 2 1 EQ Use the EQ to boost or cut selective frequencies of the audio signal The EQ is mainly a tool to tailor your audio signal to taste by cutting out selected frequencies or boosting...

Страница 495: ...ated by LOW MID Section Freq Frequency selector for the first mid frequency band Ranges from 40 Hz to 16 kHz Gain This determines how much the selected frequency is increased attenuated by HIGH MID Se...

Страница 496: ...on Width Bandwidth control for the second mid frequency band OUTPUT Section Gain Gain control for the EQ altogether 11 2 2 Filter Filter with selectable characteristics that can be modulated via LFO o...

Страница 497: ...pass BP band pass HP high pass and Notch Depending on the mode selected the following parameters vary as indicated FREQ Section Cutoff Controls the cutoff frequency of the filter Resonance Controls th...

Страница 498: ...03 Hz up to 16 Hz LFO Shape Defines how the LFO evolves over time Source LFO Sync Speed Defines the speed of the modulation in note values from 16 1 one cycle every 16 bars up to 1 32 note LFO Shape D...

Страница 499: ...S Sound number e g A1 S4 for the Sound 4 of Group A1 Gain Adjusts the input level of the side chain signal fed into the Plug in FILTER Section Filter Activates a filter on the side chain input This f...

Страница 500: ...our cabinet types and the variable positioning of six different microphones The Cabinet Emulation effect in the Plug in Strip The Cabinet Emulation in the Control area Main page depicted Main Page Ele...

Страница 501: ...een the effect wet signal and original dry signals Available values range from 0 0 to 100 0 default 100 0 11 3 Modulation Effects 11 3 1 Chorus The Chorus is useful to thicken signals and enhance or a...

Страница 502: ...ct OUTPUT Section Mix Mix lets you adjust the amount of the effect in relation to the dry original audio signal 11 3 2 Flanger Classic flanger effect with LFO and envelope modulation The Flanger sound...

Страница 503: ...t Invert Inverts the Flanger MOD Section Amount This defines how much the Flanger gets modulated by the modulation source Source Here you can select the modulation source of the Flanger available opti...

Страница 504: ...ereo field of the effect OUTPUT Section Mix Mix lets you adjust the amount of the effect in relation to the dry original audio signal 11 3 3 FM FM modulates the frequency of the audio signal based on...

Страница 505: ...gh Split settings the effect becomes more gritty and crackling DEPTH Section Contour Contour determines the extent to which the input volume affects the intensity of the effect Amount Determines the a...

Страница 506: ...put signal fed back into the input Increasing this parameter will increase the intensity of the effect Stereo This parameter widens the stereo field of the effect Invert Inverts the settings of the Fr...

Страница 507: ...Pole Activating this causes the Phaser to use the 8Pole mode resulting in a more intense phasing effect MOD Section Amount This defines how much the Phaser gets modulated by the modulation source Sour...

Страница 508: ...ection Mix Mix lets you adjust the amount of the effect in relation to the dry original audio signal The Phaser on the controller 11 4 Spatial and Reverb Effects 11 4 1 Ice This is a special reverb fo...

Страница 509: ...a bit more muffled The higher the Color value the brighter it sounds Ice The ICE factor higher values sound more metallic Size Adjust the size of the virtual room here OUTPUT Section Mix Mix lets you...

Страница 510: ...ed for melodic content The Metaverb panel in the Plug in Strip The Metaverb in the Control area Parameter Description ROOM Section Size Adjust the size of the virtual room here EQ Section Low Low band...

Страница 511: ...e effect in relation to the dry original audio signal 11 4 3 Reflex This is a special resonating reverb At moderate settings the Reflex can be useful to emulate small tight rooms At more extreme setti...

Страница 512: ...the brighter it sounds Smooth With this parameter you can soften the metallic character of Reflex Size Adjust the size of the virtual room here OUTPUT Section Mix Mix lets you adjust the amount of the...

Страница 513: ...tural sound for all sorts of other signals The Reverb panel in the Plug in Strip The Reverb in the Control area Parameter Description ROOM Section Room This allows you to choose one of four basic char...

Страница 514: ...mutes the dry signal and traps the current state of the Reverb output in a temporary buffer to make it last much longer This is a powerful tool for playing live By simultaneously tweaking the Mix knob...

Страница 515: ...Plug in Strip The Reverb in the Control area Main page depicted Main Page Element Description ROOM Section Mode Allows you to choose one of three basic modes of Reverb Room Hall and Plate default Room...

Страница 516: ...sity of the reflections in the virtual room A low diffusion setting makes the reflections sound more distinct like closely spaced echoes A high diffusion setting creates reflections so close they soun...

Страница 517: ...ibels from 0 0 dB to 12 0 dB default 0 0 dB 11 4 5 2 Reverb Hall The Reverb Hall mode is a spacious and natural reverb that is particularly suited to tonal sounds When used with a high Reverb Time set...

Страница 518: ...clockwise to increase the perceived size of the room and reverb reflections Available values range from 0 0 to 100 0 default 10 0 COLOR Section Damping Adjusts damping of the high frequencies in the r...

Страница 519: ...Available values can be adjusted in milliseconds from 0 0ms to 250 0ms default 0 0ms OUTPUT Section Mix Adjusts the ratio between the effect wet signal and original dry signals Available values range...

Страница 520: ...as well such as snare drums The Plate Reverb in the Control area Parameter Description MAIN Section Pre Delay Adjusts the time between the original signal and the early reflections Decay Adjusts the d...

Страница 521: ...e MASCHINE factory library the Beat Delay is used in various Groups here and offers a lot of rhythmic sonic possibilities Please note that in the Control area and on your controller the Beat Delay par...

Страница 522: ...longer decays Crossover Allows for panning the feedback signal rhythmically in the stereo field Color Defines the basic frequency of the feedback circuit lower values result in a deeper sound whereas...

Страница 523: ...ing them as a cloud the Grain Delay is useful for creating ambient textures Increase Size Space and Density to quickly transform any sound into an evolving ambient texture As a unique experimental eff...

Страница 524: ...Introduces artifacts into the grains Reverse Produces a reverse playback of the grain CLOUD Section Space Determines the spacing between the grain clouds the higher the value the bigger the space bet...

Страница 525: ...rameter widens the stereo field of the effect Values go from 0 no stereo to 100 full stereo 11 5 3 Grain Stretch The Grain Stretch effect uses granular synthesis to manipulate the speed and pitch of t...

Страница 526: ...Adjusts the pitch of the grains Link When on grain size is corrected by the pitch Size Adjusts the size of the grains OUTPUT Section Mix Mix lets you adjust the amount of the effect in relation to the...

Страница 527: ...are centered around one frequency and can be spread for an intense chorus like effect Depending on your selection the other parameters in the Pitch area will change Spread String mode Allows you to d...

Страница 528: ...y With Decay you adjust how fast the Resochord fades out OUTPUT Section Mix Mix lets you adjust the amount of the effect in relation to the dry original audio signal 11 6 Distortion Effects 11 6 1 Dis...

Страница 529: ...the feedback signal OUTPUT Section Gate The Gate button is used to cancel out feedback loops introduced by high Feedback settings Release This parameter determines how fast the distorted sound dies d...

Страница 530: ...Hz which results in a hissy crackle BITCRUSH Section Bits Introduces a distortion based on bit reduction Smooth Reduces the aliasing introduced by the Lofi effect Stereo Widens the stereo field of th...

Страница 531: ...described separately below The Saturator panel here in Tube mode in the Plug in Strip Classic Mode The Classic mode is the legacy mode It combines compression and saturation to increase the overall lo...

Страница 532: ...ue magnetic tapes It can be used lightly to add warmth and coloring to the sound or heavily to add aggressive distortion The Saturator in Tape mode in the Control area Tape Mode Parameter Description...

Страница 533: ...or s input according to the amount of low frequencies at its output This notably prevents the bass content polluting the saturation The Charge parameter allows you to adjust the amount of feedback At...

Страница 534: ...he effect Use this to compensate for changes in volume caused by input gain and signal compression 11 6 4 Analog Distortion The Analog Distortion be used to add grit to Drums and Percussion Lead Synth...

Страница 535: ...from 0 0 to 100 0 default 100 0 Focus Switches the frequency range of the processed signal pulling it slightly further forwards in the mix The effect is more pronounced when Definition is set to lower...

Страница 536: ...ic sound sources An additional plate reverb lets you pick out individual notes with your fin ger and have them ring out for several seconds For more information see section 11 7 5 Ring Stutter Stutte...

Страница 537: ...Perform FX in the Plug in Strip Filter Perform FX in the Control area Main Page Parameter Description MODE Section Mode Select an effect TOUCHSTRIP Section Effect Reference Perform FX MASCHINE 2 Manu...

Страница 538: ...ce will sound more pronounced at lower saturation settings and vice versa Setup Page Parameter Description RANGE Section Min Freq Sets the lower limit for cutoff frequency Max Freq Sets the upper limi...

Страница 539: ...Flanger Perform FX in the Plug in Strip Flanger Perform FX in the Control area Main Page Parameter Description MODE Mode Select an effect TOUCHSTRIP Effect Reference Perform FX MASCHINE 2 Manual 539...

Страница 540: ...ve polarity lowers the pitch by an octave and produces a slightly hollower sound Tone Offers the choice between Flanger mode essentially a straightforward comb filter or short delay and Phaser mode wh...

Страница 541: ...rst Echo Perform FX in the Plug in Strip Burst Echo Perform FX in the Control area Main Page Parameter Description MODE Mode Select an effect TOUCHSTRIP Effect Reference Perform FX MASCHINE 2 Manual 5...

Страница 542: ...HO Time Controls the delay time either continuously or in quantized divisions according to the Time Mode Time Mode Sets the rhythm mode of the delay either in quantized note divisions Straight Dotted...

Страница 543: ...the length of the burst of audio to feed into the delay input whenever the effect is initially activated Shorter burst lengths e g 100 150ms are useful for picking out notes or drum hits Longer burst...

Страница 544: ...eso Echo Perform FX in the Plug in Strip Reso Echo Perform FX in the Control area Main Page Parameter Description MODE Mode Select an effect TOUCHSTRIP Effect Reference Perform FX MASCHINE 2 Manual 54...

Страница 545: ...unprocessed and the wet signal is added on top according to the Wet Level parameter In Insert mode the dry signal is processed with a filter and the wet signal is added on top The Wet Level parameter...

Страница 546: ...ality to melodic sound sources Using the additional plate reverb tweak a knob or Smart Strip to hand pick in dividual notes and keep them ringing into the stratosphere Ring Perform FX in the Plug in S...

Страница 547: ...tors converge to a single modulation frequency At higher Spread values the oscillator frequencies become further apart Glide Sets the smoothing rate of the control position allowing for pitch slides a...

Страница 548: ...dry signal is muted entirely leav ing silence except when the effect is activated This is useful for using Ring as an instrument with a sustained sound e g a pad as source material 11 7 6 Stutter Turn...

Страница 549: ...Stutter Perform FX in the Plug in Strip Stutter Perform FX in the Control area Main Page Parameter Description MODE Mode Select an effect TOUCHSTRIP Effect Reference Perform FX MASCHINE 2 Manual 549...

Страница 550: ...rol is assigned to Pitch Otherwise each of these parameters has no effect and is respectively hidden LOOP Direction Controls the looping direction Forward always forward Reverse always reverse or Both...

Страница 551: ...motion and wobble on the fly Instantly add expression with multiple modes Rate and Depth ranges and use the Stereo knob to create auto pan motion effects Tremolo Perform FX in the Plug in Strip Tremol...

Страница 552: ...the playback speed of the audio much like moving the pitch control on a turntable or tape player and Freq Shift which uses a modulated frequency shifter Freq Shift produces a somewhat detuned sound d...

Страница 553: ...s the rate of the modulation when the parameter position is set to 0 Rate Max Controls the rate of the modulation when the parameter position is set to 100 11 7 8 Scratcher Scratcher warps your sounds...

Страница 554: ...cratcher Perform FX in the Plug in Strip Scratcher Perform FX in the Control area Main Page Parameter Description MODE Mode Select an effect TOUCHSTRIP Effect Reference Perform FX MASCHINE 2 Manual 55...

Страница 555: ...r values produce a delay effect Shorter values result in a comb filtering effect The Position parameter acts as a further scale factor on this delay time Feedback Controls the delay feedback Freq Shif...

Страница 556: ...highlighted Mix View button left of the Mixer to switch from Mix view to Arrange view You can also do this from your controller see section 2 2 3 Switching between Arrange View and Mix View for more i...

Страница 557: ...he longest Clip used in the Scene Inserting a new Clip that is longer than the Scene automatically extends the Scene Removing the longest Clip from the Scene automatically shrinks the Scene Extending...

Страница 558: ...ce whatever you do in the Arranger your Patterns stay un touched with one exception When you double click a Clip you can enter a name that will be saved to the referenced Pattern See 6 6 6 Naming Patt...

Страница 559: ...roup List All the Groups of your Project are listed here In the row at the right of each Group you can choose which of its Patterns must be played in each Scene You do this by cre ating Clips 7 each o...

Страница 560: ...a lighter gray region Drag this region or any of its borders in the timeline 6 to move or resize the Loop Range respectively You can also set the Loop Range to a particular Scene by clicking the Scene...

Страница 561: ...ly to zoom in or out of the Arranger while keeping the right border of the display at a fixed position in the song Similarly click the right handle 3 of the scroll bar hold the mouse button and drag y...

Страница 562: ...Arranger You can also adjust the height of the Arranger in order to display more less Groups at once by dragging its bottom right corner vertically with your mouse Drag the handle to adjust the Arran...

Страница 563: ...e next portion of your Project with the same zoom factor as soon as the playhead reaches the end of the portion currently displayed This way you always see the portion of your Project that is currentl...

Страница 564: ...cursor that retains the current playhead position relative to the Pattern Grid division This allows seam less jumps that don t break the rhythm of your music If the Pattern Grid is set to Off i e disa...

Страница 565: ...click the cell located in the column of the desired Scene and in the row of the desired Group This selects both the desired Scene and Group simultaneously You can also click the desired Scene label a...

Страница 566: ...w empty Pattern Creating the Clip and the Pattern Simultaneously You can also create a Clip referencing a new empty Pattern In the Arranger double click the cell located in the column of the desired S...

Страница 567: ...y given time You can have multiple Scenes in your project which correspond to multiple sections in your song though only one Scene can play at a time For example you can have a Scene for the intro as...

Страница 568: ...you should familiar ize yourself with all the methods so that you can choose the one that is most appropriate for what you are trying to do at any given time 12 2 1 Scene Management Overview In the so...

Страница 569: ...Scene slots on the left and the cells in the selected pad grid on the right are strictly equivalent you can use either the slots or the corresponding cells to execute all the man agement commands des...

Страница 570: ...nk in the Scene Manager To select a Scene in the Scene Manager do the following 1 Open the Scene Manager see 12 2 1 Scene Management Overview 2 If it is not already selected select the Scene bank cont...

Страница 571: ...is no Clip for the focused Group in the Scene you have just selected the Pattern Editor is empty Additionally if the selected Scene is outside the current Loop Range The Loop Range is set to the selec...

Страница 572: ...e a new Scene A new empty Scene is created after all existing Scenes The new Scene also appears in the Scene Manager it will be located in the last non empty Scene bank right after the last Scene slot...

Страница 573: ...ck any empty Scene slot in the list on the left or click any dark cell in the selected pad grid on the right to create a new empty Scene there A new empty Scene is created in the selected Scene slot T...

Страница 574: ...to insert the new Scene and select Insert from the context menu A new empty Scene is inserted right after the Scene in question both in the Arranger and in the Scene Manager 12 2 4 Deleting Scenes To...

Страница 575: ...ene Manager hover the slot of the desired Scene with your mouse and click the little cross that appears on the right of the slot Deleting Scenes on the Controller To delete a Scene on your controller...

Страница 576: ...ld SCENE to enter Scene mode 2 Press Button 7 and 8 to select the desired Scene bank 3 Press the pad corresponding to the Scene you want to delete Alternatively you can select the Scene by pressing th...

Страница 577: ...Scene you want to delete The Scene is deleted with all its Clips The next Scenes shift ahead to fill the gap If the desired Scene bank is already selected or if there is only one Scene bank this alter...

Страница 578: ...pad grid appears in place of the symbol If the last Scene bank is empty there is no symbol under its pad grid and you can not create any new Scene bank Deleting a Scene Bank To delete a Scene bank 1...

Страница 579: ...nes By default Scenes are named Scene 1 Scene 2 Scene 3 etc You can rename Scenes and use custom names of your own Naming is only available from within the software but any changes will also show up o...

Страница 580: ...n the Scene Manager To rename a Scene in the Scene Manager 1 Open the Scene Manager see 12 2 1 Scene Management Overview 2 If necessary select the Scene bank containing the desired Scene by clicking i...

Страница 581: ...ene is renamed If you use MASCHINE as a plug in some hosts will utilize the Enter key as it is map ped to some function of the host software In this case click anywhere else in the MA SCHINE plug in w...

Страница 582: ...fault color for Scenes in Preferences Colors Scene Default See section 2 6 9 Preferences Colors Page for more information Once you have set a custom color for a Scene as described above the Scene will...

Страница 583: ...in the Scene Manager toward the desired location As the mouse cursor moves an insertion line appears at the potential places where you can drop the Scene 3 When the insertion line appears at the desi...

Страница 584: ...stays in your arrangement but empty For more info on deleting Scenes see section 12 2 4 Deleting Scenes To clear a Scene 1 Right click Ctrl click on Mac OS X the name of the desired Scene in the Arran...

Страница 585: ...the Timeline you will also see the other linked Scenes become highlighted too This reminds you that any change you make to this Scene will be made to all the highlighted Scenes too To duplicate a Sce...

Страница 586: ...ne and the original Scene will still contain the verse Drum Pattern Duplicating Scenes and Patterns With Scene and Pattern selected in the Preferences duplicating a Scene will create a new Scene just...

Страница 587: ...king on the chorus Scene and choosing Duplicate will create a linked instance of the same Scene again in the Timeline as opposed to making a new Scene Therefore any changes you make to the Scene will...

Страница 588: ...will also create new Patterns You are then free to edit the Patterns in the Scene or the data in the Patterns without affecting any of the original Scenes This is great for when you want to introduce...

Страница 589: ...ene Extending shrinking the longest Clip automatically extends shrinks the Scene accordingly Manual Length A Scene can be manually adjusted to a set length This can be shorter or longer than the Clips...

Страница 590: ...ed Pattern This is particularly useful as it avoids the need to create a new version of a pattern when you only want to extend or truncate a Pattern to make it fit an arrangement When the right Scene...

Страница 591: ...following rules apply The value set in the Arrange Grid is used for length increments When Shift is pressed while changing the length the value set in the Step Grid is used The minimum length a Scene...

Страница 592: ...e sized according to the Clips placed inside and will continue to resize with the content unless the length is again manually adjusted To enable Auto Length for a Scene in the software 1 Right click o...

Страница 593: ...in the Timeline The value set in the Arrange Grid is used for Loop range increments and movement of the loop range itself To adjust the Loop range using the software Drag the left or right end of the...

Страница 594: ...ming live you will probably want to switch back and forth between different Scenes or groups of Scenes during your performance This may also be necessary if you are composing a studio track in your ho...

Страница 595: ...op Range to a Single Scene You can easily set the Loop Range to a single Scene by selecting any Scene outside the cur rent Loop Range To set the Loop Range to a single Scene outside the current Loop R...

Страница 596: ...is looped You have following actions at your disposal Drag the Loop Range s highlighted region horizontally to move the whole Loop Range Drag the left or right border of the Loop Range horizontally to...

Страница 597: ...layback Position in Your Project for more information 12 3 2 Jumping to Other Scenes If you set a new Loop Range by selecting another Scene or group of Scenes as described in section 12 3 1 Selecting...

Страница 598: ...t playing on its beat 3 This ensures that the global groove of your track is not interrupted In the software the Perform Grid and the Retrigger setting can be adjusted in the MASCHINE Header Adjusting...

Страница 599: ...s whether they are empty or not Scene Slot MIDI Note Number Program Change Number 1 0 1 2 1 2 3 2 3 128 127 128 MIDI Note numbers Host applications use various conventions to name MIDI notes For examp...

Страница 600: ...submenu and select the MIDI channel the Scenes should receive MIDI messages from channel 1 by default 12 5 The Arrange Grid The Arrange Grid is used to quantize all modifications related to the timel...

Страница 601: ...enable the Arrange Grid 2 Click the current Arrange Grid value to open the drop down menu 3 Select a new value for the Arrange Grid The selected Arrange Grid value is applied Creating a Song Using Sc...

Страница 602: ...can map your Samples to particular Zones thereby creating multi sam ple Sounds with individual velocity and note ranges volume and panning This is useful to em ulate the behavior of classic instrumen...

Страница 603: ...create Slices from your existing Samples 13 4 Slicing a Sample The Zone page allows you to assign your Samples to particular note and velocity ranges called Zones in your Sound and to adjust various...

Страница 604: ...op Adjusting the source and mode of the recording in the software Selecting the Source to Record Click the SOURCE selector on the left to select the type of source you want to record To record externa...

Страница 605: ...o available recording modes Sync If Sync is selected you can synchronize the recording function to the sequencer so that the recording starts in sync with the sequencer after you clicked Start The rec...

Страница 606: ...e THRESHOLD control de scribed above This way you can easily visualize when the input signal exceeds the current threshold and hence when it would start the recording and adjust that threshold accordi...

Страница 607: ...stop the recording at the next bar or Cancel to cancel the recording in that case the recorded audio will not be saved When recording in Detect mode The recording will start as soon as the input sign...

Страница 608: ...ound ready to play your new recording All Plug ins previously loaded in that Sound are removed The Sound slot takes the name of your recording The recording is mapped to a new Zone covering the entire...

Страница 609: ...o zoom in out You can also use the zooming scroll bar 2 When the Sample is played back e g by pressing the pad or by clicking the little play icon in the information bar 4 a playhead indicator white v...

Страница 610: ...tect mode 4 Information bar Displays the file name and the length of the recorded Sample Click and hold the little play icon on the left to listen to the Sample on the Cue bus see section 8 2 6 Using...

Страница 611: ...ing History is not saved with the Project The Recording History is meant as a temporary tool to help you manage the various recordings made during the current ses sion When you close the current Proje...

Страница 612: ...es in the Zone List for more infor mation on selecting Zones and all your actions in that page will affect this particular Sample For example If you have just recorded a Sample it will directly appear...

Страница 613: ...r Plug in in the Sound and creates a Zone over the entire key and velocity ranges for the dragged Sample Use the scroll wheel of your mouse to zoom in out You can also use the zooming scroll bar 4 Pla...

Страница 614: ...ied Adjust the current selection range by dragging its borders or move it by dragging its top part Double click anywhere in the waveform to set the selection range to the play range i e to select ever...

Страница 615: ...the entire waveform Alterna tively you can use the scroll wheel of your mouse when hovering the waveform display 1 to zoom in out 5 PLAY RANGE section Adjusts the range that will be played when you t...

Страница 616: ...inct copy of the Sample will be saved The playback settings of the Sample e g tune amplitude envelope etc can be ad justed on the Zone page See section 13 5 4 Selecting and Editing Zones in the Map Vi...

Страница 617: ...currently selected DUPL Duplicate This duplicates the selected region of the Sample The copy is placed right after the original region STRETCH This allows you to apply time stretching and or pitch shi...

Страница 618: ...om the time signature of the source This is more suited for non rhythmic Samples In this mode only one parameter is available SPEED see below AUTO DTCT Auto Detection Beat mode only If enabled MASCHIN...

Страница 619: ...set the parameters to the desired values click Apply to apply the pitch shifting and or time stretching to the selected region in the Sample or Cancel to let the Sample untouched 13 4 Slicing a Sampl...

Страница 620: ...rded a Sample it will directly appear here If you have recorded more than one Sample the Sampled selected in the Recording History by default the last re corded Sample will appear here see section 13...

Страница 621: ...the Slice page Any change to these settings will directly affect the number and position of the Slice markers displayed on the waveform above At any time you can prelisten to the proposed Slices on t...

Страница 622: ...y The Sample Slicer Manual mode Auto Snap feature automatically aligns Slice points to the nearest transient as you manually trigger the slicing from the pads It can be turned off so that slice points...

Страница 623: ...on vintage drum machines typically used to choke the open hi hat with the closed one but also in monophonic synthesizers that are only capable of playing one note at a time BPM BPM Mode Selects how th...

Страница 624: ...Slices manually by selecting Manual in the MODE selector or start from MASCHINE s proposed Slices as described in section 13 4 2 Adjusting the Slicing Settings and fine adjust these Slices manually i...

Страница 625: ...adjust Slices with your mouse as follows Click inside a Slice i e anywhere between its borders to play it back on the Cue bus see section 8 2 6 Using the Cue Bus for more information Drag the borders...

Страница 626: ...e play icon on the left to play back the whole Sample on the Cue bus see section 8 2 6 Using the Cue Bus for more information Click the little circle or pair of circle at the far right to switch the w...

Страница 627: ...y pressing the corresponding pads on your controller 13 4 4 Applying the Slicing Once you are satisfied with the proposed and or manually adjusted Slices see section 13 4 2 Adjusting the Slicing Setti...

Страница 628: ...n be automatically created for each Slice see below 2 Slice Dragger Drag the Slice Dragger to export the Slices to any other Sound or Group If you drag to a Sound in the Sound List at the left of the...

Страница 629: ...he automatic note creation upon Slice export The mode selected here will be used both when clicking the Apply button 1 and when using the Slice Dragger 2 Following options are available Create Pattern...

Страница 630: ...timing and pitch If you change the tempo of your Project you will hear that the loop automatically adjusts to the new tempo Exporting Single Slices You can also export an individual Slice to another S...

Страница 631: ...a Group where you have not yet loaded anything else 13 5 Mapping Samples to Zones Mapping Samples is a way to create Sounds with more than one Sample across the MIDI key board and with different velo...

Страница 632: ...The Zone page here for an empty Sound 13 5 2 Zone Page Overview The Zone page provides following elements Sampling and Sample Mapping Mapping Samples to Zones MASCHINE 2 Manual 632...

Страница 633: ...channel display 4 Zone List Shows all Zones in a list The Zone List can be shown hidden by clicking the Zone List button 1 Click an entry in the list to set the focus to that Zone You can also select...

Страница 634: ...Settings for a detailed description of the available parameters 13 5 3 Selecting and Managing Zones in the Zone List The Zone List shows all Zones of the focused Sound The Zone List in the Zone page C...

Страница 635: ...It will creates as many new Zones You can also add Zones to your Sound by dragging and dropping Samples directly onto the Sample Map of the Map view See section 13 5 7 Adding Samples to the Sample Ma...

Страница 636: ...e See section 13 5 6 Adjusting the Zone Settings for more information on these settings The focused Zone also appears on the Edit and Slice pages which allows you to further process of its contained S...

Страница 637: ...nes in between Press Ctrl A Cmd A on Mac OS X Selects deselects all Zones in the list When deselecting only the focused Zone remains selected Deleting Zones from the List To remove one or more Zone s...

Страница 638: ...mouse button to drop the selected Zone s to this new place Moving Zones allow you to reorder the Zone List This can come in handy before you run the Map as Drum Kit command from the Sample Map s cont...

Страница 639: ...the Sample of that Zone You can zoom in out both horizontally and vertically via the zooming scroll bars 3 and 4 respectively Each Zone header displays the name of the corresponding Sample Click a Zon...

Страница 640: ...4 Vertical zooming scroll bar Click the main part of the scroll bar and drag your mouse vertically to scroll through the Sam ple Map on the vertical axis velocity or drag it horizontally to zoom in ou...

Страница 641: ...Zone Simultaneously adjusts the lowest highest note and the lowest highest velocity of the selected Zone s depending on the corner Click inside a Zone and drag Moves the selected Zone s across the Sa...

Страница 642: ...Map Map as Drum Kit Reduces the selected Zones to one note over the full velocity range and puts the Zones next to each other upwards from the middle C C3 The actual note assigned to each Zone depends...

Страница 643: ...and loop markers 5 See below Playhead indicator When the Sample is played back e g by pressing the pad or by click ing the little play icon in the information bar above the waveform a playhead indicat...

Страница 644: ...can use the scroll wheel of your mouse when hovering the waveform display 1 to zoom in out 4 Play range markers The S and E markers indicate the start and end points of the play range respectively Dra...

Страница 645: ...on of parameters Following parameters are available 1 PLAY RANGE section The parameters in the PLAY RANGE section allow you to adjust the portion of Sample that will be played back when the Zone is tr...

Страница 646: ...ducing any clicks Alternatively you can also adjust the loop start and end points by dragging the borders of the loop in the Sample view and move the entire loop by dragging its title bar By moving th...

Страница 647: ...after being triggered DECAY Adjusts how fast the Sample Slice dies down 5 MAP section The MAP section contains the parameters defining the key and velocity ranges of the Zone Parameter Description KEY...

Страница 648: ...the focused Zone Hold SHIFT when turning the Knobs to adjust the parameters in finer increments In the waveform on the right display the regions outside the play range are grayed out Page 2 LOOP Param...

Страница 649: ...sit uation Page 3 TUNE MIX Parameters The TUNE MIX page contains parameters controlling pitch and level related aspects of the Sample playback Parameter Description TUNE Knob 1 Sets the tuning of the...

Страница 650: ...city of the focused Zone VEL HI Highest Velocity Knob 4 Defines the highest velocity of the focused Zone 13 5 7 Adding Samples to the Sample Map You can add Samples directly to the Map view of the Zon...

Страница 651: ...Samples to the Sample Map at once 1 Hold Ctrl Cmd on Mac OS X or Shift on your computer keyboard and click the de sired Samples in the Browser or in your operating system 2 Drag the selected Samples...

Страница 652: ...Using the Perform Features Use both Touch Strips 14 6 Using the Touch Strips Record modulation 14 7 Recording Modulation from Your Keyboard In addition you can adjusts settings for your keyboard via...

Страница 653: ...arious situations are described in the following paragraphs Default Focus for New Instances When you load a new instance standalone or plug in of MASCHINE or KOMPLETE KONTROL your KOMPLETE KONTROL S S...

Страница 654: ...ly To connect your KOMPLETE KONTROL S SERIES keyboard to a particular instance of MA SCHINE 1 Bring the desired MASCHINE instance to the front in your operating system or open its user interface in yo...

Страница 655: ...nnot select them Black entries indicate connected controllers Select any of them to bring its focus to this MASCHINE instance Only one item can be selected at a time It is indicated by the check mark...

Страница 656: ...Hence its functionality is unchanged Switching the Focus from Your Keyboard You can also select a particular MASCHINE instance to focus on directly from your KOMPLETE KONTROL S SERIES keyboard This p...

Страница 657: ...nce and press the encoder to switch the focus to that instance Now your KOMPLETE KONTROL S SERIES keyboard focuses on the selected instance If another KOMPLETE KONTROL S SERIES keyboard was already fo...

Страница 658: ...the preset currently loaded in the NI product within the KOMPLETE KONTROL in stance The STANDALONE section displays the instances of MASCHINE and KOMPLETE KON TROL running in standalone mode if any A...

Страница 659: ...in stance Clicking on a host track that doesn t contain any KOMPLETE KONTROL instance discon nects your keyboard from its MASCHINE instance and switches it to MIDI mode re ena bling auto focus In all...

Страница 660: ...you can disable the control of the MASCHINE transport in the Preferences panel as described at the end of this section In some cases they are used in combination with the Control encoder and the Navig...

Страница 661: ...y Step Grid increments SHIFT FFW Moves the playhead forwards by Step Grid increments Transport in MASCHINE Running as a Plug in If keyboard is focused on MASCHINE plug in Komplete Kontrol S Transport...

Страница 662: ...E Li brary Disabling MASCHINE Transport Functions on Your Keyboard If needed you can disable your keyboard s transport functions in MASCHINE they are enabled by default This is done in the Transport C...

Страница 663: ...enable or disable the transport functions of your keyboard in MASCHINE click the Enabled check box in the Transport Control section of the Hardware page in the Preferen ces panel KOMPLETE KONTROL Int...

Страница 664: ...focused Sound The Pitch and Modulation strips affect that Sound as well If your keyboard is in Instrument mode the default mode Knobs 1 8 control the parame ters in the Parameter pages of the selecte...

Страница 665: ...the Knobs the first row contains the parameter names and the second row contains the section names if any sec tion names are displayed under the first parameter of each section Any parameter change ma...

Страница 666: ...age of the Preferences panel your keyboard must be connected to your computer and controlling the MASCHINE instance Moreover if a controller from the MASCHINE family is also focused on the MASCHINE in...

Страница 667: ...n preset from the MASCHINE Library to load it in this Plug in slot If you hold SHIFT the leftmost display indicates the focused Sound and Group The PRESET field shows the name of the focused Sound The...

Страница 668: ...the leftmost display indicates the selected Plug in see above If the last Plug in is already selected and you press the Navigate Right button the PAGE field reads EMPTY and PRESS BROWSE appears in th...

Страница 669: ...HIFT Navigate Up Down buttons If the last Group is already selected and you press SHIFT Navigate Down button the PAGE field reads EMPTY and PRESS BROWSE appears in the other displays Additionally the...

Страница 670: ...is played whether because you press it or because your keyboard receives a MIDI note corresponding to that key its LED turns fully on If the focused Sound slot contains a KOMPLETE or NKS Instrument pr...

Страница 671: ...14 4 Browsing Your MASCHINE Library You can browse your MASCHINE Library directly from your KOMPLETE KONTROL S SERIES and load the desired files into the focused MASCHINE instance For this your KOMPL...

Страница 672: ...header The on screen overlay browser in MASCHINE is very similar to that in the KOMPLETE KON TROL software both in appearance and use We will focus here on the few differences be tween both For all de...

Страница 673: ...ibrary is that the latter only contains Instrument presets whereas the former contains many more file types Projects Groups Sounds Instrument presets Effect presets and Samples As a conse quence the o...

Страница 674: ...directly moves to the next available section e g the Bank selection or the TYPES filter This handy feature allows you to quickly narrow your search E g if you have no MA SCHINE EXPANSIONS installed t...

Страница 675: ...ectly to the File Type selector keep the cur rent selection in the File Type and Content selectors and remove all other selections Loading a File from the Result List In the on screen overlay browser...

Страница 676: ...ating and Controlling Your Sounds within a Group Loading the Previous Next File from the Result List Press the PRESET buttons right of the control encoder to load the previous next item from the resul...

Страница 677: ...ARP buttons are off and disabled and pressing SHIFT SCALE SHIFT ARP will not work either Note that this does not affect the Perform features on controllers from the MASCHINE family These are availabl...

Страница 678: ...section 14 3 Navigating and Controlling Your Sounds within a Group When your keyboard is connected to a MASCHINE instance Scale Edit mode shows the same Knob layout and parameters as when it is conne...

Страница 679: ...eter which is specific to your keyboard only the on off states on each device are independent of each other Again all these parameters are described in section Scale and Chord Parameters For consisten...

Страница 680: ...r KOMPLETE KONTROL S SERIES keyboard Press ARP to enable or disable the Arp engine The ARP button is fully lit when the Arp engine is enabled otherwise it is dimly lit The state of the ARP button and...

Страница 681: ...Sounds within a Group When your keyboard is connected to a MASCHINE instance Arp Edit mode shows the same Knob layout and section names as on the MASCHINE STUDIO or MASCHINE MK2 controller except for...

Страница 682: ...ides a quicker way of check ing important parameters in a live situation since their values are quite self explanatory To sum up all Arp parameter values are always synchronized between your KOMPLETE...

Страница 683: ...DI Pane of the Control Lane under the Pattern Editor please refer to the MASCHINE 2 0 Manual for more information on this Touch Strip Behavior You can adjust the behavior of each touch strip i e how i...

Страница 684: ...uter and controlling the MASCHINE instance Moreover if a controller from the MASCHINE family is also focused on the MASCHINE instance make sure that your keyboard is se lected in the Controller menu a...

Страница 685: ...ulation strip on your KOMPLETE KON TROL S SERIES keyboard and corresponds to the usual behavior for a modulation control In this mode the touch strip reads the position of your finger and applies the...

Страница 686: ...te of the mod ulation strip Bar or Dot Bar displays a bar of lit LEDs from the default position of the strip to the current value whereas Dot displays a dot of lit LEDs at the current value Friction s...

Страница 687: ...avity slider Adjusts the attraction of your finger on the ball The higher the Gravity value the faster the ball will move This parameter doesn t affect the ball movement if you throw the ball with you...

Страница 688: ...n the ball The higher the Gravity value the faster the ball will move This parameter doesn t affect the ball movement if you throw the ball with your finger see the description of the Ball mode above...

Страница 689: ...percentage 3 Turn the desired Knobs 1 8 above the displays to record deviations to the actual values Your modulation gets recorded now Each Knob movement is stored in your Pattern as a modulation eve...

Страница 690: ...articular this allows you to overwrite existing modulation events while keeping the last modulation value you have record ed This option is the same as for MASCHINE STUDIO For all details please refer...

Страница 691: ...es panel To enable or disable the Touch Auto write option click the Touch Auto write check box in the Touch Sensitive Knobs section of the Hardware page in the Preferences panel KOMPLETE KONTROL Integ...

Страница 692: ...el 14 8 Adjusting the Settings for Your Keyboard in the MASCHINE Preferences When your KOMPLETE KONTROL S SERIES keyboard is focused on a MASCHINE instance the Hardware page of MASCHINE s Preferences...

Страница 693: ...TROL S SERIES keyboards The available parameters are listed in the table below Each of them is described in detail in the corresponding section KOMPLETE KONTROL Integration Adjusting the Settings for...

Страница 694: ...e transport functions of your keyboard in MASCHINE on or off See section 14 2 Controlling the Transport in MASCHINE Pitch Strip and Modulation Strip All parameters Adjust the behavior of the touch str...

Страница 695: ...true piano feel across 88 fully weighted hammer action keys The KOMPLETE KONTROL S SERIES keyboards are tightly integrated into the MASCHINE workflows Connected the KOMPLETE KONTROL S88 will appear i...

Страница 696: ...y Make sure you have the most recent version of the MASCHINE software installed You can find the latest available version following this link http www native instruments com updates Make sure that you...

Страница 697: ...the crash happened You will find the crashlog in the following folders Windows My Documents Native Instruments Maschine 2 Crashlogs Mac OS X Users Library Logs CrashReporter 15 1 4 Updates Whenever y...

Страница 698: ...line Knowledge Base from the Help menu in the Application Menu Bar or from the Help submenu in the MASCHINE menu 15 2 2 Technical Support If no Knowledge Base entry matches your problem or if the matc...

Страница 699: ...15 2 3 Registration Support If problems occur during the product activation procedure please contact our Registration Support team www native instruments com regsuppfrm 15 2 4 User Forum In the Native...

Страница 700: ...y and velocity scaling to your personal taste see sec tion 2 6 6 Preferences Plug ins Page to learn how to do that you will have even more fun playing MASCHINE 16 1 3 Check Your CPU Power Before Playi...

Страница 701: ...stakes can be the key for inspiring tracks and performances as well as just jamming around with your Sounds and Samples 16 2 Basic Techniques 16 2 1 Use Mute and Solo Mute and Solo are a good way to b...

Страница 702: ...ery useful tool for playing live use it to add some additional drums drop in some effect sounds play a bassline or a melody Note Repeat is also interesting to use with tonal Sounds and you can access...

Страница 703: ...ude Envelope in the Sampler s Parameter pages see 13 5 4 Selecting and Editing Zones in the Map View 16 3 3 Using Loops to Cycle Through Samples You can use loops to cycle through Samples creating gli...

Страница 704: ...d Group Sound slot or Plug in slot This way you can listen to this object in the current context of your Project Automation Automation means the control of MASCHINE parameters from an external source...

Страница 705: ...ressing the corresponding pad on your controller If you load an effect Plug in in this first Plug in slot though the Sound won t generate audio itself but instead it becomes available for other Sounds...

Страница 706: ...rn in the Arranger will get updated accordingly Control Area The Control area is located in the middle of the MASCHINE window in Arrange view between the Arranger above and the Pattern Editor below Th...

Страница 707: ...a Group can have its own insert effect loaded in its Plug in slots These affect all the Sounds in the Group A Group can also contain any number of Patterns grouped into banks of 16 Pat terns each Gro...

Страница 708: ...elodic instruments e g synthe sizer The Keyboard view of the Pattern Editor and the Keyboard mode of the pads on your controller are bound together If you enable Keyboard view in the Pattern Editor th...

Страница 709: ...oup within it This way in any Sound any Group or the Master you can define your custom set of parameters for quick ac cess Master The Master is where all audio signals from each of the Groups and Soun...

Страница 710: ...y enabled in the software and inversely Parameter Pages The Parameter pages constitute the biggest part of the Control area in the MASCHINE window They contain the adjustable parameters for the Plug i...

Страница 711: ...ou can quietly choose a Sample before modifying any thing in your Project Project A Project contains all data needed for a song all Groups Patterns Sounds Samples Scenes and all settings modulation ef...

Страница 712: ...able in the Browser loaded in the Sampler Plug in and manipulated in the Sample Editor Scene A Scene is a combination of Clips for your different Groups Each Clip references a specific Pattern of a Gr...

Страница 713: ...ly used to apply quantization or to compose Patterns from your controller in Step mode All steps together make up the Step Grid In the software s Pattern Editor steps are visualized by vertical lines...

Страница 714: ...ug ins in MASCHINE both instruments and effects by Native Instru ments or any third party manufacturer by loading them as Plug ins into the Plug in slots of the Sound Group and Master level You might...

Страница 715: ...l Zones in a Sound is the Sample Map It is the map of all Samples included in the Sound along with the individual key ranges and velocity ranges at which these Samples are triggered Glossary MASCHINE...

Страница 716: ...Sounds Groups Project 169 Audio driver selecting 54 Audio input 290 469 Audio interface 701 selecting inputs and outputs 53 settings 53 Autoload 109 definition 704 Automation definition 704 B Beat Del...

Страница 717: ...lear Scene software 584 Clip creating 565 definition 706 removing 565 Color Group 157 Pattern 271 Scene 581 Sound 146 Compressor 480 Control area definition 706 Control Lane 254 definition 704 Control...

Страница 718: ...aking Scenes Unique 588 Scene Linking 585 Scenes 585 Scenes software 584 Dynamics effects 480 E Edit page software 612 Effect categories delays 521 distortions 528 dynamics 480 filtering 494 modulatio...

Страница 719: ...er 486 EQ 494 EQ Filter mode 204 Equalizer 494 Events cut copy paste software 246 definition 707 deleting software 245 editing with the mouse 237 introduction 27 moving software 242 nudging software 2...

Страница 720: ...23 Grain Stretch 525 Groove properties definition 707 Group applying effects to 458 color 157 copying and pasting 161 creating 155 definition 707 deleting 164 duplicating 161 Group List 136 Input prop...

Страница 721: ...36 Group view definition 707 H Header definition 708 Help 696 Host automation 321 HP2 Filter mode 204 I Ice 508 Import MIDI to Pattern 279 IMPORT button 131 Importing your files into the Library 130 I...

Страница 722: ...ter mode 204 M Macro Controls 334 definition 709 Making Scenes Unique 588 MASCHINE Library 83 MASCHINE software stand alone or plug in 45 Master applying effects to 458 definition 709 introduction 26...

Страница 723: ...lug in 193 Scene software 582 Sound 152 Multi effect 476 702 Mute 701 definition 710 Plug in slot 192 N Name Group 157 Pattern 269 Scene 579 Sound slot 145 Native Instruments Plug ins 210 Native Kontr...

Страница 724: ...n 321 controlling parameters via MIDI 321 Pattern 222 adjusting length software 232 color 271 creating software 265 cut copy paste content software 273 cut copy paste events notes software 246 deletin...

Страница 725: ...notes software 243 Pattern bank creating software 268 deleting software 268 Pattern Editor 223 definition 710 Pattern Grid 231 Pattern Length 232 Pattern Manager 262 Perform Grid 597 Phaser 506 Pinni...

Страница 726: ...69 saving with Samples 167 Q Quantization definition 711 quantizing after recording 248 Quick Browse 134 R Record page software 603 Redo 39 Reflex 511 Rendering audio 169 Reset Sound slot 153 Resize e...

Страница 727: ...slicing software 619 Saturator 531 Save Group 159 Group with Samples 165 Plug in preset 194 Project with Samples 167 Sound 147 Scene 556 arranging software 558 clearing software 584 color 581 creating...

Страница 728: ...713 duplicating 149 Input properties Audio page 290 469 Input properties MIDI page 315 introduction 26 136 Macro properties 334 moving 152 naming 145 Output properties Audio page 295 Output propertie...

Страница 729: ...Tag Filter using 99 Tags assigning Types and Sub Types 120 creating 121 Take Undo Redo 40 Tape saturation 532 Template Project plug in 61 stand alone 61 Text search using in Browser 103 Threshold 483...

Страница 730: ...V Velocity scaling 75 View switching 28 VST plug ins 210 Z Zone definition 714 Zone page software 631 Index MASCHINE 2 Manual 730...

Отзывы: