Selenio
TM
BNP User Guide, Release 3.7.1
97
- Basic BNP Redundancy Configuration
•
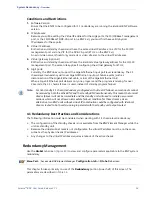
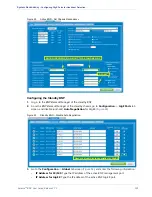
Gateway for ETH2
: Type the IP address to be shared by both the active and standby
chassis.
4.
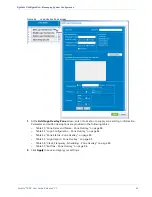
At the
Global
tab screen, click
Apply Configuration
.
5.
Wait two minutes for the configuration to be saved. During this time, a change will occur to the
BNP GUI status bar: Look for the addition of an indicator showing
Active
and
Standby
BNP IP
addresses.
6.
From the
BNP Element Manager
main menu, go to
Maintenance
(
Alt m
)-->
License Manager
to
display the
License Manager
screen.
•
At the
License Manager
screen, confirm there are no entries in any of the License Key fields.
See “Managing Licenses” on page 190 for more information.
•
If you see entries in any of these fields, please contact Imagine Communications Customer
Support for assistance on how to remove the license keys.
7.
From
BNP Element Manager
main menu, go to
Maintenance
(
Alt m
)
-> Shutdown
to shut down
this BNP and exit the GUI.
8.
Physically remove power from the standby chassis.
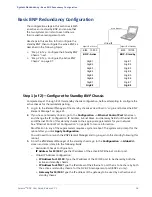
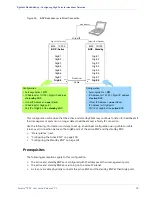
Step 2 (of 2)—Configure the Active BNP Chassis
Complete all steps in this section only after completing the steps provided in “Step 1 (of 2)—Configure
the Standby BNP Chassis” on page 96.
1.
Log in to
Element Manager
of the active chassis, as described in “Log in and Access the BNP
2.
From the
BNP
Element Manager
of the active chassis, go to the
Configuration -> Global
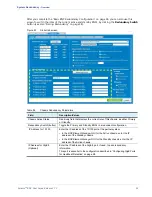
tab and
enter data into the following fields:
-
Redundant Chassis Configuration:
IP Address for 10/100
: Type the IP address of the standby BNP Ethernet control port.
-
Virtual IP Address Configuration:
•
IP Address for 10/100
: Type the IP address of the 10/100 port to be shared by both the
active and standby chassis.
•
IP Address for ETH2
: Type the IP address of the Ethernet 2 port that is to be shared by
both the active and standby chassis, for the DVB-CA management port (BNP 3xr only)
•
Gateway for 10/100
: Type the IP address of the gateway to be used by both active and
standby chassis.
•
Gateway for ETH2
: Type the IP address to be shared by both the active and standby
chassis.
:
3.
At the
Global
tab screen, click
Apply Configuration
.
4.
From the
BNP Element Manager
main menu, go to
Maintenance
(
Alt m
)-->
License Manager
to
display the
License Manager
screen.
Check the
License Manager
to ensure that this active chassis has a license key.
5.
Physically remove power from this active chassis.
6.
Apply power to this active chassis and wait for it to fully boot up.
7.
Apply power to the standby chassis.

