


Definite integrals
Signed area…
menu is the
Signed Area
tool. Before we begin to use it, make
sure that
Another very useful tool provided in the
is switched on, and that the cursor is on
F1(X)
- the quadratic. The
Signed Area
tool is
similar to the Box Zoom in that it requires you to choose start and end points of the area to be calculated.
3
Suppose we want to find the definite integral:
x
2
−
5
x
−
4
dx
∫
−
2
Choose
and then
Signed Area.
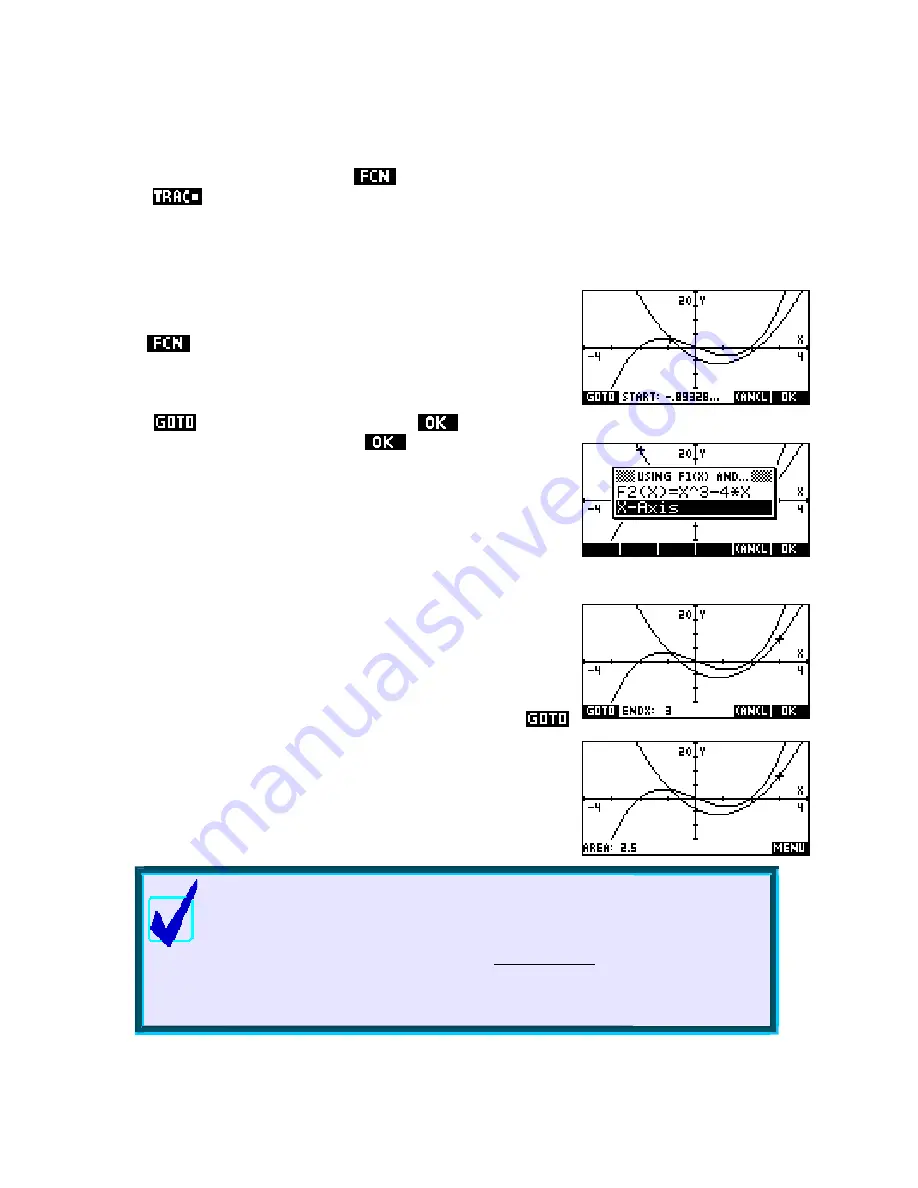
At the bottom of the screen you
will see a prompt, as shown right, asking you to choose a starting point.
Press the
key, enter the value
-2
and press
or
ENTER
.
The starting value will then be -2 so press
again (or
ENTER
) to
accept it.
Another menu will now pop up, asking you to choose what area you
wish to calculate. In this case there are only two choices: between
F1(X)
and the x axis, or between
F1(X)
and
F2(X)
.
If we had defined more functions in the
SYMB
view then this menu
would be longer. In this case we want the area between
F1(X)
and the
x axis, so position the highlight as shown and press
ENTER
.
The graphs will then reappear, with a message requesting that you
choose an end point. In the screenshot shown right I have pressed
and entered the value 3 to move to that point directly.
If you now press
ENTER
again to accept the end point, the hp 39gs or
hp 40gs will calculate the signed area and display the result at the
bottom of the screen.
Calculator Tip
l
it is a little misleading.
l
“Signed
area”
.
1( )
∫
It should be c early understand that although the label at the
bottom of the screen is
Area
What has actually been calcu ated is the definite integral
(right), with ‘areas’ below the x axis included as negatives.
This is why the label on the original menu reads
instead of just
“Area”
2nd point
1st point
F X dx
59