GE H
EALTHCARE
D
IRECTION
FQ091013, R
EVISION
1
V
IVID
I
N
AND
V
IVID
Q
N S
ERVICE
M
ANUAL
8-100
Section 8-5 - Software Loading
8-5-1-1-1
Preparation
NOTE:
Make sure that the required Software Option Keys are available prior to the upgrade process.
When performing this procedure, backup of the archive is not necessary as this upgrade does not
tamper with or affect the patient archive (database). However, it is recommended that the Backup
procedure be performed on regular basis.
At the site, perform the following steps before you start the upgrade procedure:
1.) Perform Disk Management for all database records and select the "Copy" option
(for instructions, refer to the Vivid
i
n/ Vivid q N User Manual on your document CD).
2.) Perform a full back-up for Patient Archive and System Configuration
(for instructions, refer to the Vivid
i
n/ Vivid q N User Manual on your document CD).
3.) Write down the following Connectivity settings as it will be necessary to restore them at the end of
the process:
-
TCP/IP address
-
Network printer (if present)
-
Wireless network settings (if present)
-
Trackball speed
-
InSite ExC settings
NOTE:
The following upgrade procedure is based on the Vivid q N system. The procedure is the same
as for the Vivid i n system.
8-5-1-1-2
Vivid
i
n/ Vivid q N Software Upgrade Procedure - BT10 to BT11
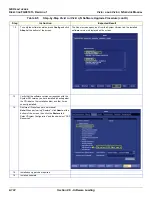
Table 8-5
Step-by-Step Vivid
i
n/ Vivid q N Software Upgrade Procedure
Step
Instruction
Expected Result
1.
Perform a complete shutdown of the system.
2.
Remove the battery and remove all peripherals currently
connected to the system, with the following exceptions:
Make sure no peripherals are connected to the USB
connectors except the DVD and the PCMCIA.
3.
If not already connected, connect the DVD\CD-RW to
the USB port at the rear of the system and connect
power to the DVD\CD-RW drive.
4.
Press the <Eject> button of the DVD\CD-RW drive to
verify that no disc is present in the disk drive.
5.
Insert the DVD containing the full software version
(P/N Rxxxxx) into the DVD-RW drive and close the tray.
The DVD\CD-RW drive tray will load the software.
6.
On the console, hold down the <ON/OFF> button for
three seconds.
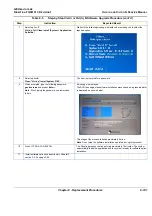
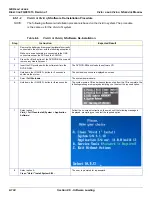
The system powers ON and when system boot-up from the DVD is complete,
the following message is displayed prompting you to select the required option:
Содержание Vivid in
Страница 2: ......
Страница 30: ...GE HEALTHCARE DIRECTION FQ091013 REVISION 1 VIVID I N AND VIVID Q N SERVICE MANUAL xxviii...
Страница 739: ......

