


KEYPAD AND DISPLAY
GEK-106273L
MIF Digital Feeder Protection
8-25
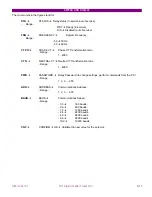
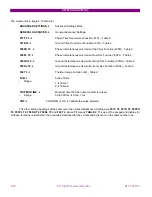
The mnemonics used are:
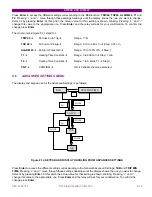
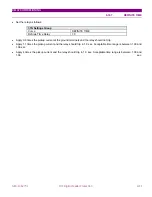
DATE TIME
Relay Date and Time.
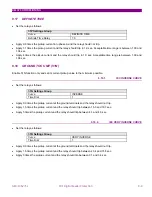
YXX (YEAR
)
Set the Year Information in the relay internal clock.
MXX
(MONTH)
Set the Month Information in the relay internal clock.
DXX
(DAY)
Set the Day Information in the relay internal clock.
HXX (HOUR)
Set the Hour Information in the relay internal clock.
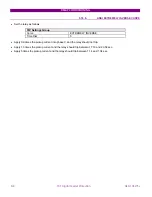
MXX (MINUTE)
Set the Minutes Information in the relay internal clock.
DATE AND TIME
The Date and Time just set in the relay is shown.
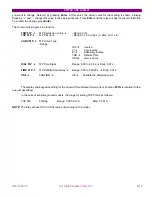
8.9
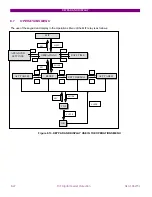
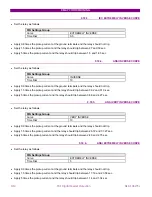
RESETTING THE THERMAL IMAGE UNIT
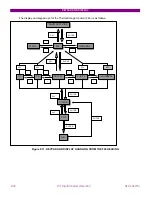
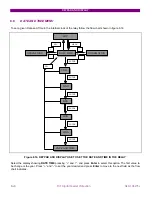
To reset the Thermal Image Unit using the faceplate keypad and display follow the flow chart shown in figure 8.13.
Look for the
RST THERMAL
heading in the display. Press
Enter
. A confirmation message will be shown, CNF. To
confirm that you really want to reset the Thermal Image Unit press
Enter
. The thermal Image unit will be reset and
the message
OK
will be shown to point out that the operation has been executed successfully. To return to the
second level press
Enter
, as figure 8.13 indicates.
It is also possible to reset the Thermal Image Unit from the computer, using the ENERVISTA MII SETUP program.
Enter in the Operations Menu of the ENERVISTA MII SETUP program and select the corresponding button.
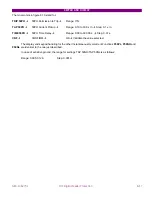
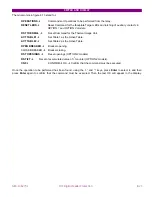
8.10
RESETTING THE TARGET LEDS
There are three ways to reset the faceplate target LEDs using the relay keypad:
1. Starting from the Steady State scrolling display press
Enter
for more than three seconds. All LEDs will light up
(LEDs test) and reset. To check that all LEDs are operative, press
Enter
and release it before three seconds. By
doing that, all LEDs will light up but will not be reset.
2. Follow figure 8.13 and look for the
RST LEDS
message in the display. Press
Enter
. The confirmation message
will be shown
CNF
. Press
Enter
to confirm that you really want to reset the LEDs. All Target LEDs will be reset
and the message
OK
will be shown, to point out that the operation has been performed successfully. To return to
the second level, press
Enter
.
3. RESET LEDS digital input (in OPTION 1 and OPTION 2 models).
It is also possible to reset the Target LEDs from the computer, using the ENERVISTA MII SETUP program. Enter in
the Operations Menu of the ENERVISTA MII SETUP program and select the corresponding button.
Содержание GEK-106273L
Страница 19: ...GETTING STARTED 1 12 MIF Digital Feeder Protection GEK 106273L ...
Страница 95: ...SETTINGS 5 38 MIF Digital Feeder Protection GEK 106273L ...
Страница 101: ...I O CONFIGURATION 6 44 MIF Digital Feeder Protection GEK 106273L ...
Страница 127: ...KEYPAD AND DISPLAY 8 26 MIF Digital Feeder Protection GEK 106273L ...
Страница 147: ...INSTALLATION AND MAINTENANCE 10 2 MIF Digital Feeder Protection GEK 106273L ...
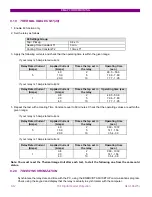
Страница 154: ...ANNEX 1 THERMAL IMAGE UNIT GEK 106273L MIF Digital Feeder Protection 11 7 Figure A 1 1 THERMAL CURVE FOR τ1 3 MINUTES ...
Страница 155: ...ANNEX 1 THERMAL IMAGE UNIT 11 8 MIF Digital Feeder Protection GEK 106273L Figure A 1 2 THERMAL CURVES FOR τ1 3 MIN ...
Страница 199: ...ANNEX 5 HARMONIC FILTERING 15 4 MIF Digital Feeder Protection GEK 106273L ...