6-20
Optional Accessor
ies
6
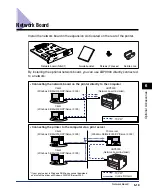
Network Board
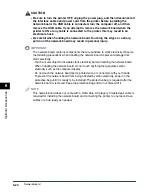
CAUTION
•
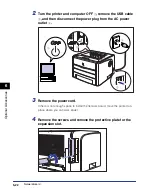
Be sure to turn the printer OFF, unplug the power plug, and then disconnect all
the interface cables and power cord from the printer before installing the
network board. If a USB cable is connected, turn the computer off, and then
remove the USB cable. If you attempt to remove the network board when the
printer is ON or any cable is connected to the printer, this may result in an
electrical shock.
•
Be careful when handling the network board. Touching the edges or a sharp
portion of the network board may result in personal injury.
IMPORTANT
The network board contains components that are sensitive to static electricity. Observe
the following precautions when handling the network board to prevent damage from
static electricity.
- Touch a metal object to dissipate static electricity before handling the network board.
- When handling the network board, do not touch anything that generates static
electricity such as the computer display.
- Do not touch the network board parts, printed wire, or connectors with your hands.
- To prevent the network board from being affected by static electricity, keep it in the
protective bag until it is ready to be installed. The protective bag is required after the
network board is removed. Keep the protective bag and do not discard of it.
NOTE
This network board does not come with a LAN cable. A Category 5 twisted pair cable is
required for installing the network board and connecting the printer to a network. Have
cables or a hub ready as needed.
Содержание laser Shot LBP 3300
Страница 2: ...LBP3300 Laser Printer User s Guide ...
Страница 25: ...xxii ...
Страница 45: ...1 20 Before You Start 1 Connecting to a Computer ...
Страница 90: ...2 45 Loading and Outputting Paper 2 Setting Up the Printer Driver and Printing 7 Click OK to start printing ...
Страница 99: ...2 sided Printing 2 54 Loading and Outputting Paper 2 12 Click OK to start printing ...
Страница 105: ...2 sided Printing 2 60 Loading and Outputting Paper 2 ...
Страница 305: ...5 32 Routine Maintenance 5 Handling the Printer ...
Страница 391: ...7 52 Troubleshooting 7 Confirming the Printer Features ...
Страница 397: ...8 6 Appendix 8 Dimensions of Each Part Paper Feeder Unit PF 35 117 4 116 6 369 7 421 1 mm ...
Страница 411: ...8 20 Index Appendix 8 V Ventilation Slots 1 4 W Watermark 4 28 4 51 When Nothing is Printed 7 37 Windows Firewall 8 10 ...
Страница 413: ...8 22 Appendix 8 Location of the Serial Number ...
Страница 414: ...R IE 700AC CANON INC 2005 ...

