Chapter 2
2-21
F-2-87
11) Connect the power cable to the wall outlet, and turn on the main power switch. See that the machine is in a standby state, and start service mode.
12) Make the following selections in the machine's service mode (COPIER>FUNCTION>INSTALL>CARD); then, enter the appropriate card number (1 to 2001).
-Use the number that is the lowest of all the numbers that the user will be using.
-As many as 1000 cards may be used starting with the number entered.
13) Turn off the control panel power switch.
14) Turn off and then on the main power switch.
2.6.4 Installation in a NetSpot Accountant (NSA) Environment
0007-2764
iR2270 / iR2870 / / iR2270N / / iR2870N / iR2230 / / iR3530 /
1) Make the following selections in user mode: system control setup>group ID control>count control; then, see that the following numbers are available:
ID00000001 to ID00001000. (If you entered '1' in service mode: COPIER>FUNCTION>INSTALL>CARD.)
2) Make the following selections in user mode: system setup>network setup>TCP/IP setup>IP address. Set the following: 'IP address', 'gateway address', 'subnet
mask'.
Unless you have set 'system control group ID' and 'system control ID No.', you will not be able to execute 'register card to device' as part of NSA setup work.
3) In user mode, enter numbers of your choice for 'system control ID' and 'system control ID No.' as part of system administrator information.
4) Turn off the control panel power switch.
5) Turn off and then on the main power switch.
2.7 Installing the NE Controller
2.7.1 Installing the NE Controller-A1
0007-5625
iR2270 / iR2870 / iR3570 / iR4570 / / / / / iR2230 / / iR3530 /
When installing the NE Controller-A1 to its host machine, take note of the following:
1. be sure to perform the work in compliance with the laws and regulations of the country in question.
2. be sure that the host machine has properly been installed before starting the work.
3. be sure to disconnect the power plug of the host machine before starting the work.
4. be sure to identify the screws by type (length, diameter) and location.
5. be sure the settings data are ready on the PC at the service station.
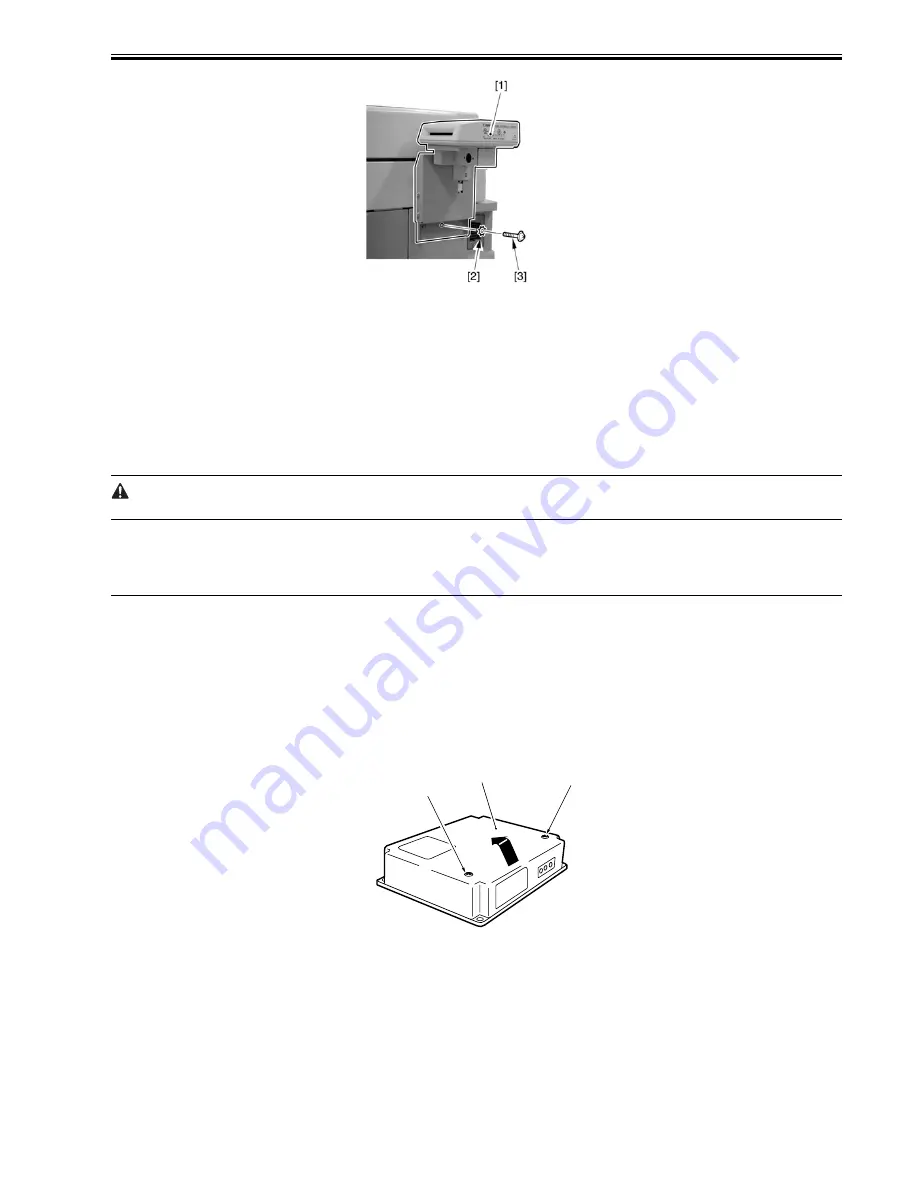
1) Remove the 2 screws [2] of the top cover [1], and detach the cover.
F-2-88
2) Connect the connector [1] of the power supply unit to the connector [2] as shown.
[1]
[2]
[2]
Содержание iR3570 Series
Страница 1: ...Jan 17 2007 Service Manual iR4570 3570 2870 2270 Series...
Страница 2: ......
Страница 6: ......
Страница 27: ...Chapter 1 Introduction...
Страница 28: ......
Страница 70: ......
Страница 71: ...Chapter 2 Installation...
Страница 72: ......
Страница 146: ......
Страница 147: ...Chapter 3 Basic Operation...
Страница 148: ......
Страница 150: ......
Страница 154: ......
Страница 155: ...Chapter 4 Main Controller...
Страница 156: ......
Страница 187: ...Chapter 5 Original Exposure System...
Страница 188: ......
Страница 217: ...Chapter 5 5 27 F 5 91...
Страница 218: ......
Страница 219: ...Chapter 6 Laser Exposure...
Страница 220: ......
Страница 222: ......
Страница 230: ......
Страница 231: ...Chapter 7 Image Formation...
Страница 232: ......
Страница 236: ......
Страница 279: ...Chapter 7 7 43 F 7 241 2 Remove the screw 1 F 7 242 3 Detach the static eliminator 1 to the front F 7 243...
Страница 280: ......
Страница 281: ...Chapter 8 Pickup Feeding System...
Страница 282: ......
Страница 388: ......
Страница 389: ...Chapter 9 Fixing System...
Страница 390: ......
Страница 419: ...Chapter 9 9 27 F 9 148...
Страница 420: ......
Страница 421: ...Chapter 10 External and Controls...
Страница 422: ......
Страница 426: ......
Страница 437: ...Chapter 10 10 11 F 10 12 2 Remove the check mark from SNMP Status Enabled...
Страница 438: ...Chapter 10 10 12 F 10 13...
Страница 440: ...Chapter 10 10 14 F 10 15...
Страница 475: ...Chapter 11 MEAP...
Страница 476: ......
Страница 478: ......
Страница 481: ...Chapter 12 Maintenance and Inspection...
Страница 482: ......
Страница 484: ......
Страница 509: ...Chapter 13 Standards and Adjustments...
Страница 510: ......
Страница 512: ......
Страница 521: ...Chapter 14 Correcting Faulty Images...
Страница 522: ......
Страница 528: ......
Страница 537: ...Chapter 14 14 9 43mm s b Z x i j B iR4570_395 s u A B FM2 0287...
Страница 538: ...Chapter 14 14 10...
Страница 539: ...Chapter 14 14 11...
Страница 585: ...Chapter 15 Self Diagnosis...
Страница 586: ......
Страница 588: ......
Страница 623: ...Chapter 16 Service Mode...
Страница 624: ......
Страница 626: ......
Страница 679: ...Chapter 17 Upgrading...
Страница 680: ......
Страница 682: ......
Страница 693: ...Chapter 17 17 11 F 17 18 2 Click Start F 17 19 3 When the session has ended click OK...
Страница 698: ...Chapter 17 17 16 F 17 28 2 Click Start F 17 29 3 When the session has ended click OK...
Страница 710: ...Chapter 17 17 28 F 17 51 3 Click Start F 17 52 4 Click Save...
Страница 712: ...Chapter 17 17 30 F 17 55 2 Select the data to download F 17 56 3 Click Start...
Страница 714: ......
Страница 715: ...Chapter 18 Service Tools...
Страница 716: ......
Страница 717: ...Contents Contents 18 1 Service Tools 18 1 18 1 1 Special Tools 18 1 18 1 2 Oils and Solvents 18 1...
Страница 718: ......
Страница 720: ......
Страница 721: ...Jan 17 2007...
Страница 722: ......


