


®
SECTION 11 (-FL) FLOWSENSE
®
making
since 1986
water work
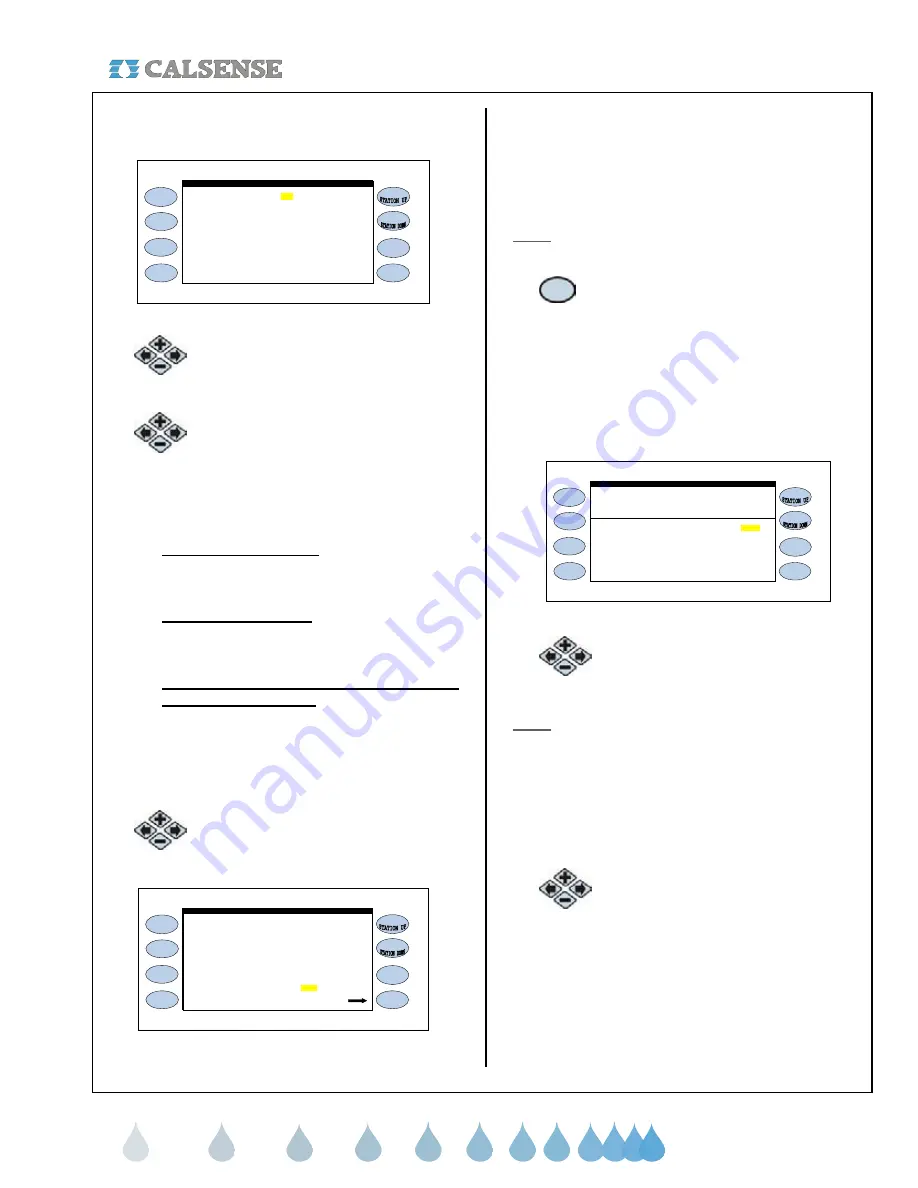
The MAINLINE BREAK SETTINGS screen is
displayed (Figure 11.6).
During Irrigation 400 gpm
MAINLINE BREAK SETTINGS
ALL Other Times 150 gpm
Use capacity to limit the
----------------------SYSTEM CAPACITY SETTINGS-----------------------
number of stations on? NO
Figure 11.6
2.
Press the blue
ARROW
keys to
move the cursor to the DURING
IRRIGATION gpm.
3.
Press the
PLUS
or
MINUS
keys to
change the number.
Use the same method to change the ALL OTHER
TIMES number.
•
DURING IRRIGATION:
The during-irrigation
number is the mainline break number used
while the controller is irrigating.
•
ALL OTHER TIMES:
The all other times
number is the mainline break number used
when the controller is not irrigating.
•
USE CAPACITY TO LIMIT THE NUMBER
OF STATIONS ON ?:
If you want to use
capacity to limit the number of stations on in
the system change to YES.
This will open up the portion of the screen dealing
with Capacity with or without Pump (Figure 11.7).
4.
Press the
PLUS
or
MINUS
key to
change the capacity numbers.
During Irrigation 400 gpm
number of stations on? YES
Capacity without Pump 100 gpm
Use capacity to limit the
----------------------SYSTEM CAPACITY SETTINGS-----------------------
MAINLINE BREAK SETTINGS
ALL Other Times 150 gpm
(set which programs use the pump )
Capacity with Pump 200 gpm
Figure 11.7
Capacity with pump:
When a program irrigates by
use of pump the GPM limit set will not be exceeded.
Capacity without pump:
When a program irrigates
without the use of a pump the GPM limit will not be
exceeded.
Note:
Pump and non-pump programs will not run
simultaneously on the same controller / system.
5.
If you are using a pump and did not
select SET WHICH PROGRAMS TO
USE PUMP in the pump section of this
manual then press the
SET
WHICH
PROGRAMS TO USE THE PUMP
Menu key (Figure 11.7).
The WHICH PROGRAMS USE THE PUMP screen
is displayed (Figure 11.8).
PROG A . . . . . . . . . . . . . . . . . . . . . . . YES
PROG C . . . . . . . . . . . . . . . . . . . . . . . YES
PROG D . . . . . . . . . . . . . . . . . . . . . . . YES
PROG E . . . . . . . . . . . . . . . . . . . . . . . YES
DRIP 1 . . . . . . . . . . . . . . . . . . . . . . . YES
PROG B . . . . . . . . . . . . . . . . . . . . . . . YES
DRIP 2 . . . . . . . . . . . . . . . . . . . . . . . YES
WHICH PROGRAMS USE THE PUMP
if you would like to use the pump
For each program, select YES
Figure 11.8
6.
Press the blue
ARROW
keys to move
the cursor to the program desired.
Note:
The default setting is set to YES on all
programs, which means that the controller’s pump
output will be activated whenever a station on any
program is activated.
Set the Pump Output Enabled setting to NO. If the
Pump Output Enabled setting is set to NO on a
program, the pump output will not activate when a
station on that program is activated.
7.
Press the
PLUS
or
MINUS
keys to
change any program setting.


