


SECTION 6 REPORTS / SECTION 7 LIGHTS
®
making
since 1986
water work
IRRIGATION DETAILS
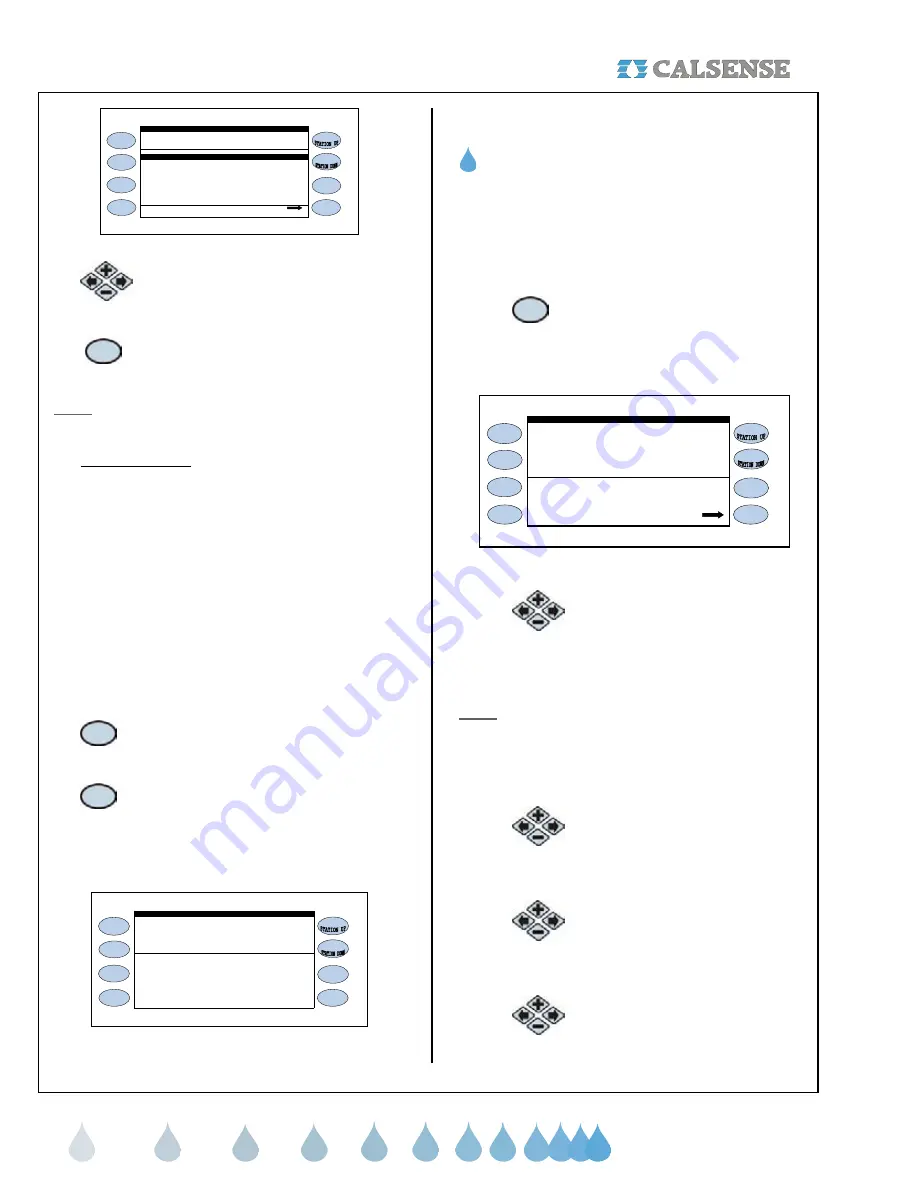
STN REASON HOLD TOTAL SOAK CYCLE
1 MAN 0.0 0.0 0.0 3.6 ON
Clear Station
Figure 6.15
3.
Press the
PLUS
or
MINUS
keys
to highlight the station that you
want to clear.
4.
Press the
CLEAR
Menu key to clear
the highlighted station (Figure 6.16).
Note:
Clearing a station will cease the operation for
that station delegated on that particular line entry.
3. Real-Time Flow
Real time flow allows the user to view the following:
•
System flow rate
•
Average flow rates
•
Expected flow rate
•
Flow meter attached to which controller and
the rate at which it is currently flowing
•
Whether the system is stable or unstable
•
Master valve open or closed
•
The number of valves that are currently on.
•
Number of controllers in the chain.
From the REPORTS menu screen (Figure 6.2).
1.
Press the
LIVE SCREENS
Menu
key to access the REAL-TIME
DISPLAYS screen (Figure 6.13)
2.
Press the
REAL TIME FLOW
Menu
key.
The REAL-TIME FLOW screen is displayed
(Figure 6.16)
Valves
A 23 X X 0 Closed
F1 F2 F3 ON MV
REAL-TIME FLOW
22.9 system flow
0 expected flow S
22 avg flow
Figure 6.16
SECTION 7: LIGHTS
A. PROGRAMMING A LIGHTS SCHEDULE
You can program up to four (4) individual light
programs, with two (2) different start and stop times,
each and a rolling two (2) week schedule.
From the MAIN MENU screen.
1.
Press the
LIGHTS
Menu key.
The LIGHTS SCHEDULING & MANUAL
OPERATION screen is displayed (Figure 7.1)
Schedle for : Fri, Oct 28 2005
OFF TIMES: OFF OFF
LIGHTS SCHEDULING & MANUAL OPERATION
L1:
ON TIMES: OFF OFF
Status: OFF
currently: Manually Start
Fri 10/28/05 1:24:52PM
Figure 7.1
2.
Press the
PLUS
or
MINUS
keys to
scroll through the four (4) light
program screens. They are
designated as L1:, L2:, L3: and L4:
Note:
The lights program names can be changed by
the user via Command Center software.
Once you have selected the lights program that you
want to use.
3.
Press the blue
ARROW
keys to
highlight the date entry. You can
select any date between now and
two weeks from today’s date.
4.
Press the blue
ARROW
keys to
highlight the ON TIMES (Two per
program), and OFF TIMES (two
per program).
5.
Adjust the times by using the
PLUS
or
MINUS
keys.


