


SECTION 4 FLOW / SECTION 5 WEATHER
®
making
since 1986
water work
H. ALERT ACTIONS
The Alert Actions section of the controller allows you
to setup the way in which you want the controller to
inform you of any problems. The Alert Actions
setting defaults with Alert / No Action set for all
programs. There are three possible settings:
•
Alert / No Action:
An alert is displayed on
the screen but the valve continues to
irrigate.
•
Alert / Shut-Off:
An alert is displayed on the
screen and the value is shut off.
•
No Alerts:
No alert is displayed and the
valve continues to irrigate.
From the FLOW METER, MASTER VALVE & PUMP
screen (Figure 4.1).
1.
Press the
ALERT ACTIONS
Menu
key.
The ALERT ACTIONS screen is displayed
(Figure 4.17).
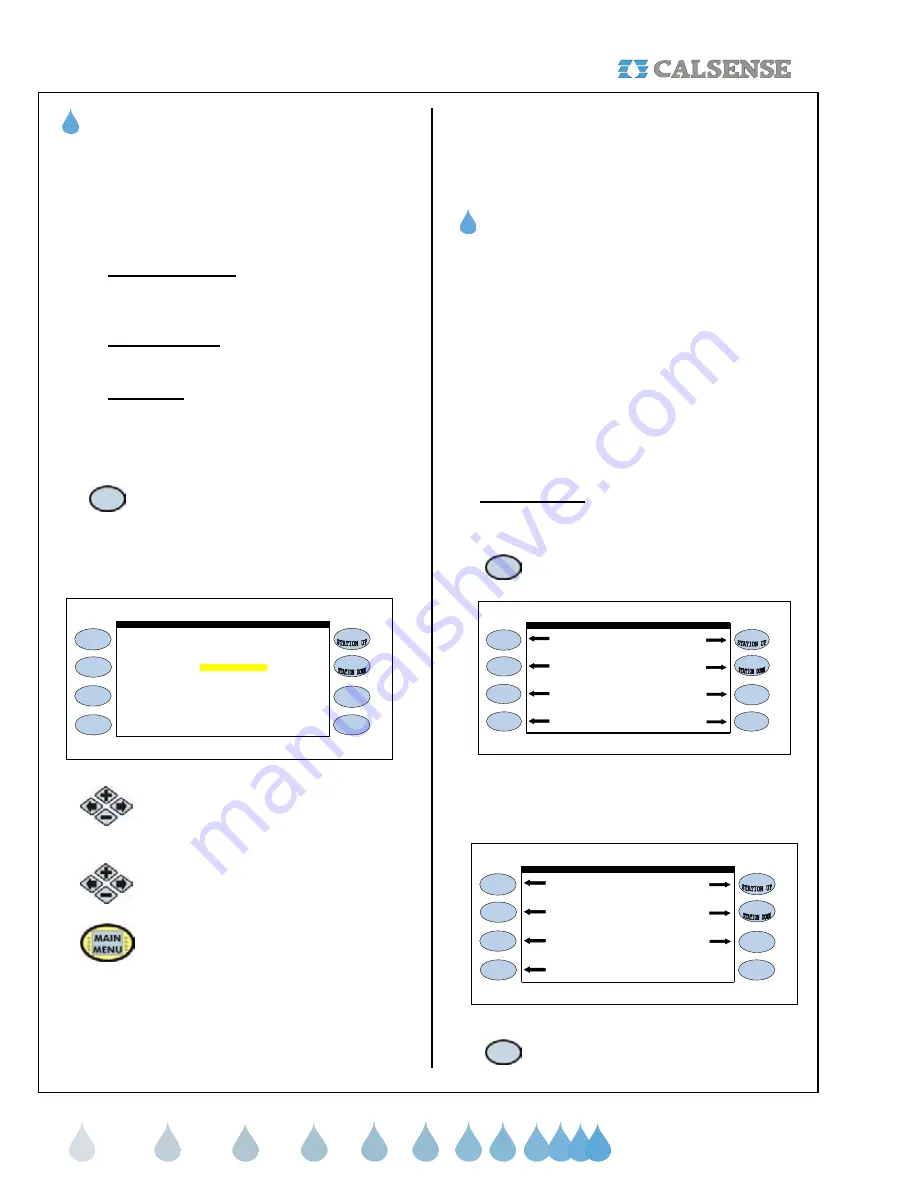
PROG A . . . . . . . . . . . . . . Alert / No Action Alert / No Action
ALERT ACTIONS
HIGH FLOW LOW FLOW
PROG B . . . . . . . . . . . . . . Alert / No Action Alert / No Action
PROG C . . . . . . . . . . . . . . Alert / No Action Alert / No Action
PROG D . . . . . . . . . . . . . . Alert / No Action Alert / No Action
PROG E . . . . . . . . . . . . . . Alert / No Action Alert / No Action
DRIP 1 . . . . . . . . . . . . . . Alert / No Action Alert / No Action
DRIP 2 . . . . . . . . . . . . . . Alert / No Action Alert / No Action
Figure 4.17
2.
Press the blue
ARROW
keys to move
the cursor to the Program HIGH
FLOW and LOW FLOW settings.
3.
Press the
PLUS
or
MINUS
keys to
change the settings.
4.
Press the MAIN MENU key to return
to the MAIN MENU screen.
THIS CONCLUDES THE ALERTS / ACTIONS
SECTION
SECTION 5: WEATHER
The weather section of the controller is used to set
up the ET Gage, Rain bucket, Wind Gage, Rain
switch, budgets, and Moisture sensors.
A. ET GAGE
The ET Gage setting in the controller is used for:
•
Setting ET irrigation day
•
*Selecting ET gage Usage
•
*Logging ET Gage Pulses
•
*Setting Gage fill percentage
•
**Manually entering pulses
•
**Skipping tonight’s entries
* Only if (-G) option installed in controller and an ET
Gage is connected.
** Used for troubleshooting, or servicing ET Gage.
1. ET Gage setup
From the MAIN MENU screen (Figure 5.1).
1.
Press the
WEATHER
Menu key.
Setup Status
Flow Radio Remote
Weather Reports
CALSENSE WATER MANAGEMENT SYSTEM
Programs & Stations Lights
Figure 5.1
The WEATHER SETUP screen is displayed
(Figure 5.2).
Rain Switch
Wind Gage Moisture
Rain Bucket Budget
WEATHER SETUP
ET Gage ET
Figure 5.2
2.
Press the
ET GAGE
Menu key.


