


SECTION 5 WEATHER
®
making
since 1986
water work
If you are currently using Moisture sensors on this
controller then change the setting to YES.
2.
Press the
PLUS
or
MINUS
keys to
change the settings.
1. Moisture Sensor Setup
The MOISTURE SENSOR SETUP screen will
change to reveal the Use by Program settings
(Figure 5.32).
Moisture Sensing in Use ? YES
PROG A . . . . . . . . . . . . . . . . . . . . . . . . . . YES
MOISTURE SENSING SETUP
USE BY PROGRAM
PROG C . . . . . . . . . . . . . . . . . . . . . . . . . . YES
PROG B . . . . . . . . . . . . . . . . . . . . . . . . . . YES
PROG D . . . . . . . . . . . . . . . . . . . . . . . . . . YES
Sensor Assignment
PROG E . . . . . . . . . . . . . . . . . . . . . . . . . . YES
DRIP 1 . . . . . . . . . . . . . . . . . . . . . . . . . . YES
DRIP 2 . . . . . . . . . . . . . . . . . . . . . . . . . . YES
Figure 5.32
1.
Press the blue
ARROW
keys to
move the cursor to the next entry
(Figure 5.33)
Moisture Sensing in Use ? YES
PROG A . . . . . . . . . . . . . . . . . . . . . . . . . . YES
MOISTURE SENSING SETUP
USE BY PROGRAM
PROG C . . . . . . . . . . . . . . . . . . . . . . . . . . YES
PROG B . . . . . . . . . . . . . . . . . . . . . . . . . . YES
PROG D . . . . . . . . . . . . . . . . . . . . . . . . . . YES
Sensor Assignment
PROG E . . . . . . . . . . . . . . . . . . . . . . . . . . YES
DRIP 1 . . . . . . . . . . . . . . . . . . . . . . . . . . YES
DRIP 2 . . . . . . . . . . . . . . . . . . . . . . . . . . YES
Figure 5.33
2.
Press the
PLUS
or
MINUS
keys
to change the Use by Program.
3.
Press the blue
ARROW
keys to
move the cursor to the next entry.
Note:
This will allow you to set up the programs that
you want to use Moisture Sensors on.
Note:
The controller may be set up for some
programs to use ET, other programs to use
moisture, or programs can be set up to use a
combination of the two.
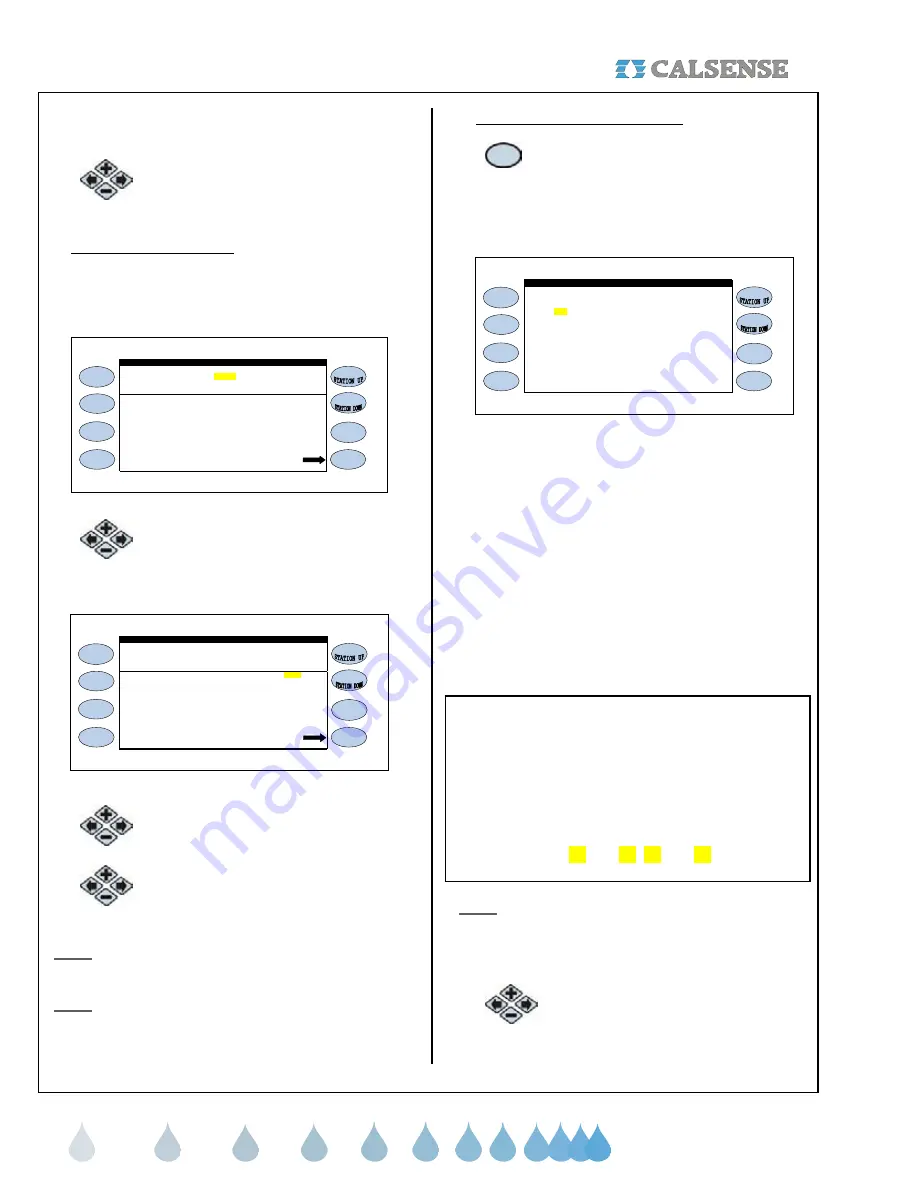
2. Moisture Sensor Assignment
1.
Press the
SENSOR ASSIGNMENT
Menu key.
The MOISTURE SENSOR ASSIGNMENT
SCREEN (Figure 5.34).
Sensor 01 02 03 04 05 06 07 08 09 10
Station 21 22 23 24 25 26 27 28 29 30
Sensor 21 22 23 24 25 26 27 28 29 30
Station 31 32 33 34 35 36 37 38 39 40
Sensor 11 12 13 14 15 16 17 18 19 20
Station 11 12 13 14 15 16 17 18 19 20
Sensor 31 32 33 34 35 36 37 38 39 40
MOISTURE SENSOR ASSIGNMENT
Station 01 02 03 04 05 06 07 08 09 10
Figure 5.34
Next, you will have to enter the settings for each
Moisture sensor assigned to a station.
A representative station for each different climatic
and plant material zone on the controller is given a
sensor and is known as a Master station. Slave
stations are stations without sensors and are
assigned to a master station which share similar
water requirements. The choice of groups of stations
controlled by the same sensor is done at the
controller within the MOISTURE SENSOR
ASSIGNMENT screen.
Example:
Station: 01 02 03 04 05 06 07 08 09 10
Sensor: 01 02 03 04 05 06 07 08 09 10
becomes
Station: 01 02 03 04 05 06 07 08 09 10
Sensor: 01 02 03 04 03 03 07 03 09 10
Note:
In the example above station 03 is the Master
station (the station with the moisture sensor) and
stations 05, 06, and 08 are now slaves stations to
station 03 (Highlighted in the example).
2.
Press the
PLUS
or
MINUS
keys to
change the entry.


