


184
Initializing with a Recovery Drive
To initialize the settings on your TeraStation with a recovery drive, follow the procedure below. If using a recovery
drive to initialize the TeraStation, you do not have to be logged in to Settings. For instructions on how to create a
recovery drive, refer to the "Creating a Recovery Drive" in chapter 1.
1
Insert the recovery drive into a USB 2.0 port (not a USB 3.0 port) on the TeraStation.
2
Set the boot mode switch to "USB".
3
Press the power button to turn on the TeraStation.
4
When the I41 message appears on the LCD panel, press the function button.
5
It will take several minutes for initializing the settings. The TeraStation will shut down when it's finished.
6
After shutdown, the I39 message is displayed.
7
Set the boot mode switch to "HDD" position.
8
Press the power button to start the TeraStation.
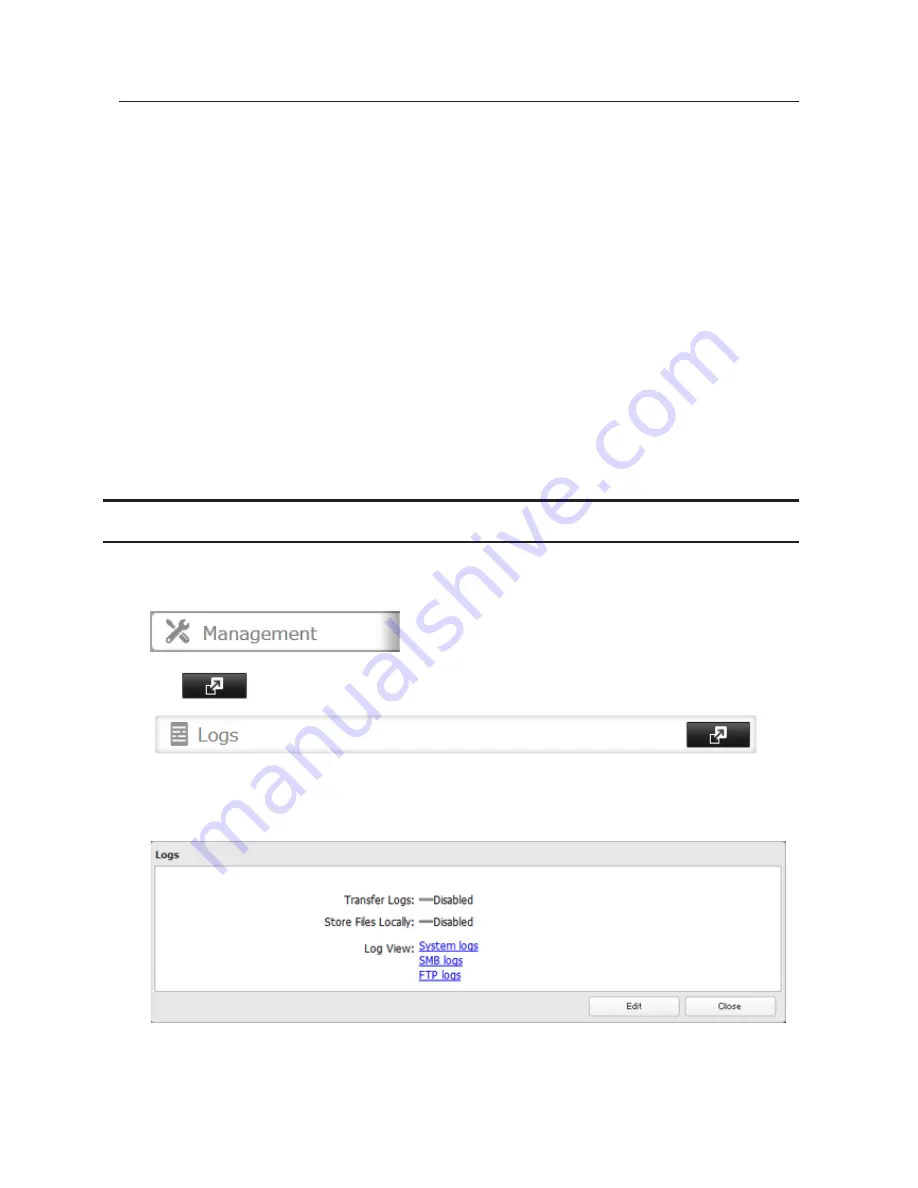
Logs
Follow the procedure to check the TeraStation's logs.
1
In Settings, click
Management
.
2
Click
to the right of "Logs".
3
Click
Edit
.
4
Select a log to view.
The file operation log stores file operations performed on the internal hard drives. File operations on USB
drives are not logged.
Note:
All logs are encoded in UTF-8 format. To show them correctly, change the software encoding to "UTF-8".
Содержание TeraStation TS3200D
Страница 22: ...21 4 Configure the desired settings then click OK...
Страница 63: ...62 2 Select the TeraStation name from the drop down menu of Target and click Register iSCSI Device 3 Click OK...
Страница 84: ...83 2 Click to the right of Backup 3 Click List of LinkStations and TeraStations...
Страница 86: ...85 3 Click Create New Job Note Up to 8 backup jobs can be configured...
Страница 99: ...98 18Click Time Machine 19Click Select Backup Disk 20Select the TeraStation then click Use Disk...
Страница 118: ...117 3 Click Edit 4 Click Browse 5 Select the shared folder that you want to make available to iTunes then click OK...
Страница 119: ...118 6 Click OK then OK again 7 Move the iTunes server switch to the position...
Страница 124: ...123 4 Open the License tab then click Activate Free License To deactivate the license click...
Страница 126: ...125 3 Click Next 4 Click Find Cameras...
Страница 132: ...131 2 Select the search criteria on the left side of the search screen then click Search...
Страница 133: ...132 3 The search results are displayed Click a thumbnail to start the media viewer...
Страница 214: ...213 For Customers in Taiwan BSMI For Customers in China CCC A...


