


9
TS3200D
10
1
2 3 4 5
6
7
8
9
11
12
19
13 14
16 17
20
21
18
or
25
24 25
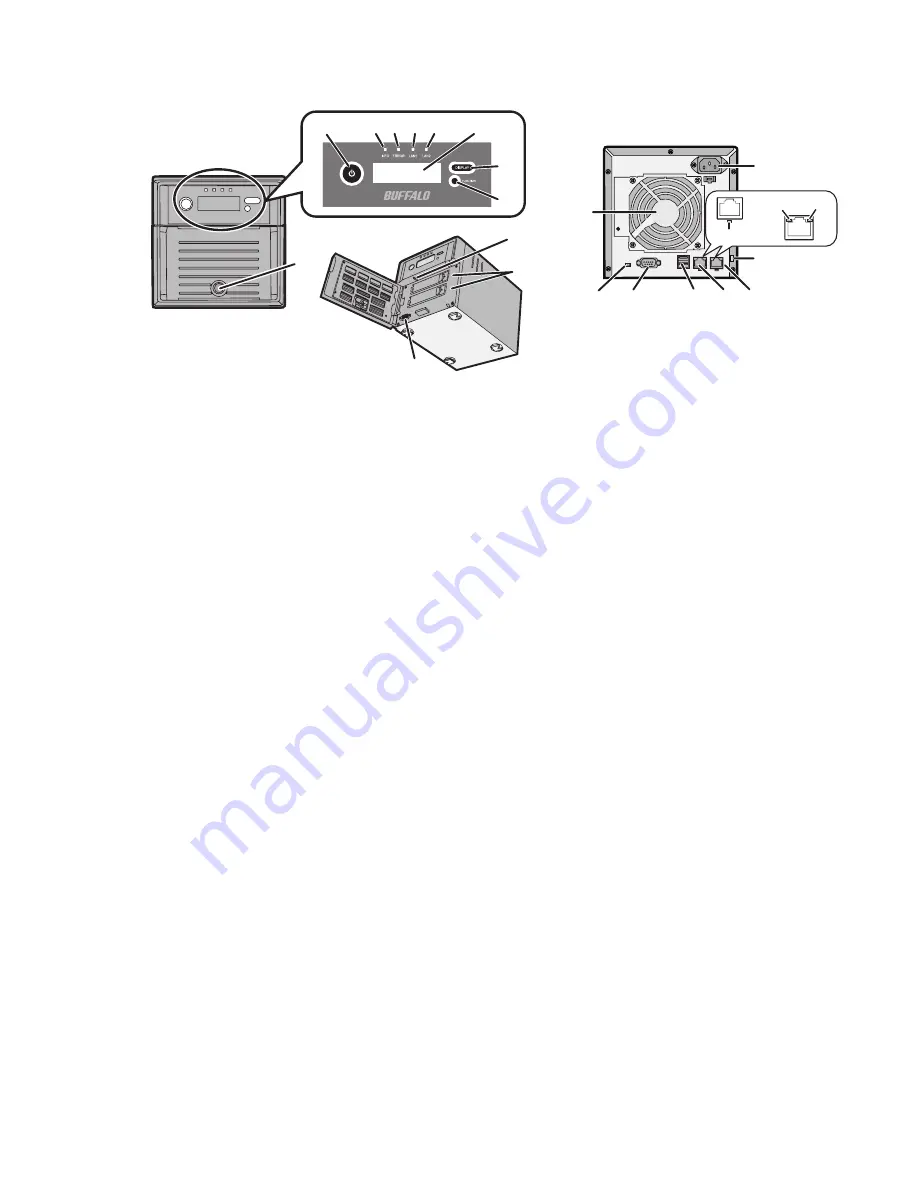
1
Power Button
To power on, connect the power cable and wait for 10 seconds, then hold down the power button for 1
second. To power off, hold down the power button for 3 seconds (until it beeps).
2
Info LED
If there is a status message, the amber info LED will light up. Check the LCD panel to see the status message.
3
Error LED
If there is an error, the red error LED will light up. Check the LCD panel to see the error message.
4
LAN1 LED
When LAN port 1 is connected, this LED glows green. It blinks when the connection is active.
5
LAN2 LED
When LAN port 2 is connected, this LED glows green. It blinks when the connection is active.
6
LCD Panel
This display shows the status of many TeraStation settings. It also displays errors and messages when available.
7
Display Button
Switches between the different display modes. Also, if the TeraStation is beeping, press this button to stop it.
8
Function Button
Use this button for Direct Copy, dismounting USB devices, rebuilding RAID arrays, and configuring failover.
9
Drive Lock
Open the front panel with the key to replace hard drives or access the reset button.
10
Init Button
Hold down this button to initialize the TeraStation's admin username and password, IP address, SSL, and
service port restriction settings to their factory default values. The behavior of this button can be modified in
Settings.
11
Status LEDs
Normally, these LEDs blink green when hard drives are accessed. If a drive fails, its LED will turn red or amber.
12
Factory Use Only
Содержание TeraStation TS3200D
Страница 22: ...21 4 Configure the desired settings then click OK...
Страница 63: ...62 2 Select the TeraStation name from the drop down menu of Target and click Register iSCSI Device 3 Click OK...
Страница 84: ...83 2 Click to the right of Backup 3 Click List of LinkStations and TeraStations...
Страница 86: ...85 3 Click Create New Job Note Up to 8 backup jobs can be configured...
Страница 99: ...98 18Click Time Machine 19Click Select Backup Disk 20Select the TeraStation then click Use Disk...
Страница 118: ...117 3 Click Edit 4 Click Browse 5 Select the shared folder that you want to make available to iTunes then click OK...
Страница 119: ...118 6 Click OK then OK again 7 Move the iTunes server switch to the position...
Страница 124: ...123 4 Open the License tab then click Activate Free License To deactivate the license click...
Страница 126: ...125 3 Click Next 4 Click Find Cameras...
Страница 132: ...131 2 Select the search criteria on the left side of the search screen then click Search...
Страница 133: ...132 3 The search results are displayed Click a thumbnail to start the media viewer...
Страница 214: ...213 For Customers in Taiwan BSMI For Customers in China CCC A...


