P/N 133487
109
Banner Engineering Corp.
•
Minneapolis, U .S .A .
www .bannerengineering .com • Tel: 763 .544 .3164
SC22-3 Safety Controller
Instruction Manual
Appendix B
B.6 Configuration Confirmation
You will need to confirm this new configuration before it can be
used in a safeguarding application . To do this you will need to
connect the SC22-3 Controller to your computer, using the USB
cable . The confirmation process has two parts:
1 . The SC22-3 microcontrollers receive and check a copy of
the configuration to be sure that all safety critical settings are
appropriate (configuration validation) .
2 . The Controller sends a copy of the configuration back to the
PC Interface for the final, manual confirmation check process
(configuration verification) .
To confirm CFG1, follow the steps below .
• Save CFG1
• Connect the SC22-3 Controller to the PC using the USB cable
(refer to Section 1 .3 .1 .)
• Apply 24V dc power to the Controller .
When the powered Controller is connected, the Receive, Send
and Confirm buttons in the PCI tool bar become
active and turn from gray scale to full color .
• Click on the Confirm button .
A message will appear, asking if you want to save a copy of the
Controller’s existing configuration .
NOTE: The Controller used during the confirmation process may
have an existing (either factory default or user-defined)
configuration . Any configuration already loaded in the
Controller will be overwritten (and therefore lost) during
this confirmation process . It is the user’s responsibility
to save existing configurations, as needed.
• Select Yes to save the configuration or No to proceed to
overwrite the Controller’s existing Configuration .
• Enter the password (the factory default is 0000) on the Confirm
Configuration pop-up menu .
• Click OK .
• A pop-up warning message will ask if you want to continue;
select Yes .
The configuration validation process takes a few seconds and
when complete, the verification window appears .
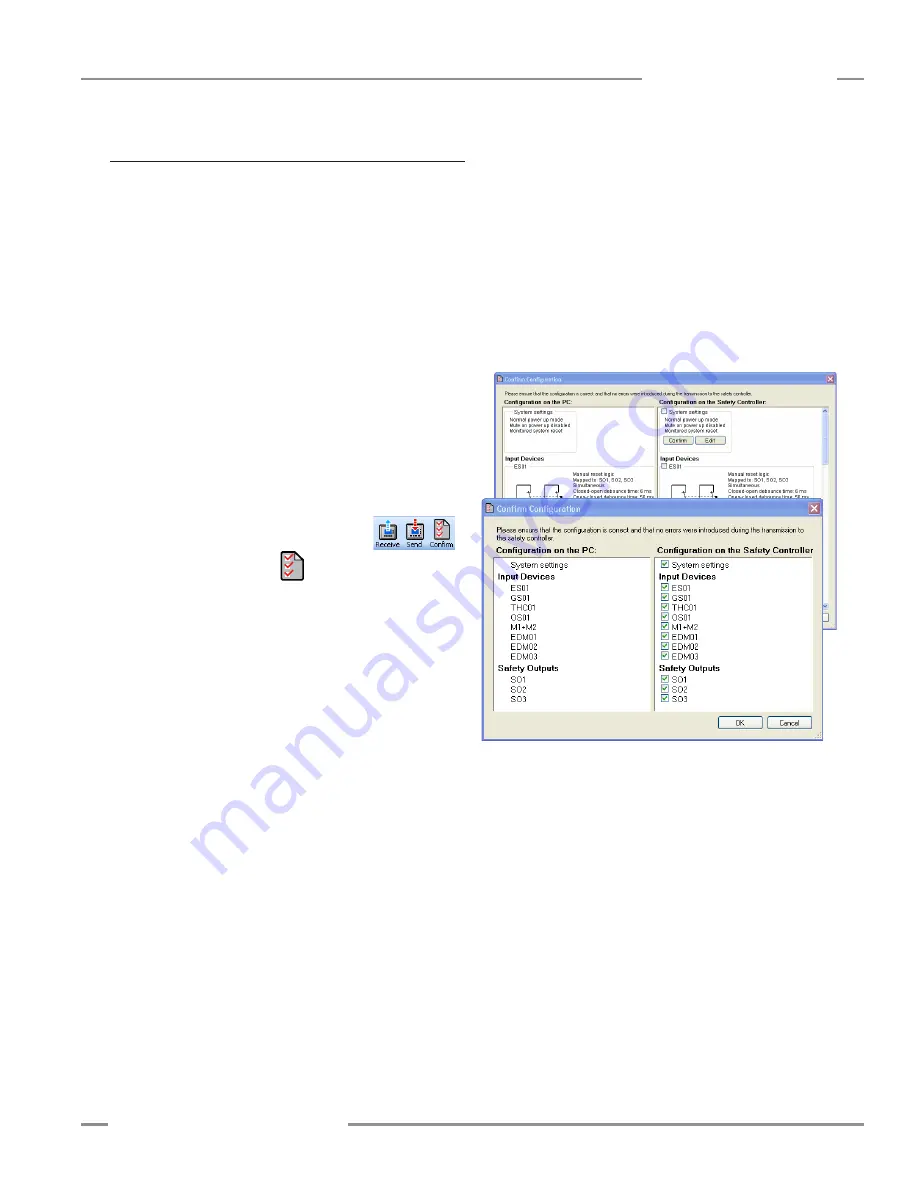
• Review the properties in the right column to be sure that they
match the properties in the left column .
If any device properties need to be changed, see Edit the
Configuration at the end of this section (page 110) .
If both columns match, select Confirm for each device .
The confirmation screen shows the summary that is created
when you have completed verifying each property .
As each device is confirmed, the Device Properties window for
that device will compress, eventually showing only a checklist .
• To review a confirmed device property, click on the checkbox
and the Device Properties window for that device will expand .
• When the manual verification is complete, click OK .
• The Controller requires a system reset (or cycle power) to enter
Run mode .
• Because the two-hand control (THC) inputs are not connected,
the Controller will enter Lockout mode (the Controller’s Status
indicator will be flashing red and the front panel display will
indicate “
ES01: Stop
” and then “
THC01: Fault
”, on line 5 for
SO3 .


