


72
|
Chapter 6
Customizing the Grid
To change grid appearance from the Grid edit bar
■
Click the View Options button at the left end of the Grid edit bar. The
View Options dialog box appears with the Appearance page displayed.
Follow the instructions in “Setting Up the Grid” on page 61.
To change grid settings from the Grid edit bar
■
Click the Grid Options button near the left end of the Grid edit bar. The
Drawing Options dialog box appears with the Grid page displayed. Follow
the instructions in “Changing the Appearance of the Grid and the Draw-
ing Origin” on page 65.
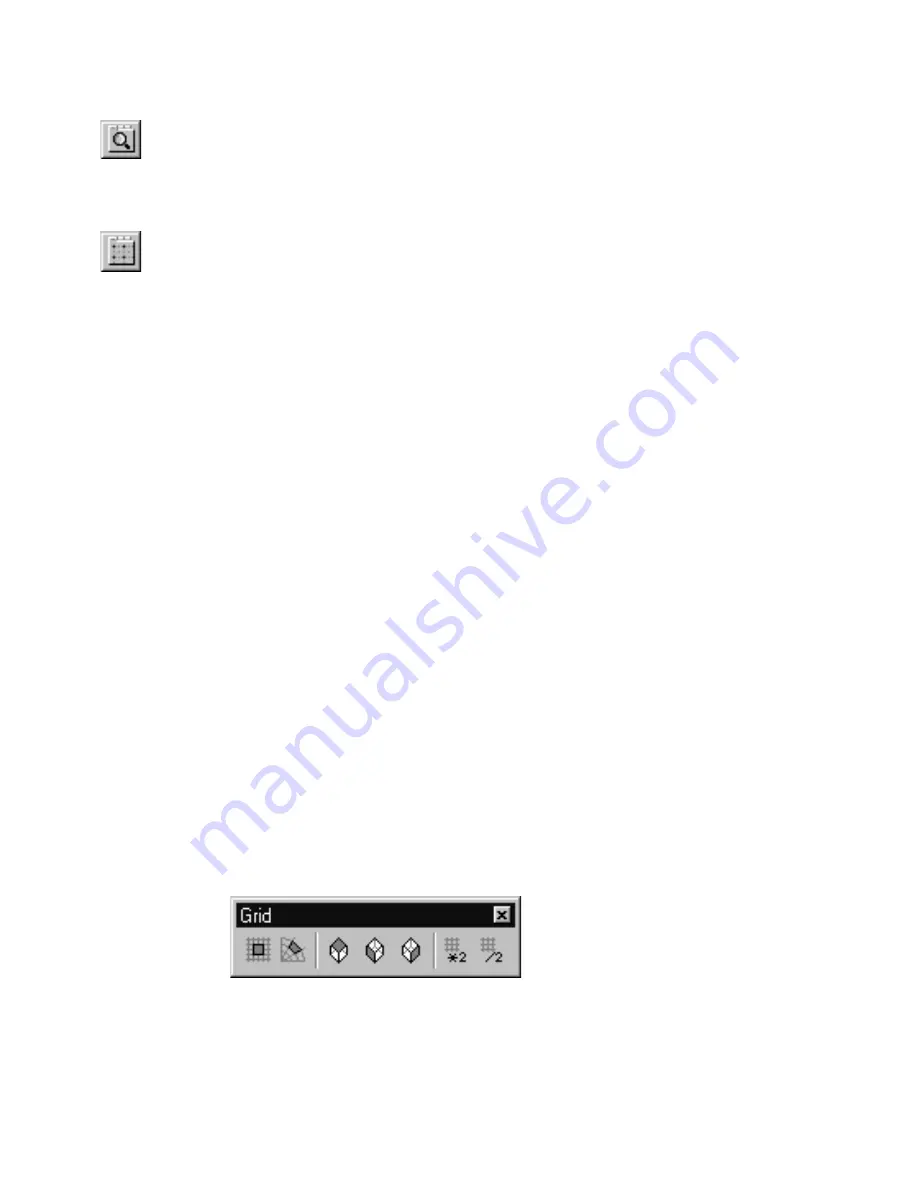
Using the Grid Toolbar
The Grid toolbar is designed for drawings that require frequent changes in
grid type or size. For example, when drawing an isometric model, it’s helpful
to use the isometric top grid to draw on a top plane, the isometric left grid to
draw on a left plane, and the isometric right grid to draw on a right plane. By
clicking one of the buttons on the Grid toolbar, you can easily switch
between grid types.
The final two buttons allow you to change the size of the reference grid by
increasing or decreasing the Major Line Interval by a factor of two. The
Double Grid Size button doubles the Major Line Interval. The Halve Grid Size
button halves the Major Line Interval.
To display the Grid toolbar
■
Right-click any bar or toolbar and click Grid on the pop-up menu that
appears. If a check appears beside the item, that toolbar is displayed in
your drawing window.
OR
1
On the View menu, click Toolbars. The Toolbars dialog box appears.
2
Scroll down the list of toolbars, then click in the Grid check box. When
the check box is checked, the Grid toolbar appears in your drawing
window.
Содержание AUTOSKETCH 8
Страница 1: ...October 2001 AutoSketch User s Guide RELEASE 8...
Страница 11: ...1 Part 1 First Things to Know Chapter 1 Welcome Chapter 2 Important Concepts Chapter 3 Screen Layout...
Страница 12: ...2...
Страница 20: ...10 Chapter 1 Welcome...
Страница 28: ...18 Chapter 2 Important Concepts...
Страница 42: ...32 Chapter 3 Screen Layout...
Страница 44: ...34...
Страница 68: ...58 Chapter 5 Setting Up a New Drawing...
Страница 84: ...74 Chapter 6 Customizing the Grid...
Страница 136: ...126 Chapter 10 Entering Lengths Angles...
Страница 138: ...128...
Страница 164: ...154 Chapter 12 Polylines Polygons Curves...
Страница 176: ...166 Chapter 13 Arcs Circles...
Страница 194: ...184 Chapter 14 Symbols...
Страница 206: ...196 Chapter 15 3D Effects...
Страница 219: ...209 Part 4 Annotating a Drawing Chapter 17 Working With Text Chapter 18 Creating Dimensions Chapter 19 Markers...
Страница 220: ...210...
Страница 256: ...246 Chapter 19 Markers...
Страница 258: ...248...
Страница 270: ...260 Chapter 20 Selecting Deleting Entities...
Страница 274: ...264 Chapter 21 Undoing Redoing Repeating Actions...
Страница 308: ...298 Chapter 23 Trimming Entities...
Страница 340: ...330 Chapter 26 Making Inquiries...
Страница 342: ...332...
Страница 350: ...340 Chapter 27 Storing Data in a Drawing...
Страница 360: ...350 Chapter 28 Retrieving Data From a Drawing...
Страница 366: ...356 Chapter 29 Using Web Tools...
Страница 388: ...378 Glossary...
Страница 400: ...390 Index...


