


148
|
Chapter 12
Polylines, Polygons, & Curves
Vertex editing allows you to change the shape of an existing regular polygon,
and to add or delete vertices. After performing vertex editing, the resulting
entity will no longer be a regular polygon. For information on vertex editing,
see the chapter titled “Reshaping Entities,” which begins on page 299.
To draw a regular polygon by entering its center and edge points
1
On the Draw menu, click Polygon, Center, Edge, or click the Center-Edge
Polygon button on the All-In-One toolbar.
2
(optional) Click or enter the different number of sides in the Number of
Segments box on the edit bar and press ENTER.
3
(optional) Click Inscribe or Circumscribe from the drop-down list box on
the edit bar to determine if the polygon is inscribed in the reference circle
or circumscribed around it. This setting determines the meaning of the
points you enter in the following steps.
4
Click the centerpoint of the regular polygon. A small diamond marker
marks the point and a rubber-band polygon appears, moving with the
pointer.
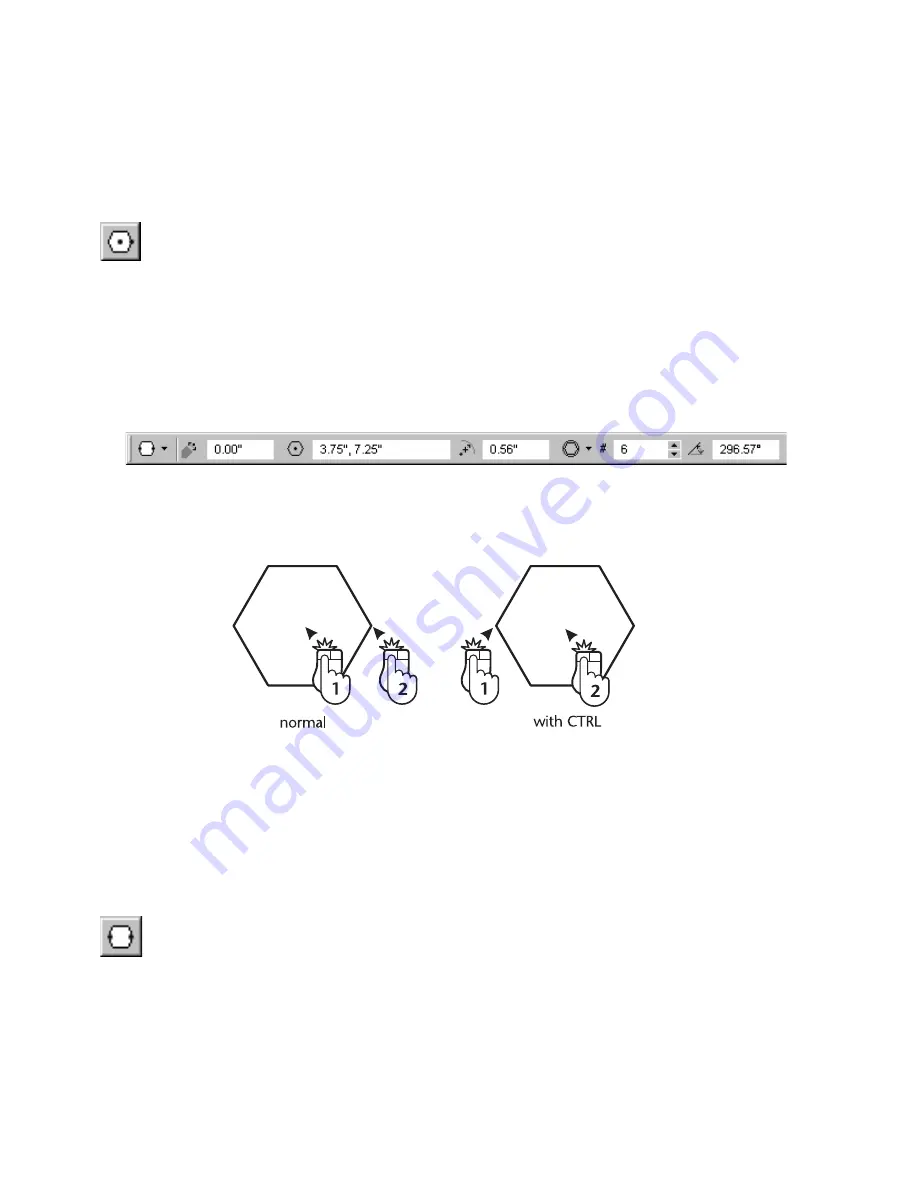
5
(optional) Press and hold CTRL while you click the point in the next step
to reverse the points.
6
Click the corner point for the polygon if Inscribe appears on the edit bar,
or enter a midpoint for a side of the polygon if Circumscribe appears. If
you are holding CTRL, the corner or side point is switched with the
centerpoint.
To draw a regular polygon by entering opposite corners or sides
1
On the Draw menu, click Polygon, Regular: Edge, Opposite, or click the
Edge-Opposite Polygon button on the All-In-One toolbar.
2
(optional) Click or enter a different number of sides in the Number of
Segments box on the edit bar and press ENTER.
Содержание AUTOSKETCH 8
Страница 1: ...October 2001 AutoSketch User s Guide RELEASE 8...
Страница 11: ...1 Part 1 First Things to Know Chapter 1 Welcome Chapter 2 Important Concepts Chapter 3 Screen Layout...
Страница 12: ...2...
Страница 20: ...10 Chapter 1 Welcome...
Страница 28: ...18 Chapter 2 Important Concepts...
Страница 42: ...32 Chapter 3 Screen Layout...
Страница 44: ...34...
Страница 68: ...58 Chapter 5 Setting Up a New Drawing...
Страница 84: ...74 Chapter 6 Customizing the Grid...
Страница 136: ...126 Chapter 10 Entering Lengths Angles...
Страница 138: ...128...
Страница 164: ...154 Chapter 12 Polylines Polygons Curves...
Страница 176: ...166 Chapter 13 Arcs Circles...
Страница 194: ...184 Chapter 14 Symbols...
Страница 206: ...196 Chapter 15 3D Effects...
Страница 219: ...209 Part 4 Annotating a Drawing Chapter 17 Working With Text Chapter 18 Creating Dimensions Chapter 19 Markers...
Страница 220: ...210...
Страница 256: ...246 Chapter 19 Markers...
Страница 258: ...248...
Страница 270: ...260 Chapter 20 Selecting Deleting Entities...
Страница 274: ...264 Chapter 21 Undoing Redoing Repeating Actions...
Страница 308: ...298 Chapter 23 Trimming Entities...
Страница 340: ...330 Chapter 26 Making Inquiries...
Страница 342: ...332...
Страница 350: ...340 Chapter 27 Storing Data in a Drawing...
Страница 360: ...350 Chapter 28 Retrieving Data From a Drawing...
Страница 366: ...356 Chapter 29 Using Web Tools...
Страница 388: ...378 Glossary...
Страница 400: ...390 Index...


