


Using Extrusion Tools
|
187
■
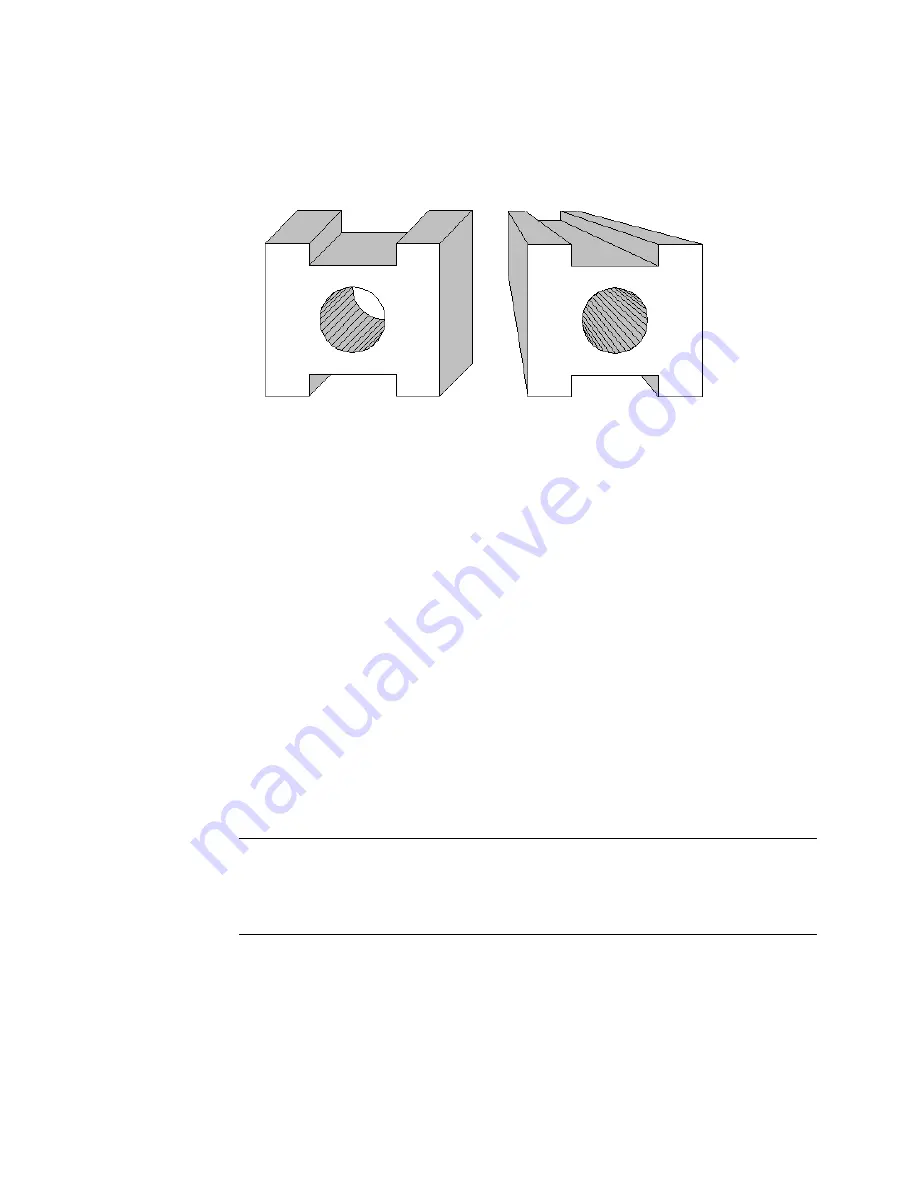
Since objects appear to get smaller as they move further away,
3D Perspective Extrusion creates a scaled copy of the selection set. Like
3D Parallel Extrusion, you place the copy anywhere in the drawing and
AutoSketch connects the corresponding edges using lines or polygons.
Both commands require you to enter points that define the distance and
direction AutoSketch uses to perform the 3D effect. 3D Parallel Extrusion
requires you to enter two points—a “from” point and a “to” point. These
points can be located at any point in the drawing and do not have to be on
the actual entity. This is helpful if you want to define the distance and direc-
tion based on known points in the drawing. For instance, in an isometric
drawing of a chair, you might want to extrude an ellipse to create a rail for
the legs.
3D Perspective Extrusion requires you to enter a “to” point only. However,
this command has one additional control. When you click the
3D Perspective Extrusion button on the 3D Effects toolbar, the edit bar
displays the Depth text box. The Depth value is a percentage that determines
how far toward the vanishing point (represented by the pointer) the extru-
sion extends. This value cannot be less than 1%, which creates very little
extrusion, or greater than 99%. For example, if you set the Depth value to
60%, then move the pointer ten units, AutoSketch extrudes the entity six
units, or 60% of the distance to the vanishing point, from the original.
CAUTION
Extruding text entities that contain many characters may create
large numbers of entities which, in turn, requires a large amount of memory to
create a view. It is not recommended that you extrude text entities that contain
more than a few characters.
Parallel extrusion
Perspective extrusion
Содержание AUTOSKETCH 8
Страница 1: ...October 2001 AutoSketch User s Guide RELEASE 8...
Страница 11: ...1 Part 1 First Things to Know Chapter 1 Welcome Chapter 2 Important Concepts Chapter 3 Screen Layout...
Страница 12: ...2...
Страница 20: ...10 Chapter 1 Welcome...
Страница 28: ...18 Chapter 2 Important Concepts...
Страница 42: ...32 Chapter 3 Screen Layout...
Страница 44: ...34...
Страница 68: ...58 Chapter 5 Setting Up a New Drawing...
Страница 84: ...74 Chapter 6 Customizing the Grid...
Страница 136: ...126 Chapter 10 Entering Lengths Angles...
Страница 138: ...128...
Страница 164: ...154 Chapter 12 Polylines Polygons Curves...
Страница 176: ...166 Chapter 13 Arcs Circles...
Страница 194: ...184 Chapter 14 Symbols...
Страница 206: ...196 Chapter 15 3D Effects...
Страница 219: ...209 Part 4 Annotating a Drawing Chapter 17 Working With Text Chapter 18 Creating Dimensions Chapter 19 Markers...
Страница 220: ...210...
Страница 256: ...246 Chapter 19 Markers...
Страница 258: ...248...
Страница 270: ...260 Chapter 20 Selecting Deleting Entities...
Страница 274: ...264 Chapter 21 Undoing Redoing Repeating Actions...
Страница 308: ...298 Chapter 23 Trimming Entities...
Страница 340: ...330 Chapter 26 Making Inquiries...
Страница 342: ...332...
Страница 350: ...340 Chapter 27 Storing Data in a Drawing...
Страница 360: ...350 Chapter 28 Retrieving Data From a Drawing...
Страница 366: ...356 Chapter 29 Using Web Tools...
Страница 388: ...378 Glossary...
Страница 400: ...390 Index...


