


100
|
Chapter 9
Entering & Modifying Points
As in any CAD program, almost every activity in AutoSketch requires you to
enter points.
■
To draw a line, you enter a startpoint and an endpoint.
■
To move an entity, you enter a “from” and a “to” point.
■
To stretch or resize the selection set, you must click a handle and drag it
to a new point.
AutoSnap allows you to draw with more precision by automatically identify-
ing exact points such as an entity's midpoint, endpoint, or centerpoint.
These points are called snap points because you need only click near one and
the point is snapped to the exact point shown.
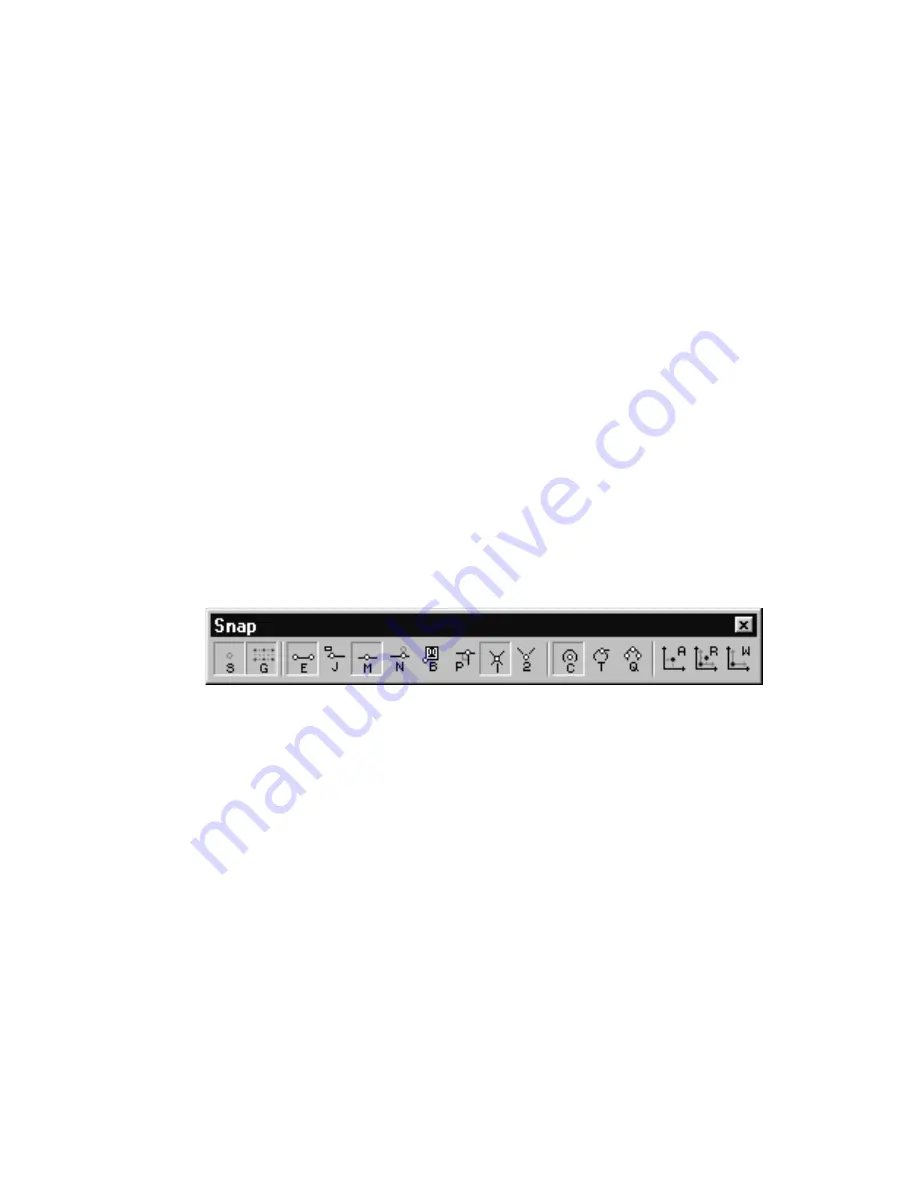
In all, there are fifteen ways to enter a point in AutoSketch—thirteen using
the mouse and two using the keyboard. These correspond with the fifteen
snaps you can choose by clicking their buttons on the All-In-One toolbar, or
by typing the letter shown on the button.
In many CAD applications you are limited to using one snap at a time.
However, MultiSnap mode allows you to use several snaps simultaneously,
allowing you to draw complete entities without pausing to switch between
snaps. MultiSnap mode allows you to select almost any combination of snaps
while you’re drawing. You can click on a toolbar or use the keyboard to toggle
snaps on and off independently, or turn off all snaps by typing
S
. If you
type
S
again, all snaps from the previous set are reactivated.
If you prefer to use just one snap at a time, you can switch to Single Snap
mode on the Drawing page of the Drawing Options dialog box.
To disable MultiSnap mode
1
On the Tools menu, click Drawing Options. The Drawing Options dialog
box appears.
2
Click the Drawing page tab.
3
Uncheck the Enable MultiSnap check box. When this check box is
checked, MultiSnap mode is enabled.
4
Click OK.
Содержание AUTOSKETCH 8
Страница 1: ...October 2001 AutoSketch User s Guide RELEASE 8...
Страница 11: ...1 Part 1 First Things to Know Chapter 1 Welcome Chapter 2 Important Concepts Chapter 3 Screen Layout...
Страница 12: ...2...
Страница 20: ...10 Chapter 1 Welcome...
Страница 28: ...18 Chapter 2 Important Concepts...
Страница 42: ...32 Chapter 3 Screen Layout...
Страница 44: ...34...
Страница 68: ...58 Chapter 5 Setting Up a New Drawing...
Страница 84: ...74 Chapter 6 Customizing the Grid...
Страница 136: ...126 Chapter 10 Entering Lengths Angles...
Страница 138: ...128...
Страница 164: ...154 Chapter 12 Polylines Polygons Curves...
Страница 176: ...166 Chapter 13 Arcs Circles...
Страница 194: ...184 Chapter 14 Symbols...
Страница 206: ...196 Chapter 15 3D Effects...
Страница 219: ...209 Part 4 Annotating a Drawing Chapter 17 Working With Text Chapter 18 Creating Dimensions Chapter 19 Markers...
Страница 220: ...210...
Страница 256: ...246 Chapter 19 Markers...
Страница 258: ...248...
Страница 270: ...260 Chapter 20 Selecting Deleting Entities...
Страница 274: ...264 Chapter 21 Undoing Redoing Repeating Actions...
Страница 308: ...298 Chapter 23 Trimming Entities...
Страница 340: ...330 Chapter 26 Making Inquiries...
Страница 342: ...332...
Страница 350: ...340 Chapter 27 Storing Data in a Drawing...
Страница 360: ...350 Chapter 28 Retrieving Data From a Drawing...
Страница 366: ...356 Chapter 29 Using Web Tools...
Страница 388: ...378 Glossary...
Страница 400: ...390 Index...


