


238
|
Chapter 18
Creating Dimensions
Centerline Dimensions
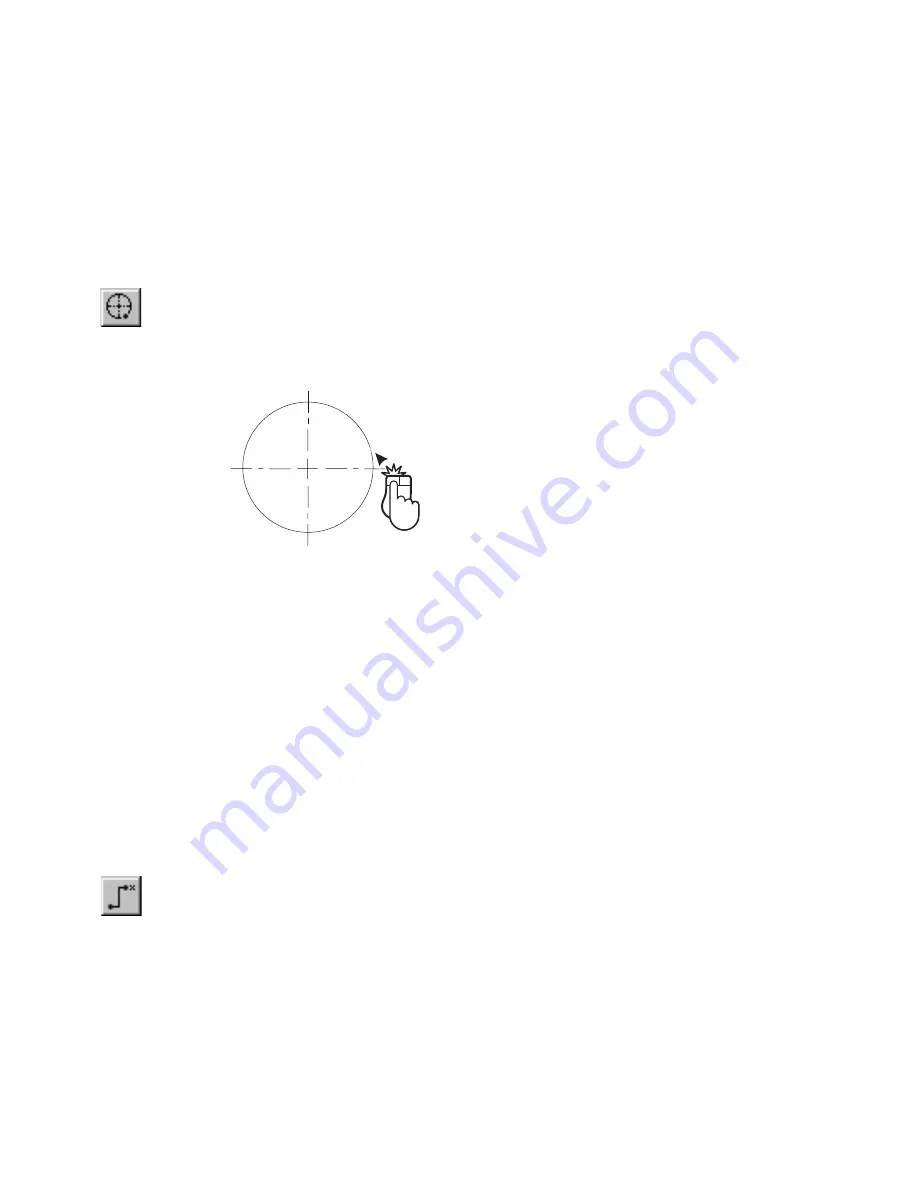
Often you must mark the center of an arc or circle. A centerline dimension
allows you to do this. It consists of a cross marker at the centerpoint and four
lines extending through the quadrant points. In the case of an arc, these lines
are drawn regardless of the arc’s included angle.
To mark the center of an arc or circle
1
On the Draw menu, click Dimension, Centerline, or click Centerline
Dimension on the All-In-One toolbar.
2
Select an arc or circle. AutoSketch draws the centerline dimension.
Ordinate Dimensions
Ordinate dimensions are used to note the x- or y-coordinate of a specific
point. AutoSketch measures the coordinate either from the drawing origin or
from a temporary origin you specify. You must specify two points to create
an ordinate dimension: an ordinate point and a text point. The position of
the text point in relation to the ordinate point determines whether the x- or
y-coordinate is displayed. AutoSketch automatically calculates the value
displayed in the dimension label based on settings in the Dimension Format
dialog box. For information on formatting an ordinate dimension, see online
Help.
To note the x- or y-coordinate of a point
1
On the Draw menu, click Dimension, Ordinate, or click Ordinate
Dimension on the All-In-One toolbar.
2
(optional) Specify a temporary origin by pressing CTRL while you enter a
point. Until you cancel the command, AutoSketch continues to measure
all ordinate dimensions from this point.
Содержание AUTOSKETCH 8
Страница 1: ...October 2001 AutoSketch User s Guide RELEASE 8...
Страница 11: ...1 Part 1 First Things to Know Chapter 1 Welcome Chapter 2 Important Concepts Chapter 3 Screen Layout...
Страница 12: ...2...
Страница 20: ...10 Chapter 1 Welcome...
Страница 28: ...18 Chapter 2 Important Concepts...
Страница 42: ...32 Chapter 3 Screen Layout...
Страница 44: ...34...
Страница 68: ...58 Chapter 5 Setting Up a New Drawing...
Страница 84: ...74 Chapter 6 Customizing the Grid...
Страница 136: ...126 Chapter 10 Entering Lengths Angles...
Страница 138: ...128...
Страница 164: ...154 Chapter 12 Polylines Polygons Curves...
Страница 176: ...166 Chapter 13 Arcs Circles...
Страница 194: ...184 Chapter 14 Symbols...
Страница 206: ...196 Chapter 15 3D Effects...
Страница 219: ...209 Part 4 Annotating a Drawing Chapter 17 Working With Text Chapter 18 Creating Dimensions Chapter 19 Markers...
Страница 220: ...210...
Страница 256: ...246 Chapter 19 Markers...
Страница 258: ...248...
Страница 270: ...260 Chapter 20 Selecting Deleting Entities...
Страница 274: ...264 Chapter 21 Undoing Redoing Repeating Actions...
Страница 308: ...298 Chapter 23 Trimming Entities...
Страница 340: ...330 Chapter 26 Making Inquiries...
Страница 342: ...332...
Страница 350: ...340 Chapter 27 Storing Data in a Drawing...
Страница 360: ...350 Chapter 28 Retrieving Data From a Drawing...
Страница 366: ...356 Chapter 29 Using Web Tools...
Страница 388: ...378 Glossary...
Страница 400: ...390 Index...


