


6-3
Using Autofill
The programmer includes an AutoFill feature that allows you to automatically add pre-selected
text or selections to a point’s device type, point type, or custom label fields.
Follow these steps to use AutoFill:
1.
Open the card whose points you want to edit.
2.
Click on the point containing the text or selections you want to copy. The point’s entry
highlights to show it is selected.
3.
If you want to copy the highlighted text to a range of points, do one of the following:
•
Range of Adjoining Points. If the points adjoin one and other, hold down the SHIFT
key and click the left mouse button on the topmost point in the range. Continue to
hold down the SHIFT key, move to the bottom point in the range, and click and
release the mouse button.
•
Range of Non-Adjoining Points. If the points do not adjoin one another, hold down
the CTRL key and select each point. Release the CTRL key only after all points have
been selected.
4.
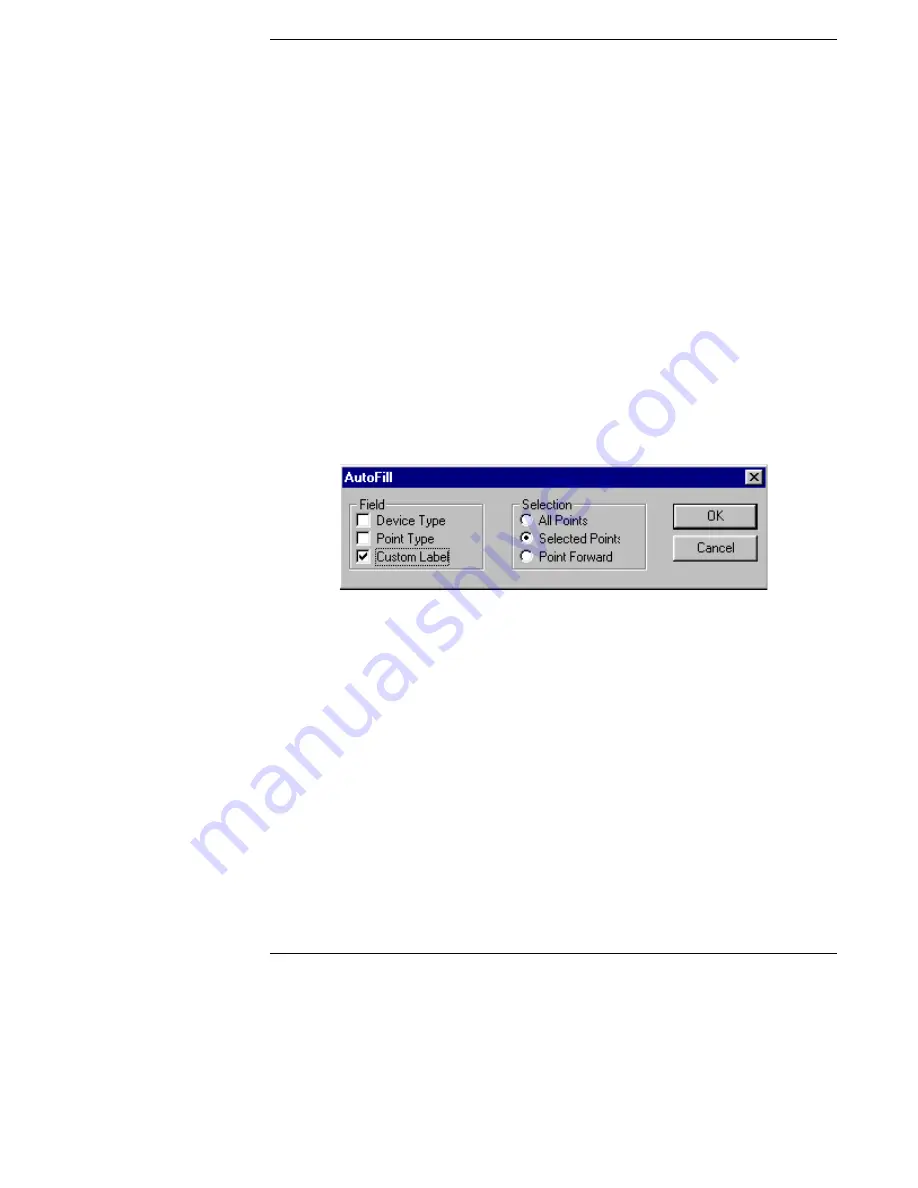
Press the F4 key. The AutoFill dialog appears.
Figure 6-2. Autofill Dialog
5.
Click on the check boxes (device type, point type, or custom label) corresponding to the
fields that you want to automatically fill. You can select multiple fields (i.e. device type
and custom label).
6.
Click on the appropriate radio button in the Selection panel, as follows:
•
All Points. Automatically fills every point with the device type, point type, or cus-
tom label of the point selected in Step 2 above.
•
Selected Points. Automatically fills every selected point (Step 3 above) with the
device type, point type, or custom label of the point selected in Step 2 above.
•
Point Forward. Automatically fills every point forward of the point selected in Step
2 above with that point's device type, point type, or custom label.
7.
Click OK to AutoFill the selected fields.


